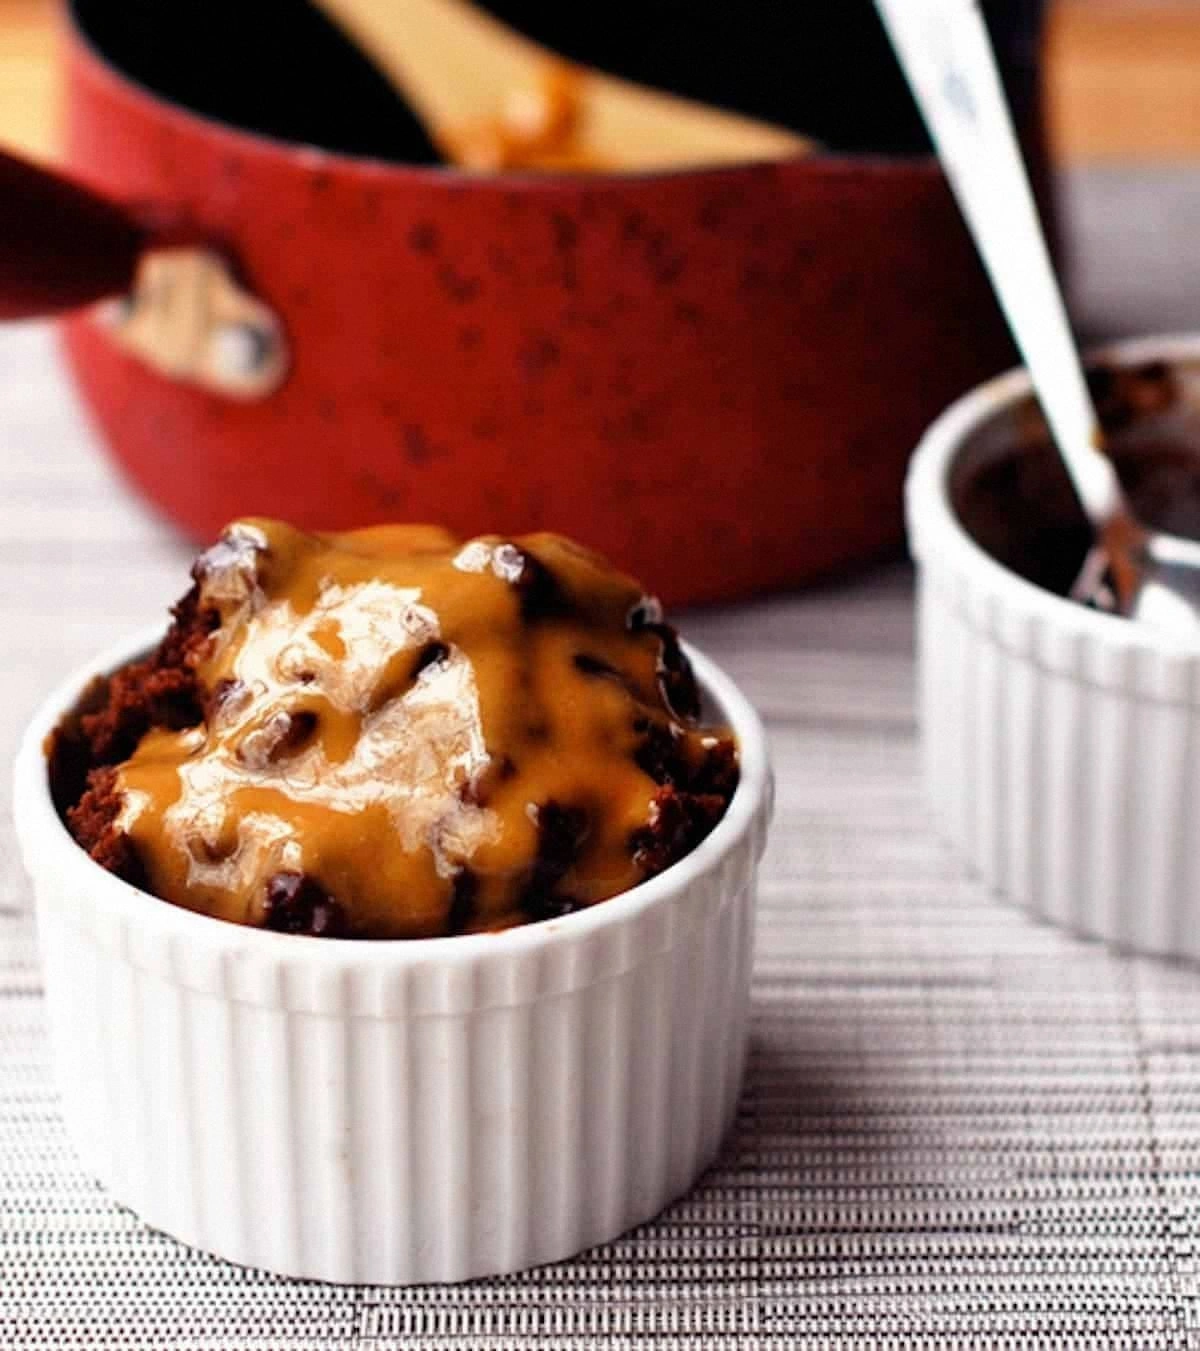
I swear, the first time I tried to make a hot fudge cake I ended up with a pancake that could double as a frisbee. The kitchen smelled like burnt sugar and my confidence hit rock bottom, but that disaster sparked a fire under me. I spent a sleepless weekend watching every video, reading every comment, and tasting every store‑bought version until I finally cracked the code. The result? A cake that looks like a glossy, molten chocolate lake, and when you cut into it, a silky peanut butter swirl erupts like a volcanic eruption of flavor.
Picture this: the oven door swings open, a warm, buttery aroma rushes out, and the first thing you notice is that glossy, dark‑brown crust that crackles just enough to make you think of a fresh caramel candy. The cake’s top is glossy, the edges are slightly crisp, and the interior is so moist it practically slides your fork right through. When you drizzle the homemade hot fudge sauce over the warm layers, it pools and then sets into a glossy sheen that looks like a runway for a runway‑ready dessert. And the peanut butter? It swirls through the batter like silk, creating pockets of nutty heaven that melt in your mouth.
Why does this version stand out? Most recipes either over‑sweeten the fudge or drown the cake in a soggy mess of sauce. I dared to balance the sweet, the salty, the bitter cocoa, and the creamy peanut butter so that each bite feels like a perfectly orchestrated symphony. The secret? A touch of espresso powder to deepen the chocolate, a splash of milk to keep the crumb tender, and a quick flash‑freeze of the hot fudge before it meets the cake. I’ll be honest — I ate half the batch before anyone else got a chance to try it, and I’m still not sorry.
Okay, ready for the game‑changer? I’m about to walk you through every single step — from picking the right cocoa to mastering the glossy glaze that makes this cake the talk of every gathering. By the end, you’ll wonder how you ever settled for a bland store‑bought version. I dare you to taste this and not go back for seconds. Let’s dive in.
What Makes This Version Stand Out
- Flavor Harmony: The combination of deep cocoa, buttery fudge, and creamy peanut butter creates a balanced taste that’s neither too sweet nor too heavy. Each bite feels like a dessert truffle that’s been given a second life in cake form.
- Texture Contrast: A crisp, caramelized crust meets a moist, airy crumb, while the sauce adds a glossy, melt‑in‑your‑mouth finish. The contrast keeps you chewing and smiling.
- Simplicity: Despite the luxurious feel, the ingredient list is pantry‑friendly, and the steps use everyday kitchen tools. No fancy mixers, just a whisk, a spatula, and a bit of patience.
- Unique Twist: A splash of espresso powder and a quick chill of the fudge sauce give the cake depth you won’t find in standard recipes. It’s a secret weapon that elevates the chocolate flavor.
- Crowd Reaction: This cake has a habit of disappearing within minutes at parties. Guests keep asking for the recipe, and you’ll become the undisputed dessert hero.
- Ingredient Quality: Using high‑quality cocoa and real peanut butter (no hydrogenated oils) makes the difference between “good” and “mind‑blowing.”
- Cooking Method: Baking at a slightly lower temperature ensures a tender crumb while the high‑heat finish creates that coveted crackly top.
- Make‑Ahead Potential: The cake can be baked a day ahead, and the fudge sauce can be stored in the fridge, making assembly a breeze for busy hosts.
Inside the Ingredient List
The Flavor Base
All‑purpose flour forms the structural backbone of the cake. Using a high‑protein flour gives you that subtle chew, while a lower‑protein version keeps it tender. If you swap in cake flour, expect an even softer crumb but a slightly lighter texture. Pro tip: Sift the flour with cocoa powder to avoid lumps and ensure an even chocolate distribution.
Unsweetened cocoa powder is the heart of the chocolate flavor. I recommend a Dutch‑process cocoa for a smoother, less acidic taste. Skipping the cocoa or using a low‑quality brand will leave the cake tasting flat and dull. If you’re allergic to cocoa, try a blend of carob powder and a dash of espresso powder for a similar depth.
The Texture Crew
Butter, softened to room temperature, creates a rich mouthfeel and helps the cake rise evenly. Using clarified butter (ghee) can raise the smoke point and give a nutty undertone. Salt, even a pinch, is crucial; it amplifies the chocolate and balances the sweetness of the fudge.
Granulated sugar not only sweetens but also contributes to the cake’s tender crumb by breaking down gluten. If you prefer a lower‑glycemic option, substitute half the sugar with coconut sugar, but expect a caramel note that pairs nicely with peanut butter.
Eggs act as emulsifiers, binding the fat and liquid together. For a richer texture, separate the yolks and whites, whisk the whites to soft peaks, and fold them in at the end — this creates a lighter, airy crumb. Skipping this step will give you a denser cake, which some people actually prefer for a brownie‑like feel.
The Unexpected Star
Hot fudge sauce is the glossy, decadent layer that defines this dessert. I use a blend of dark chocolate, heavy cream, butter, and a pinch of sea salt, simmered until glossy. If you buy pre‑made sauce, choose one with at least 30% cocoa solids; otherwise, the flavor will be too sweet and thin.
Peanut butter brings a savory, nutty contrast that cuts through the chocolate richness. Opt for natural, unsweetened peanut butter for the best flavor. Swapping it for almond butter adds a subtle earthiness, while a chocolate‑swirled peanut butter creates a double‑chocolate experience.
The Final Flourish
Whole milk adds moisture and a subtle creaminess that keeps the crumb tender. If you’re dairy‑free, oat milk works beautifully and adds a slight sweetness. A splash of vanilla extract rounds out the flavor profile, while a pinch of espresso powder deepens the chocolate without tasting like coffee.
Optional chocolate chips give bursts of melty chocolate in every bite. If you’re allergic to dairy, use dairy‑free chips or omit them entirely — the fudge sauce is more than enough.
A light dusting of powdered sugar just before serving adds a visual sparkle and a hint of extra sweetness that balances the salty peanut butter. Skipping it won’t ruin the cake, but the presentation loses a touch of elegance.
Everything's prepped? Good. Let's get into the real action…
The Method — Step by Step
Preheat your oven to 350°F (175°C) and grease a 9‑inch round cake pan with butter, then line the bottom with parchment paper. This ensures the cake releases cleanly and prevents a soggy bottom. The moment the oven clicks on, you’ll hear that comforting hum that tells you something delicious is about to happen. Let the pan sit while you prepare the batter — this is the calm before the flavor storm.
In a large bowl, whisk together the flour, cocoa powder, baking powder, baking soda, and salt. The dry mix should look like a deep, velvety chocolate cloud. If you spot any lumps, sift again; a smooth dry mix guarantees an even crumb. Power transition: This next part? Pure magic.
In a separate bowl, cream the softened butter with the granulated sugar until the mixture is light, fluffy, and pale yellow. This should take about 3‑4 minutes on medium speed — you’ll notice the texture turning almost silky, like a chocolate mousse waiting to happen.
Kitchen Hack: Scrape the sides of the bowl with a rubber spatula every 30 seconds to ensure every butter grain is fully incorporated.Add the eggs one at a time, beating well after each addition. Then stir in the vanilla extract and espresso powder. The batter will thicken slightly, and you’ll smell a faint coffee note that deepens the chocolate flavor without being overtly coffee‑y. If you prefer a caffeine‑free version, simply omit the espresso powder.
Gradually add the dry ingredients to the wet mixture, alternating with the whole milk, beginning and ending with the dry mix. Mix just until combined; over‑mixing will develop gluten and make the cake tough.
The batter should be glossy and thick, like a rich chocolate ganache.Watch Out: If you see streaks of flour, stop mixing immediately — those are signs of over‑mixing.Fold in the peanut butter gently, creating ribbons of nutty gold throughout the chocolate batter. This is the moment you’ll see those beautiful swirls that later become the surprise pockets in each slice. If you want a more uniform flavor, whisk the peanut butter into the batter fully, but you’ll lose the visual drama.
Pour the batter into the prepared pan, smoothing the top with a spatula. Place the pan on the middle rack of the oven and bake for 25‑30 minutes, or until a toothpick inserted into the center comes out with a few moist crumbs but no wet batter. The edges should start pulling away from the pan, signaling a perfect crust formation. That sizzle when it hits the pan? Absolute perfection.
While the cake bakes, prepare the hot fudge sauce. In a saucepan, combine dark chocolate, heavy cream, butter, and a pinch of sea salt. Heat over low, stirring constantly until the mixture is smooth and glossy. Once it reaches a gentle boil, remove from heat and let it cool for 5 minutes.
Kitchen Hack: Transfer the hot fudge to a shallow metal pan and place it in the freezer for 10 minutes; it will thicken just enough to spread without dripping.When the cake is done, let it cool in the pan for 10 minutes, then invert onto a wire rack. While it’s still warm, drizzle the chilled hot fudge sauce over the top, allowing it to cascade down the sides. The sauce should set into a thin, glossy glaze as it cools. Finally, dust lightly with powdered sugar for that final sparkle. And now the fun part — serve while warm or at room temperature, and watch your guests’ eyes widen.
That's it — you did it. But hold on, I've got a few more tricks that'll take this to another level...
Insider Tricks for Flawless Results
The Temperature Rule Nobody Follows
Never bake a chocolate cake straight from a cold fridge. Let the batter sit at room temperature for 10‑15 minutes before it hits the oven. This small pause ensures the butter and eggs are evenly tempered, leading to a uniform rise and a softer crumb. One friend tried skipping this step and ended up with a dome that cracked like a broken egg shell.
Why Your Nose Knows Best
When the cake is about 20 minutes into baking, open the oven door just a crack and inhale. If you catch a toasty, slightly caramel aroma, you’re on the right track. If the scent is still raw flour, give it a few more minutes. Trusting your senses beats relying solely on a timer.
The 5‑Minute Rest That Changes Everything
After removing the cake from the pan, let it rest on a wire rack for at least five minutes before slicing. This allows the steam to redistribute, preventing a soggy bottom and ensuring the fudge glaze sets perfectly. Skipping this rest will cause the glaze to slide off and the crumb to be gummy.
The Peanut Butter Swirl Secret
Instead of fully mixing the peanut butter into the batter, dollop it in three spots and use a skewer to create a marbled effect. This technique creates distinct pockets of nutty flavor that burst with each bite, making the cake feel more dynamic.
The Final Glaze Shine
For an extra‑shiny finish, brush the warm cake with a thin layer of melted butter before pouring the hot fudge. The butter adds a glossy sheen and a subtle buttery note that complements the chocolate.
Creative Twists and Variations
This recipe is a playground. Here are some of my favorite ways to switch things up:
Salted Caramel Crunch
Replace half of the hot fudge sauce with a homemade salted caramel, and sprinkle crushed pretzels into the batter. The salty crunch pairs beautifully with the chocolate‑peanut combo, making it a hit for those who love sweet‑salty contrasts.
Spicy Mexican Mocha
Add a teaspoon of ground cinnamon and a pinch of cayenne pepper to the dry mix, and stir in a tablespoon of Mexican chocolate chips. The subtle heat and spice bring a new dimension that’s perfect for autumn evenings.
White Chocolate Raspberry
Swap the dark chocolate fudge for a white chocolate raspberry sauce, and fold fresh raspberry puree into the batter. The bright fruit notes cut through the richness, delivering a fresh, spring‑time vibe.
Vegan Delight
Use coconut oil instead of butter, almond milk for the liquid, and a flax‑egg mixture (1 tbsp ground flaxseed + 3 tbsp water) to replace the eggs. Choose a dairy‑free chocolate and peanut butter, and you’ve got a fully plant‑based version that still dazzles.
Coffee‑Infused Dream
Replace the espresso powder with a shot of strong brewed coffee, and drizzle a coffee‑flavored caramel sauce over the top. Coffee lovers will think they’ve stumbled into a dessert café, and the caffeine kick is subtle yet satisfying.
Storing and Bringing It Back to Life
Fridge Storage
Cover the cooled cake loosely with aluminum foil or store it in an airtight container. It will stay fresh for up to 4 days. The fudge glaze may thicken; simply microwave a slice for 10‑15 seconds to melt the sauce back to its glossy glory.
Freezer Friendly
Wrap the entire cake in a double layer of plastic wrap, then a sheet of foil. It freezes beautifully for up to 2 months. When you’re ready to serve, thaw overnight in the fridge, then let it sit at room temperature for 30 minutes. A quick splash of warm milk over the glaze will revive its sheen.
Best Reheating Method
Place a slice on a microwave‑safe plate, sprinkle a tiny splash of water around the edges, and heat for 20‑30 seconds. The steam created by the water re‑hydrates the crumb while the fudge sauce melts back into a silky river.