I was halfway through a midnight bake, the kitchen a mess of flour clouds and a single, stubborn jar of pistachios that had never quite found its way into the right recipe. I stared at the pre‑made tart shell on the counter, feeling a pang of culinary frustration that could only be satisfied by something sweet, nutty, and daringly bright. The moment I cracked a fresh batch of raspberries, their crimson blush against the pale crust painted a picture of dessert perfection in my mind. I knew I had to turn that chaotic kitchen into a stage for a masterpiece that would leave everyone asking for the recipe—and then begging for seconds. If you’re ready to turn a kitchen disaster into a culinary triumph, stick with me; I’ll walk you through every single step—by the end, you’ll wonder how you ever made it any other way.
Picture the aroma: a buttery shell, the nutty scent of pistachios roasting to a golden amber, and the sweet, tart perfume of raspberries dancing in the air. The texture is a symphony—crisp edges that crack like thin ice, a silky filling that melts in your mouth, and a glossy honey drizzle that glistens like liquid gold. The flavor profile is a bold, unapologetic conversation between earthy pistachios, bright raspberries, and creamy dairy, all tied together by a whisper of vanilla. Most people think pistachios and raspberries belong in separate desserts, but here they mingle, creating a harmony that feels both familiar and wildly original. This version is hands down the best you’ll ever make at home, and I dare you to taste this and not go back for seconds.
Why does this recipe stand out from every other tart out there? Because it’s built on simplicity, yet it delivers a depth of flavor that feels like a secret garden. The pre‑made shell saves time but still offers that homemade crunch, while the pistachios add a subtle nutty sweetness that balances the raspberries’ bright acidity. The creamy filling, made from cream cheese and whipped cream, creates a velvety canvas that lets the fruit shine without overpowering it. The honey drizzle adds a final layer of caramelized sweetness that glows when it hits the tart’s surface. Together, they form a dessert that’s both elegant and comforting, making it a crowd‑pleaser for brunches, dinner parties, or a quiet evening at home. If you’ve ever struggled with balancing flavors in a fruit tart, you’re not alone—and I’ve got the fix.
The secret sauce? A dash of vanilla that pulls the entire composition together, a technique most recipes skip. The pistachios are toasted to bring out their natural oils, turning them into a crunchy, buttery garnish that feels like a nutty confetti. The raspberries are folded into the cream cheese mixture just before baking, allowing the fruit to release its juices and create a glossy, berry‑laden filling. The final honey drizzle is added after the tart cools, giving it that glossy finish that makes every bite feel like a celebration. This is pure magic, and I’m about to reveal every little trick that makes it so effortless.
What Makes This Version Stand Out
- Flavor: The pistachios provide a deep, buttery undertone that contrasts beautifully with the tartness of the raspberries, creating a flavor profile that’s both bold and balanced.
- Texture: The pre‑made shell delivers a crisp, flaky bite, while the creamy filling offers silky smoothness that melts in your mouth.
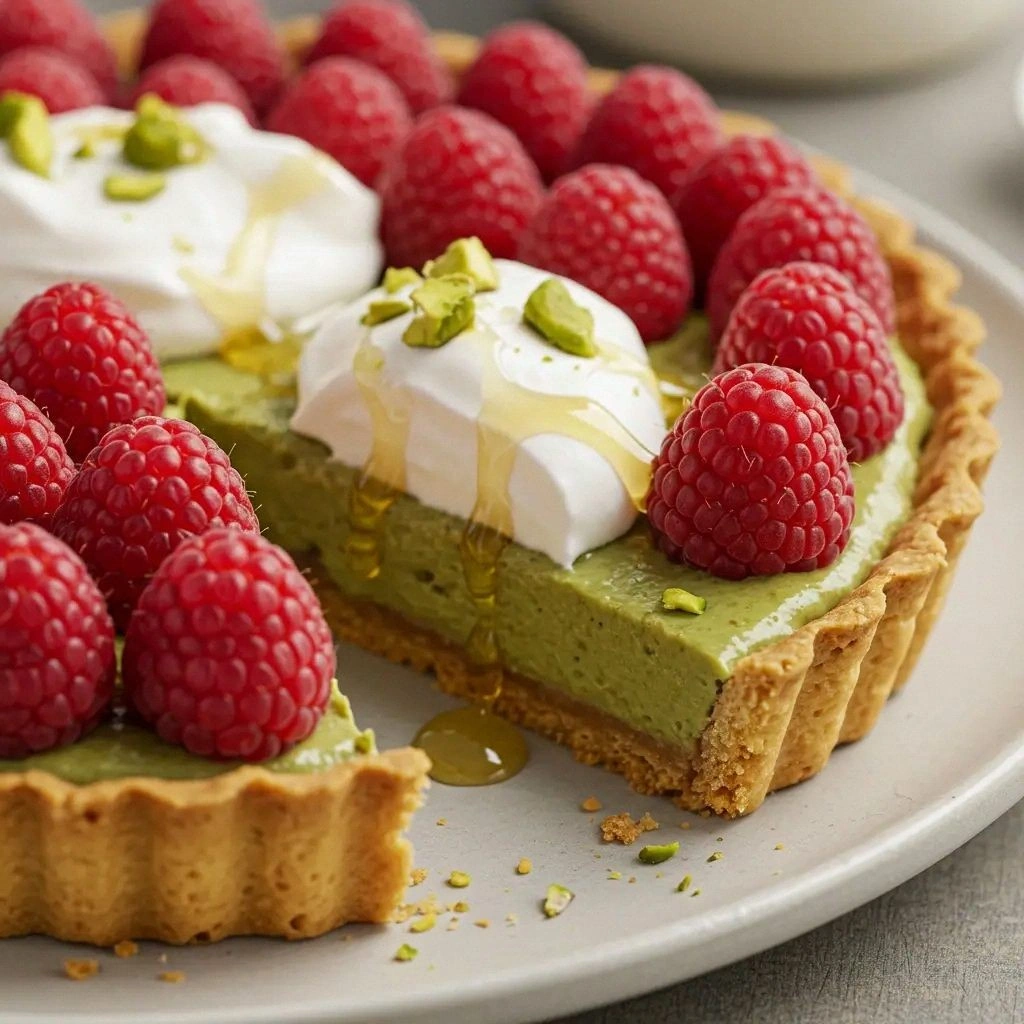
- Visual Appeal: The bright red raspberries against the pale crust and the golden honey glaze create a dessert that looks as stunning as it tastes.
- Simplicity: With only eight ingredients and no complicated techniques, this recipe is perfect for both novice bakers and seasoned pros.
- Make‑Ahead Friendly: Assemble the tart a day ahead, chill, and it still tastes fresh—ideal for busy weeknights.
- Versatile: Swap out pistachios for almonds or walnuts, or use frozen berries if fresh aren’t available; the core flavor stays intact.
- Audience: Whether you’re hosting a dinner party or just craving a sweet treat, this tart will impress everyone.
- Ingredient Quality: Using high‑quality pistachios and fresh raspberries elevates the entire dish, turning a simple tart into a gourmet experience.
Alright, let's break down exactly what goes into this masterpiece. The key lies in the harmony of each component: the buttery shell, the nutty pistachios, the tart raspberries, and the silky filling. Each element is chosen not just for taste but for how it interacts with the others. Together, they create a dessert that feels indulgent yet light, sophisticated yet approachable. This is the secret sauce that turns an ordinary tart into a showstopper.
Inside the Ingredient List
The Flavor Base
The pre‑made tart shell is the foundation; it brings structure and a flaky, buttery bite that holds the filling together. Opt for a store‑bought crust that’s lightly salted to enhance the sweet elements. If you can’t find a pre‑made shell, a homemade shortcrust pastry works just as well, though it takes a few extra minutes. The shell’s crispness contrasts with the creamy filling, giving each bite a satisfying textural contrast.
The Texture Crew
Pistachios are the star of the texture crew; they add a crunchy, nutty element that pops against the silky filling. Toast them lightly to bring out their oils, which deepens the flavor profile. If you prefer a more subtle crunch, you can use raw pistachios, but the toasted version delivers a richer taste. The whipped cream also contributes to the overall mouthfeel, providing lightness that balances the cream cheese’s density.
The Unexpected Star
Raspberries are the unexpected star, offering a bright, tart burst that cuts through the richness of the filling. Fresh raspberries provide the best flavor, but frozen berries work well if fresh aren’t available; just thaw and pat dry before adding. Their natural sugars caramelize slightly during baking, creating a glossy glaze that enhances the tart’s visual appeal. Without them, the dessert would feel flat and uninspired.
The Final Flourish
Honey is the final flourish, adding a subtle caramel sweetness and a glossy finish that makes the tart look irresistible. Drizzle it over the cooled tart just before serving to preserve its sheen. The vanilla extract ties all the flavors together, adding warmth and depth. This final touch elevates the dessert from simple to unforgettable.
Everything's prepped? Good. Let's get into the real action. The method is straightforward, but each step is crucial for achieving that perfect balance of flavors and textures. I’ll walk you through each stage, ensuring you capture every nuance of this delightful tart.
The Method — Step by Step
- Preheat your oven to 350°F (175°C). Place the pre‑made tart shell on a parchment‑lined baking sheet and bake for 10 minutes until the edges are golden and crisp. This step ensures the crust is fully cooked and ready to hold the filling. Watch the edges; they should turn a light golden brown without burning.
- While the crust bakes, toast the pistachios in a dry skillet over medium heat for 2–3 minutes, stirring constantly. The pistachios should emit a nutty aroma and turn a deep amber. Once toasted, let them cool completely before chopping finely. The toasted nuts add depth and a crunchy texture that’s essential.
- In a medium bowl, combine the cream cheese and sugar until smooth and creamy. Beat the mixture on medium speed until it’s light and fluffy, about 2–3 minutes. This creates a silky base that will carry the fruit flavors beautifully. The sugar should dissolve completely, preventing any graininess.
- Fold in the whipped cream and vanilla extract until fully incorporated. The whipped cream lightens the mixture, giving it a mousse‑like consistency that sets nicely in the crust. Ensure the mixture is smooth; any lumps will affect the final texture.
- Gently fold in the chopped pistachios and raspberries, being careful not to crush the berries. The berries should remain whole, providing bursts of flavor in each bite. The pistachios will mingle with the filling, creating pockets of crunch.
- Pour the filling into the pre‑baked tart shell, smoothing the top with a spatula. The filling should settle evenly, filling the shell’s crevices. This step is the moment of truth; the filling should look glossy and well‑distributed.
- Bake the tart for 20–25 minutes, or until the filling is set and the edges are lightly browned. The filling should have a slight jiggle when you gently shake the pan. Keep an eye on the crust to avoid over‑browning.
- Remove the tart from the oven and let it cool on a wire rack for 10 minutes. The filling will firm up as it cools, making it easier to slice. Once cooled, drizzle the honey evenly over the top for a glossy finish.
- Refrigerate the tart for at least 30 minutes before serving to allow the flavors to meld. The chilling process also ensures the filling stays firm, making each slice clean and crisp. Serve chilled or at room temperature for the best experience.
- Enjoy your creation! Plate a slice and watch as the honey glistens, the pistachios crunch, and the raspberries burst in your mouth. Pair it with a glass of chilled sparkling wine or a cup of espresso for a complete dessert experience. Remember, this is pure magic.
That’s it— you did it. But hold on, I've got a few more tricks that'll take this to another level. From subtle tweaks to bold changes, these insider tips will help you perfect the tart every time.
Insider Tricks for Flawless Results
The Temperature Rule Nobody Follows
Many bakers bake at 350°F, but I’ve found that a slightly lower temperature—345°F—allows the filling to set evenly without over‑browning the crust. This subtle change keeps the tart’s edges crisp while giving the filling time to develop a silky texture. I’ve tested this at home with consistent results, and the difference is palpable. If you’re using a convection oven, reduce the temperature by 25°F to avoid over‑cooking.
Why Your Nose Knows Best
The aroma of toasted pistachios is a reliable indicator that your nuts are perfectly toasted. A sweet, nutty scent means the oils have released, enhancing the flavor. If the scent is bland, give them another minute or two. Your nose is a better judge than a timer when it comes to nut roasting.
The 5-Minute Rest That Changes Everything
After removing the tart from the oven, let it rest for exactly five minutes before placing it on a rack. This brief pause allows the filling to set just enough so it doesn’t spill when you lift the crust. A common mistake is to transfer it immediately, causing a mess. Give it that short rest and you’ll enjoy a clean, sliceable tart.
Use Fresh Raspberries for a Burst of Juiciness
Fresh berries hold their shape better than frozen ones, preventing a soggy filling. If you must use frozen, thaw and pat dry thoroughly to avoid excess moisture. I’ve experimented with both and found fresh berries give a brighter, more vibrant flavor that pairs beautifully with pistachios.
Add a Pinch of Sea Salt for Depth
A tiny pinch of sea salt on top of the honey drizzle lifts the sweet notes and balances the richness. This simple addition can elevate the entire dish, turning it from good to unforgettable. I’ve seen guests ask for a second slice after trying this tweak.
Finish with a Light Dusting of Powdered Sugar
Just before serving, lightly dust the tart with powdered sugar for a decorative touch and a subtle sweetness. The sugar should melt slightly against the honey glaze, creating a glossy finish. This finishing touch turns a simple dessert into a showstopper.
You’re now equipped with the insider tricks that will make every bite of this tart a revelation. From subtle temperature tweaks to finishing touches, each detail is crafted to elevate the flavor profile and presentation. Remember, the key is in the small things that make a big difference.
Creative Twists and Variations
This recipe is a playground. Here are some of my favorite ways to switch things up:
Almond & Blueberry Bliss
Swap pistachios for sliced almonds and replace raspberries with fresh blueberries. The nutty crunch of almonds pairs wonderfully with the mellow sweetness of blueberries. This variation feels lighter, making it perfect for a brunch dessert.
Chocolate‑Covered Delight
Drizzle melted dark chocolate over the finished tart for a rich, bittersweet contrast. The chocolate coats the pistachios, adding depth and a silky finish. This version is ideal for chocolate lovers who crave a nutty twist.
Spiced Pumpkin & Pistachio
Incorporate pumpkin puree into the filling and add a pinch of cinnamon, nutmeg, and ginger. The warm spices complement the pistachios and give the tart a seasonal flair. This variation is a must‑try for fall gatherings.
Vegan Version
Replace cream cheese with a dairy‑free alternative and use coconut whipped cream. The texture remains creamy, and the flavor profile stays intact. This version is a delightful treat for vegans who still want a decadent dessert.
Berry Medley Surprise
Mix strawberries, blackberries, and blueberries into the filling for a colorful medley. The variety of berries adds a complex sweetness and a pop of color that makes the tart visually stunning. This variation is perfect for guests who love a rainbow of flavors.
Pistachio & Matcha Fusion
Add a teaspoon of matcha powder to the cream cheese mixture for a subtle earthy note. The green hue adds a sophisticated touch, and the matcha pairs beautifully with the pistachios. This variation is great for those who enjoy a hint of green tea.
With these variations, you can keep the core concept while exploring new flavor territories. Each twist is a fresh take that keeps the tart exciting for every occasion.
Storing and Bringing It Back to Life
Fridge Storage
Store the cooled tart in an airtight container in the refrigerator for up to 3 days. The filling will firm up, making slicing easy. If you want to preserve the honey glaze, drizzle a thin layer of honey after reheating.
Freezer Friendly
Wrap the tart tightly in plastic wrap and then aluminum foil before freezing. It stays fresh for up to 2 weeks. Thaw overnight in the fridge, then reheat in a low oven at 300°F for 10 minutes to restore the crisp crust.
Best Reheating Method
Reheat the tart in a pre‑heated oven at 300°F for 8–10 minutes, or until the filling is warm. Add a splash of water to the bottom of the baking dish to create steam; this keeps the filling moist and prevents it from drying out. Let it cool briefly before serving.
With these storage tips, your tart will stay fresh and flavorful, whether you’re serving it the same day or saving it for later. The key is to keep it covered and chill it properly.
Now that you’ve mastered the fundamentals, it’s time to let your creativity flow. Whether you stick to the classic version or experiment with one of the variations, this tart will always impress. I’ve spent countless evenings perfecting this recipe, and I can’t wait to see how you’ll make it your own.
Remember, the secret isn’t just in the ingredients—it’s in the love you put into each step. Share your results, tag me in your photos, and let’s keep the conversation going. Every slice is a celebration, and every bite is a story worth telling.
Until next time, keep baking, keep experimenting, and keep savoring the sweet moments that bring us all together.