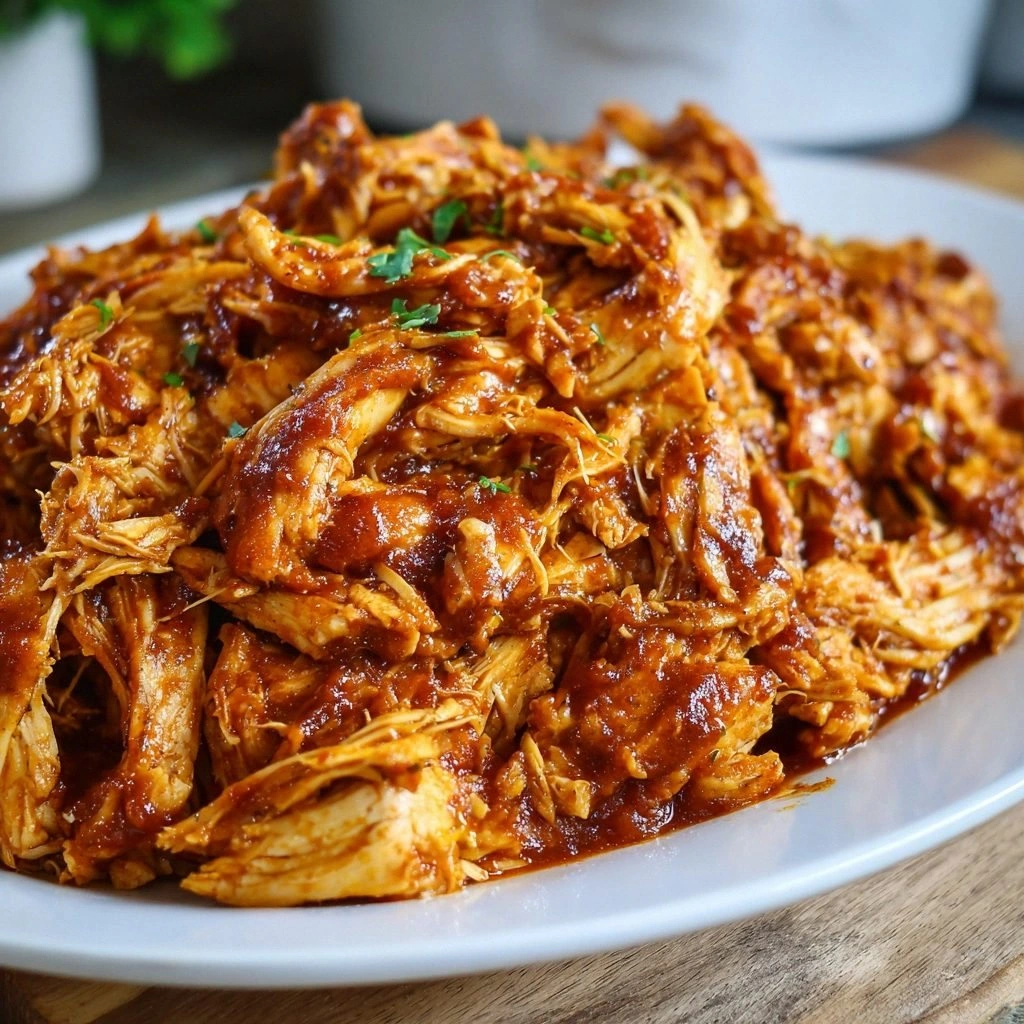
It started with a kitchen catastrophe that could have been straight out of a sitcom. I was trying to whip up a quick dinner for a group of friends, and the moment I dropped the pan full of sautéed chicken onto the counter, the splatter turned into a chaotic mess of shredded meat, garlic, and cheese. The smoke alarm screamed, and my friends laughed as I tried to salvage what was left. But in that frantic scramble, I discovered a secret sauce that turned that disaster into a culinary triumph.
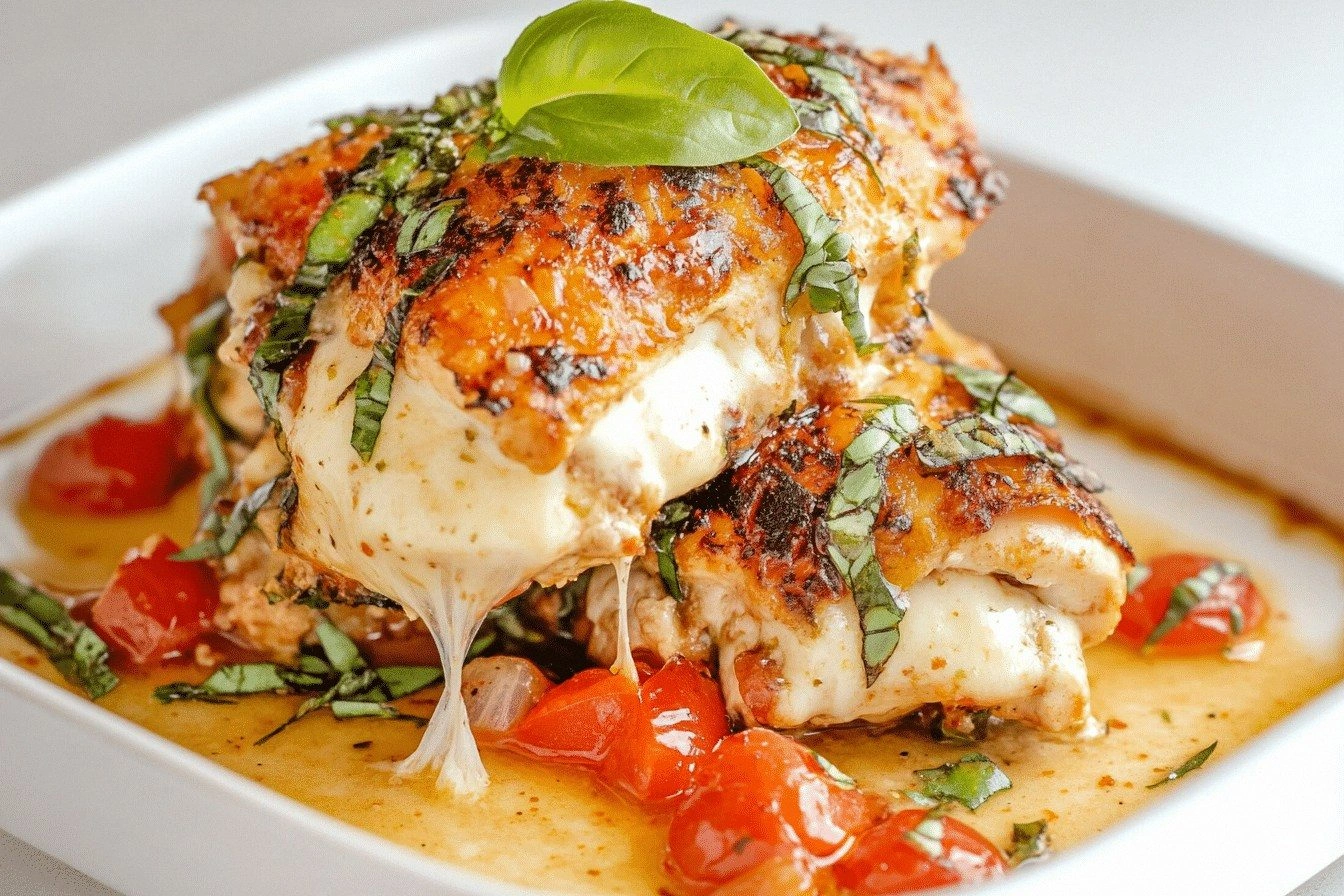
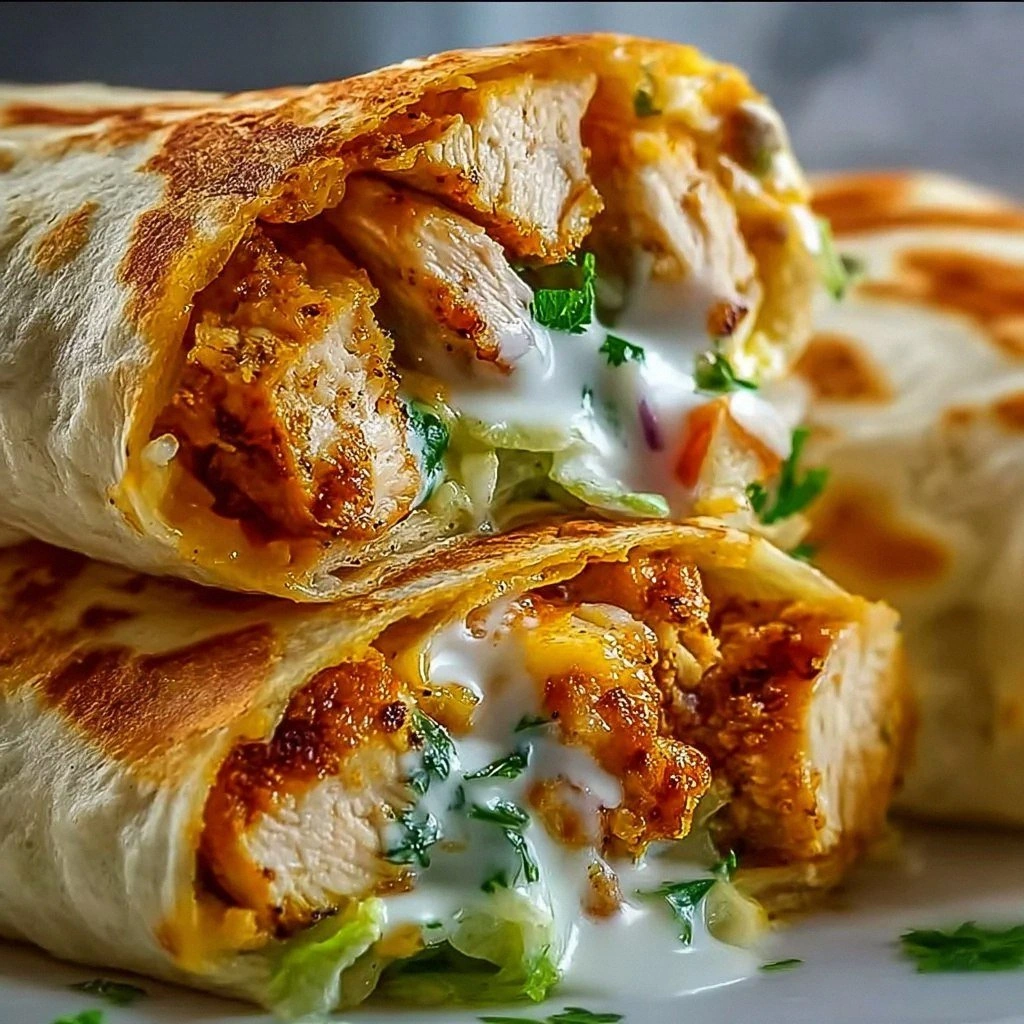
Picture this: the air is thick with the aroma of garlic blooming in olive oil, the sound of a sizzling pan that feels like a drumroll, and the sight of shredded chicken glistening in a creamy, molten blend of mozzarella and sharp cheddar. When the first bite hits your palate, the cheeses melt into a silky, velvety coating that embraces each tender chicken strand, while a hint of fresh parsley gives a pop of color and a burst of bright flavor. The low‑carb tortillas provide a satisfying crunch on the edges, and the optional spinach adds a subtle earthiness that balances the richness. The whole plate feels like a comforting hug wrapped in a golden, cheesy blanket.
What makes this version truly stand out is the meticulous layering of flavors and textures that no other recipe manages to hit so perfectly. I’ve taken the classic idea of chicken and cheese wraps and elevated it by infusing a garlic‑creamy core that coats the chicken like velvet, then sealing it in tortillas that toast to a crisp, golden perfection. The result is a dish that feels both indulgent and wholesome, a rare combination that makes every bite worth savoring.
And there’s a twist that you won’t expect: the use of low‑moisture mozzarella and a splash of cream cheese creates a creamy, luscious filling that doesn’t overwhelm the tortilla but instead enhances it. I dare you to taste this and not go back for seconds, because once you try it, you’ll be convinced that this is hands down the best version you’ll ever make at home. Let me walk you through every single step — by the end, you’ll wonder how you ever made it any other way.
What Makes This Version Stand Out
- Flavor: The combination of garlic, mozzarella, cheddar, and cream cheese creates a rich, savory profile that coats the chicken like a velvet blanket. Each bite delivers a burst of umami, followed by a lingering, buttery finish that keeps you coming back for more.
- Texture: The crispy edges of the toasted tortillas contrast with the smooth, melt‑in‑your-mouth cheese center, offering a satisfying bite that feels like a crunchy exterior and a decadent interior.
- Simplicity: With just a handful of ingredients and a straightforward assembly process, this recipe is a breeze to make, making it perfect for busy weeknights or last‑minute gatherings.
- Uniqueness: The creamy garlic core is a secret weapon that sets this wrap apart from typical cheesy chicken dishes, turning an ordinary meal into a memorable experience.
- Crowd‑Pleaser: Whether you’re feeding a family, hosting friends, or preparing a potluck, the irresistible combination of cheese, chicken, and garlic guarantees a rave from everyone at the table.
- Make‑ahead Friendly: The wraps can be assembled ahead of time and reheated without losing their crunch or flavor, making them ideal for meal prep or entertaining.
Alright, let's break down exactly what goes into this masterpiece…
Inside the Ingredient List
The Flavor Base
At the heart of this dish is the garlic, which you’ll sauté in a splash of olive oil until it turns fragrant and slightly caramelized. This simple step unlocks a deep, sweet flavor that forms the foundation of the creamy cheese blend. If you skip the garlic, the wraps lose that aromatic lift, becoming just another cheesy chicken affair. For a subtle twist, try using smoked paprika along with the garlic to add a hint of smokiness that pairs beautifully with the cheeses.
The Texture Crew
Low‑moisture mozzarella and sharp cheddar are the dynamic duo that gives the wraps their signature melt. The mozzarella’s low moisture content means it melts smoothly without releasing excess liquid, while the cheddar adds a sharp bite that balances the richness of the cream cheese. If you’re watching calories, you can replace half the mozzarella with a lower‑fat mozzarella, but be sure to keep the cheddar to preserve that robust flavor. A quick tip: let the cheeses sit at room temperature for 15 minutes before mixing; this ensures a silky, cohesive filling.
The Unexpected Star
Cream cheese isn’t just a filler; it’s the secret sauce that binds everything together. When softened properly, it creates a velvety texture that coats the chicken and tortillas alike. If you prefer a tangier profile, swap the cream cheese for a dollop of Greek yogurt, which will still provide creaminess but with a slightly sharper finish. Remember to keep the cream cheese softened at room temperature—this prevents clumps and guarantees a smooth, luscious mixture.
The Final Flourish
Fresh parsley and optional baby spinach add color, freshness, and a subtle nutritional boost. Parsley’s bright, peppery notes cut through the richness, while spinach brings a mild earthiness and a pop of green that makes the dish visually appealing. If you’re looking to add a bit of crunch, sprinkle toasted pumpkin seeds on top before serving. Don’t forget salt and pepper—seasoning is the key that ties all these flavors together, so taste as you go and adjust to your preference.
Everything's prepped? Good. Let's get into the real action…
The Method — Step by Step
Heat a large skillet over medium heat and add the tablespoon of olive oil. Once the oil shimmers, drop in the minced garlic and sauté for 30 seconds until it releases a fragrant aroma. This quick bloom is essential; if you let it burn, it will turn bitter. Watch the color change—once it’s lightly golden, you’re ready to move on.
Introduce the shredded chicken to the pan, stirring to coat it evenly with the garlic‑oil mixture. Cook for 3–4 minutes, letting the chicken absorb the savory base. The chicken should start to turn slightly golden at the edges, indicating it’s ready for the next step. Don’t rush this part; the flavor infusion is what makes the dish unforgettable.
Lower the heat and add the cream cheese, stirring constantly until it melts into a silky sauce. The cream cheese should become almost liquid, forming a smooth coating around the chicken. This step is crucial for achieving the velvety texture that makes each bite feel indulgent.
Fold in the shredded mozzarella and cheddar, allowing the cheeses to melt fully. The mixture should be thick yet pourable, like a rich, creamy custard. If it looks too thick, add a splash of milk or chicken broth to loosen it slightly; if it’s too runny, let it simmer a bit longer to thicken.
Season the mixture with salt and pepper to taste, then stir in the chopped parsley. The parsley adds a bright, herbal note that cuts through the richness, creating a balanced flavor profile. Taste the sauce and adjust seasoning if necessary—this is the moment of truth.
Warm the low‑carb tortillas in a dry skillet or microwave until pliable. If you’re using the optional spinach, pat it dry with paper towels to remove excess moisture; this prevents sogginess. Lay each tortilla flat on a clean surface.
Spread a generous spoonful of the cheesy chicken mixture onto the center of each tortilla, leaving a small border. If you like, sprinkle a few handfuls of spinach on top for added color and nutrition. The key is to keep the filling evenly distributed so that every bite is flavorful.
Fold the sides of the tortilla inwards, then roll tightly from the bottom up, creating a snug wrap. The heat from the pan will help seal the edges, giving you a perfect, bite‑size cylinder.
Heat a skillet over medium heat, brush lightly with olive oil, and place the wraps seam‑side down. Cook for 3–4 minutes on each side, until the tortillas are golden brown and the cheese inside has melted to a bubbly, golden finish. The sizzle you hear as the wrap hits the pan is the soundtrack of deliciousness.
Remove the wraps from the skillet and let them rest for a minute before cutting. This resting period allows the cheese to set slightly, preventing a gooey mess when you slice. Slice each wrap into halves or quarters, depending on your serving preference, and serve immediately while the cheese is still melty and the tortillas are crisp.
That's it — you did it. But hold on, I've got a few more tricks that'll take this to another level…
Insider Tricks for Flawless Results
The Temperature Rule Nobody Follows
Many cooks assume any medium heat will do, but the secret lies in a steady, moderate temperature that allows the cheese to melt without burning the tortilla. Keep the skillet at a medium setting and use a thermometer if you’re uncertain; 350°F (175°C) is ideal. If the heat is too high, the outside will char before the inside melts, leading to uneven textures.
Why Your Nose Knows Best
As you cook, your nose will signal when the garlic is perfectly golden and the cheese is bubbling. Trust that aroma—it’s a reliable indicator that the mixture is at its peak flavor. If the scent fades or turns sour, it’s a sign to reduce the heat or stir more vigorously.
The 5-Minute Rest That Changes Everything
After you finish cooking the wraps, let them rest on a cutting board for five minutes. This brief pause allows the cheese to set, preventing a gooey mess when you slice. It also lets the flavors meld, giving the dish a cohesive taste that’s more satisfying.
Keep It Moist, Not Wet
When adding spinach, always pat it dry thoroughly. Excess moisture can seep into the tortillas, making them soggy and difficult to toast. If you’re using any leafy greens, consider sautéing them briefly to reduce moisture before adding them to the wrap.
Use a Silicone Mat for Easy Transfer
When moving the hot tortillas from the skillet to the cutting board, place a silicone mat on the board to keep the wraps from sticking and to provide a non‑stick surface for clean cutting. This small tool saves you from a sticky cleanup later.
Creative Twists and Variations
This recipe is a playground. Here are some of my favorite ways to switch things up:
Spicy Jalapeño Crunch
Add finely diced jalapeños to the cheese mixture for a fiery kick. The heat pairs wonderfully with the creamy base, giving each bite an unexpected zing that balances the richness.
Sun‑Dried Tomato Delight
Stir in chopped sun‑dried tomatoes for a sweet, tangy flavor that complements the garlic. The chewy texture also adds a delightful contrast to the smooth cheese.
Herb‑Infused Avocado
Replace half the cream cheese with mashed avocado for a creamy, buttery texture and a dose of healthy fats. The avocado adds a subtle, nutty flavor that elevates the dish.
Mexican Fiesta Wrap
Swap the low‑carb tortillas for corn tortillas, and add a dollop of salsa and a sprinkle of cilantro. The tortilla’s corn flavor and the fresh salsa create a vibrant, fiesta‑ready wrap.
Italian Herb Medley
Incorporate dried oregano and basil into the cheese blend for an Italian twist. The herbs infuse the wrap with aromatic, herbaceous notes that transport you to a Tuscan kitchen.
Breakfast Breakfast Wrap
For a hearty breakfast, replace the chicken with scrambled eggs and add a sprinkle of chives. The eggs provide protein, while the chives add a bright, oniony finish that’s perfect for morning cravings.
Storing and Bringing It Back to Life
Fridge Storage
Wrap each completed wrap tightly in plastic wrap and store them in an airtight container in the refrigerator for up to 2 days. The cheese will firm up slightly, so reheating is recommended for optimal texture.
Freezer Friendly
Place the assembled wraps in a freezer‑safe bag, removing as much air as possible, and freeze for up to 1 month. When ready to eat, thaw overnight in the refrigerator or use the microwave’s defrost setting.
Best Reheating Method
To reheat, place the wrapped in a lightly oiled skillet over medium heat, sealing the edges with a lid to trap steam. After 4–5 minutes, flip and heat until the tortilla is crisp and the cheese is melted. For a quick option, microwave for 30 seconds on high, then finish on the skillet to restore crispness.