Picture this: a Sunday afternoon, the kitchen humming with the low buzz of the fridge, the smell of cinnamon wafting from the pantry, and a single, stubborn apple that has been sitting in the fridge for days. I was on a mission to rescue that fruit before it turned mushy, and what emerged was not just a cake, but a revelation. I sliced the apple into thin rings, tossed them with a splash of lemon juice and a generous dusting of cinnamon, and then, with a mischievous grin, I added them to a batter that was already singing with vanilla and butter. The result was a moist, fragrant cake that tasted like a warm hug from an old friend. This is the kind of moment that turns a routine bake into an adventure, and I’m thrilled to share the secrets that made it happen.
Now, let me be honest—my first attempt at an apple cake was a disaster. I overbaked it, and the crust turned into a hard, unyielding shell that made slicing a chore. I tried to salvage it by slathering it with frosting, but the result felt like a sad, over‑sweet apology. That experience taught me that the key to an unforgettable apple cake is balance—sweetness that doesn’t overwhelm, texture that sings, and a touch of that unmistakable apple freshness that lingers on the palate. I spent weeks tweaking the batter, experimenting with different apple varieties, and testing various frostings until I found the perfect harmony. And now, after countless trials, I can confidently say that this recipe is hands down the best version you'll ever make at home.
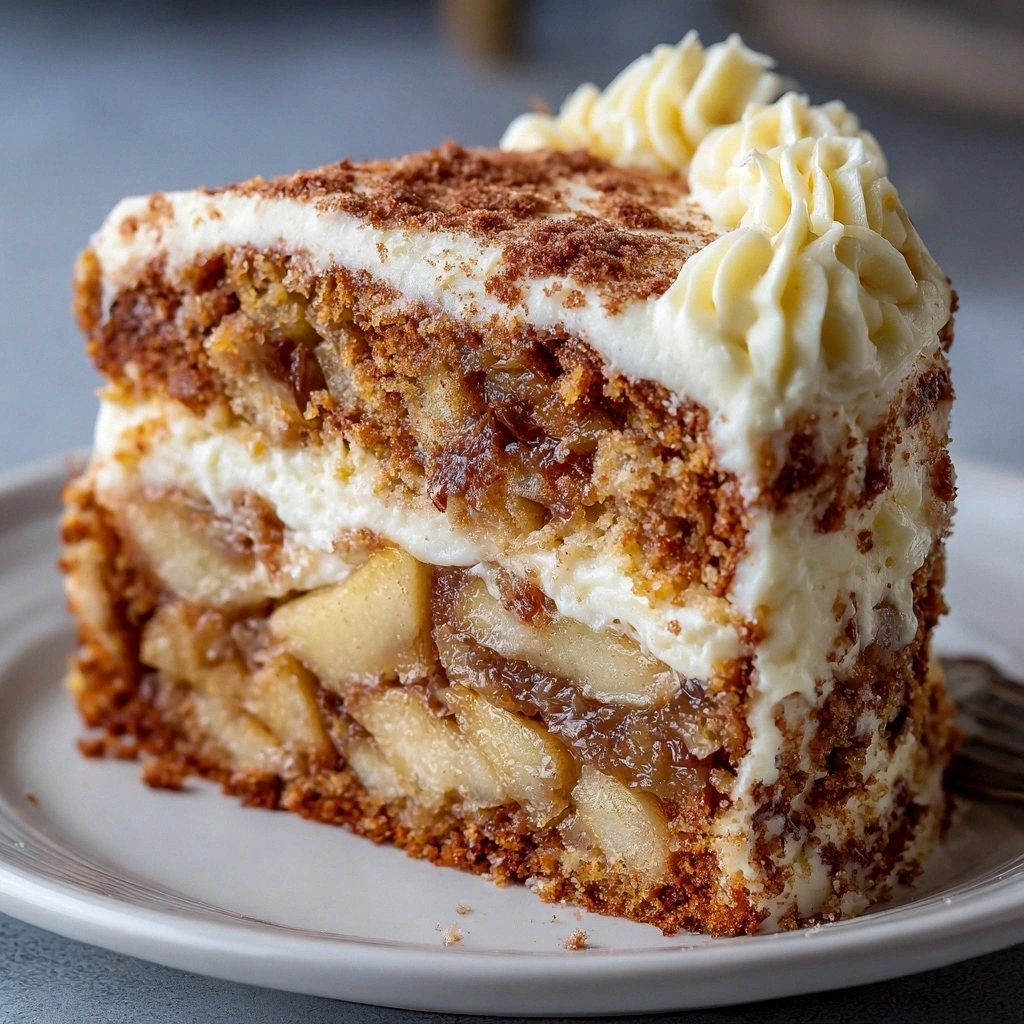
What makes this recipe stand out is not just the ingredients, but the way they interact. The apples are not merely a flavor component; they are the centerpiece that brings moisture, natural sweetness, and a subtle tartness that cuts through the richness of the batter. The frosting, a silky cream cheese blend, adds a creamy counterpoint that balances the fruitiness with a slightly tangy finish. The technique of incorporating the apples at the right moment—just before the batter reaches its peak batter consistency—ensures they remain tender and flavorful, rather than turning mushy or falling apart. The result is a cake that feels like a layered, comforting dessert, with each bite offering a burst of apple, a hint of spice, and a silky finish.
And here's the kicker: this cake can be made ahead, stored, and reheated without losing any of its magic. That makes it perfect for brunches, holiday gatherings, or simply for a cozy afternoon treat. I dare you to taste this and not go back for seconds. Picture yourself pulling this out of the oven, the whole kitchen smelling incredible, and the first bite sending a wave of warmth through your senses. Let me walk you through every single step—by the end, you'll wonder how you ever made it any other way.
What Makes This Version Stand Out
- Freshness: The apples are sliced thin and tossed with lemon juice, preserving their bright flavor and preventing browning, giving each bite a crisp, juicy explosion.
- Texture: The batter incorporates a light, airy crumb thanks to a balanced ratio of baking powder and baking soda, creating a cake that is fluffy yet dense enough to hold the fruit.
- Flavor Layering: Cinnamon and nutmeg are blended with the apples, creating a warm, spiced undertone that complements the natural sweetness of the fruit.
- Frosting Contrast: A cream cheese frosting adds a tangy, silky finish that cuts through the richness of the batter, leaving a clean, satisfying aftertaste.
- Make‑Ahead Friendly: The cake can be assembled a day in advance, refrigerated, and baked the next day, making it a stress‑free option for busy weeks.
- Visual Appeal: The golden crust with a slightly caramelized top and the glossy frosting finish make it Instagram‑ready, turning any table into a showstopper.
Alright, let's break down exactly what goes into this masterpiece...
Inside the Ingredient List
The Flavor Base
At the heart of any cake lies its flavor base—flour, sugar, leavening agents, and the fats that bind everything together. In this recipe, we use all‑purpose flour as the canvas, allowing the apples to shine without interference. Granulated sugar sweetens the batter, but we keep it moderate to let the apple’s natural sweetness take center stage. Baking powder and baking soda work together to create lift; the soda reacts with the acidity from the apples and the cream cheese frosting, while the powder provides a gentle rise. Salt, though minimal, enhances the overall flavor profile, balancing the sweetness and bringing out the spices.
What happens if you skip the salt? The cake will taste flat and overly sweet, missing that subtle depth that makes each bite satisfying. If you’re looking for a lower‑sugar option, you can substitute part of the granulated sugar with applesauce, but be prepared for a slightly denser crumb. For a gluten‑free version, swap the all‑purpose flour with a 1:1 blend of gluten‑free flour and xanthan gum to maintain structure.
The Texture Crew
Texture is everything in a cake. Butter, in its softened state, creates a tender crumb and a rich mouthfeel. We use unsalted butter, which allows us to control the salt level precisely. Eggs are beaten into the batter, adding protein and structure, while also helping to emulsify the fat and flour for a smooth consistency. Milk (or a dairy alternative) keeps the batter moist and helps dissolve the sugar, ensuring an even distribution of sweetness.
Skipping the eggs would result in a crumb that’s less cohesive and more crumbly. If you’re vegan, try flaxseed meal mixed with water as an egg substitute; it will bind the batter and add a subtle nutty flavor that complements the apples. For a dairy‑free option, replace the butter with coconut oil or a dairy‑free butter alternative, but remember that coconut oil will introduce a slight coconut flavor.
The Unexpected Star
The apples themselves are the star of the show. We recommend using a mix of tart and sweet varieties—Granny Smith for tartness and Honeycrisp for sweetness—so each bite has a balanced flavor profile. Thinly sliced apples, tossed with lemon juice, prevent browning and add a subtle citrus brightness that cuts through the richness. Cinnamon is the classic pairing, but we add a pinch of nutmeg for a warm, aromatic finish.
If you can’t find fresh apples, you can use frozen apple slices, but thaw them first and pat dry to avoid excess moisture. A quick sauté in butter before adding them to the batter can caramelize the edges, adding a delightful caramel note. The key is to keep the apple slices from becoming soggy—this is why we fold them in gently, just enough to coat the batter without breaking them apart.
The Final Flourish
The cream cheese frosting is what elevates this cake from good to unforgettable. Cream cheese brings a tangy richness that balances the sweetness of the apples, while butter adds a silky, buttery texture. Powdered sugar provides the sweet finish, and vanilla extract adds depth. A pinch of sea salt brightens the frosting’s flavor, making each bite complex and satisfying.
For a lighter frosting, swap half the cream cheese for Greek yogurt; it will keep the tang while reducing the fat content. If you’re allergic to dairy, use a dairy‑free cream cheese alternative and a neutral‑flavored plant‑based butter. The frosting can also be flavored with almond extract or lemon zest for an extra layer of complexity.
Everything's prepped? Good. Let's get into the real action...
The Method — Step by Step
- Preheat your oven to 350°F (175°C). Line a 9-inch round cake pan with parchment paper and grease the sides lightly with butter or a non‑stick spray. This ensures a smooth release and a beautiful golden top. While the oven heats, let’s talk about the batter—this is where the magic starts.
- Combine Dry Ingredients in a medium bowl: 2 cups all‑purpose flour, 1 ½ teaspoons baking powder, ½ teaspoon baking soda, ½ teaspoon salt, and 1 teaspoon ground cinnamon. Whisk them together until they’re evenly mixed. The dry mix is the foundation; a well‑combined dry mix prevents lumps and ensures even leavening.
- Cream Butter and Sugar in a stand mixer or with a handheld whisk. Beat on medium speed for 3 minutes until the mixture is pale, fluffy, and holds soft peaks. This process incorporates air, which contributes to the cake’s lightness. If you’re short on time, a hand whisk will still work—just be patient and keep the rhythm.
- Incorporate Eggs one at a time, beating well after each addition. The eggs act as a binder, holding the batter together and adding richness. After the last egg, add 1 teaspoon vanilla extract and beat for another 30 seconds. The vanilla will enhance the apple’s natural sweetness.
- Alternate Adding Dry Mix and Milk to the butter mixture: start with half of the dry mix, then a splash of milk (about ½ cup), then the remaining dry mix, and finish with the rest of the milk. Use a spatula to fold gently; overmixing can create a dense crumb. The alternating method ensures a smooth batter with no dry pockets.
- Add the Apples to the batter. Fold the thinly sliced apples, lemon‑tossed, and a pinch of nutmeg into the batter gently. This step is crucial—if you fold too hard, the apples will break apart and release too much moisture, making the cake soggy. Keep the batter loose; the apples should be coated but not submerged.
- Pour into Pan and tap gently on the counter to release air bubbles. Smooth the top with a spatula. The batter should sit evenly in the pan, with a slight slope for a uniform rise.
- Bake for 30–35 minutes, or until a toothpick inserted into the center comes out clean and the top is a deep golden brown. The cake should smell toasty and fragrant with cinnamon and apples. If the top browns too quickly, tent it with foil to prevent over‑browning.
- Cool in the pan for 10 minutes, then transfer to a wire rack to cool completely. This prevents condensation from forming on the bottom, which could make the cake soggy. Once cooled, you’ll be ready to apply the luscious frosting.
- Frost the Cake with a generous layer of cream cheese frosting. Spread evenly, then chill for 15 minutes to set the frosting before serving. The frosting’s tang will contrast beautifully with the sweet, spiced cake.
That's it — you did it. But hold on, I've got a few more tricks that'll take this to another level...
Insider Tricks for Flawless Results
The Temperature Rule Nobody Follows
Many bakers think room temperature butter is enough, but using butter that’s just slightly warmer (about 100°F) ensures it melts into the batter without forming lumps. This subtle difference creates a smoother crumb and a richer flavor. I once tried using cold butter, and the cake turned out uneven with a slightly gritty texture. The next time, I let the butter sit at room temperature for 15 minutes, and the difference was night and day.
Why Your Nose Knows Best
Before you pull the cake out of the oven, open the door and inhale. The aroma should be a warm, comforting blend of cinnamon, apples, and butter. If you smell a faint metallic scent, the oven might be too hot or the temperature inaccurate. Use an oven thermometer to double‑check; it’s a small investment that saves countless ruined batches.
The 5‑Minute Rest That Changes Everything
After removing the cake from the oven, let it rest in the pan for 5 minutes. This rest period allows the cake’s structure to set, making it easier to remove from the pan without breaking. It also lets the steam inside redistribute, preventing a soggy bottom. I used to skip this step, and the cake would crack when I tried to lift it. Now, it slides out like a dream.
Keep It Moist
If the batter looks dry, add a tablespoon of milk or even a splash of apple juice before folding in the apples. This not only adds moisture but also enhances the apple flavor. A dry cake is a sad cake, so keep the batter moist and the result will be heavenly.
Cool Before Frosting
Never frost a warm cake. The heat will melt the frosting, causing it to run and become uneven. Let the cake cool completely on a wire rack; this may take up to 30 minutes, but it pays off with a flawless finish. I once tried frosting a warm cake, and the frosting ran into a puddle—lesson learned.
Storage Secret
Wrap the cooled cake tightly in plastic wrap and store in the refrigerator for up to 3 days. Before serving, let it sit at room temperature for 15 minutes to soften the frosting and bring out the flavors. If you’re planning ahead, freeze the cake in a freezer‑safe container for up to a month; thaw overnight in the refrigerator.
Creative Twists and Variations
This recipe is a playground. Here are some of my favorite ways to switch things up:
Apple Pie Cake
Swap the cinnamon for a blend of allspice, cloves, and a splash of vanilla extract. Add a crumb topping of oats, brown sugar, and butter for a pie‑like finish. This version feels like a slice of warm apple pie with the convenience of a cake.
Spiced Pumpkin Apple Cake
Incorporate ½ cup of pumpkin puree into the batter and add a pinch of ginger. The pumpkin adds moisture and a subtle sweetness that pairs beautifully with the apples. This is perfect for a fall gathering.
Chocolate Apple Cake
Fold in ½ cup of dark chocolate chips into the batter before adding the apples. The chocolate gives a decadent depth, while the apple provides a bright counterpoint. Serve with a drizzle of caramel sauce for extra indulgence.
Gluten‑Free Apple Cake
Replace the all‑purpose flour with a gluten‑free blend (1:1 ratio) and add 1 teaspoon xanthan gum. The result is a cake that’s just as fluffy and moist, suitable for those with gluten sensitivities.
Vegan Apple Cake
Use a plant‑based butter alternative, flaxseed “eggs,” and coconut milk. For frosting, swap cream cheese with a dairy‑free cream cheese or a blend of coconut cream and powdered sugar. The vegan version maintains the same flavor profile while being kinder to animals.
Apple Cinnamon Swirl Cake
After pouring the batter into the pan, swirl a mixture of butter, brown sugar, and cinnamon over the top. Bake as usual. The swirl creates a marbled effect and a sweet, caramelized topping that’s impossible to resist.
Storing and Bringing It Back to Life
Fridge Storage
Wrap the cake tightly in plastic wrap or foil and store in the refrigerator for up to 3 days. The frosting will stay firm, and the cake will retain its moistness. When you’re ready to serve, let it sit at room temperature for about 15 minutes to soften the frosting slightly.
Freezer Friendly
Freeze the cake in a freezer‑safe container or freezer bag. For best results, wrap it in parchment paper and then in plastic wrap to prevent freezer burn. It can stay in the freezer for up to one month. When you’re ready to enjoy, thaw it overnight in the refrigerator.
Best Reheating Method
Preheat your oven to 300°F (150°C). Place the cake on a baking sheet and cover loosely with foil. Heat for 10–12 minutes, or until warmed through. If the frosting has softened, add a splash of water to the batter before reheating to keep it moist and silky.