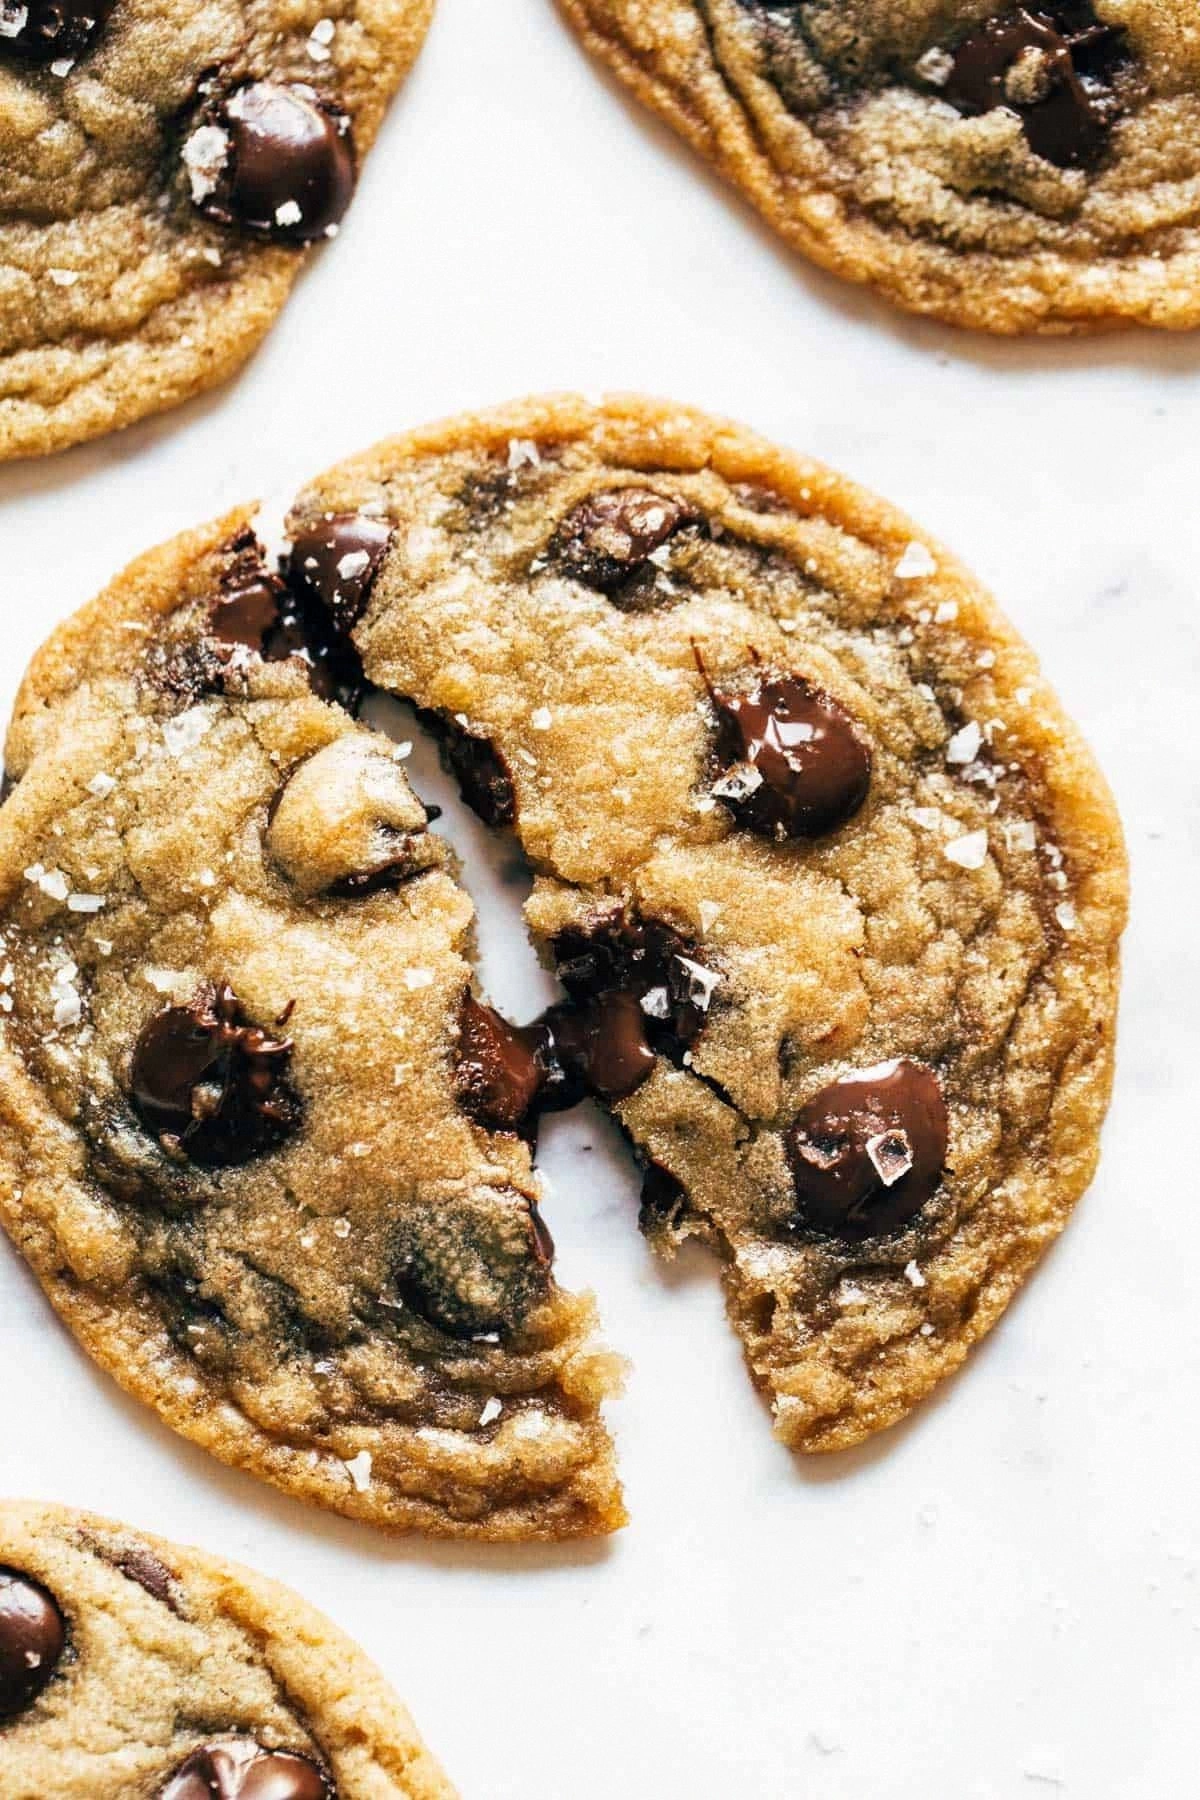
I once tried to make a batch of classic chocolate chip cookies after a marathon binge‑watching a cooking show, and what came out of my oven was a flat, sad pancake that could barely hold a single chocolate morsel. I swear I heard the cookies sigh as they slipped off the tray, and that tiny moment of defeat sparked a kitchen crusade that has now turned into the ultimate cookie redemption story. I dared my roommate to taste the first batch and not beg for a second helping, and she laughed so hard she nearly choked on the crumbs. That laugh was the catalyst for a recipe that now lives in my heart and on my cooling rack.
Picture this: the buttery aroma of melted butter hitting a hot pan, the sound of it bubbling like a tiny lava flow, and the moment it turns a deep amber, releasing nutty notes that remind you of toasted almonds and caramelized popcorn. The smell alone is enough to make the whole house feel like a bakery at dawn, and the texture? Imagine a cookie that has a crisp edge that shatters like thin ice, while the centre stays soft, chewy, and just a tad gooey—like a secret hug waiting inside. The secret? Browned butter, a game‑changer that adds depth you never knew a simple cookie could have. Most recipes skip this step, but I’m here to prove that it’s the difference between “good” and “legendary.”
Most cookie recipes treat butter as a bland, background player, but I’m about to flip that narrative. By browning the butter first, we introduce a toasty, caramel‑like flavor that pairs with the chocolate chips like a perfectly timed duet. The result is a cookie that feels sophisticated enough for a dinner party yet comforting enough for a midnight snack. I’ll be honest — I ate half the batch before anyone else got a chance to try it, and that’s why I’m handing you the exact blueprint so you can experience the same buttery bliss without the guilt of stealing the first bite.
You’re about to learn a technique that most cookie books hide under a veil of “optional” and a handful of ingredients that you probably already have in your pantry. The secret isn’t just the browned butter; it’s the timing, the temperature, and the gentle balance of sugars that creates that perfect crust‑to‑center contrast. I dare you to taste this and not go back for seconds. Let me walk you through every single step — by the end, you’ll wonder how you ever made it any other way.
What Makes This Version Stand Out
- Flavor Depth: The browned butter adds a nutty, toasty undertone that elevates the chocolate from ordinary to unforgettable, turning each bite into a mini celebration.
- Texture Harmony: A crisp, caramelized edge meets a soft, chewy middle, giving you the best of both worlds without sacrificing one for the other.
- Simplicity: Only pantry staples plus good quality chocolate are needed—no fancy gadgets or exotic spices, just pure technique.
- Uniqueness: Most cookie recipes forget the browned butter step; this one embraces it, delivering a flavor profile you won’t find in a grocery store bakery.
- Crowd Reaction: Friends and family have called these “the best cookies ever,” and the “wow” factor is immediate—no need for extra frosting or drizzles.
- Ingredient Quality: Using dark chocolate chunks adds a bittersweet contrast that makes the sweet butter shine even brighter.
- Cooking Method: Baking at a slightly lower temperature for a longer time ensures even browning without burning the edges.
- Make‑Ahead Potential: These cookies freeze beautifully, so you can bake a big batch and have a ready‑to‑go treat for any occasion.
Inside the Ingredient List
The Flavor Base
Unsalted butter is the star of the show, but not just any butter. By cooking it until it turns a deep amber, you coax out milk solids that create a caramel‑like richness. If you skip this step, you’ll end up with a flat, one‑dimensional flavor that feels more like a plain sugar cookie. For the best results, use a high‑quality European butter that has a higher butterfat content; it browns more evenly and yields a silkier texture. A quick tip: cut the butter into cubes before melting so it heats uniformly and you can control the browning process more precisely.
The Texture Crew
Granulated sugar and brown sugar work together like a dynamic duo. The granulated sugar creates crisp edges, while the brown sugar—packed with molasses—keeps the interior soft and chewy. If you replace brown sugar with more white sugar, you’ll lose that tender crumb, and the cookies will feel dry. Conversely, using only brown sugar makes them overly soft and sometimes cakey. A good swap for the brown sugar is coconut sugar, which adds a subtle caramel note without altering the moisture balance too much.
The Unexpected Star
Chocolate chips or chunks are the heart‑beat of any chocolate chip cookie, but the type you choose can dramatically shift the flavor profile. Dark chocolate (70% cacao or higher) adds a bittersweet edge that cuts through the buttery richness, creating a sophisticated taste. Milk chocolate lends a sweeter, creamier experience, while semi‑sweet offers a middle ground. If you’re feeling adventurous, try a mix of dark and milk chips for a complex bite that surprises the palate.
The Final Flourish
All‑purpose flour, baking powder, and a pinch of salt form the structural backbone. The flour provides the framework, while baking powder adds a gentle lift that keeps the cookies from becoming too dense. Salt is the flavor enhancer that makes the sweetness sing; without it, the cookies taste flat. If you’re gluten‑free, a blend of rice flour and potato starch works well, but be prepared for a slightly different crumb texture.
Everything's prepped? Good. Let's get into the real action…
The Method — Step by Step
Start by cutting 1 cup (2 sticks) of unsalted butter into small cubes and placing them in a medium‑sized saucepan over medium heat. As the butter melts, it will begin to foam; this is the water evaporating. Keep a close eye—within two minutes the foam will subside, and the butter will start to turn a golden amber, releasing a nutty perfume. This is the moment of truth: when the butter smells like toasted hazelnuts and you see tiny brown specks at the bottom, you’ve reached the perfect brown. Immediately remove the pan from heat to prevent scorching, then set it aside to cool for a minute.
Kitchen Hack: Transfer the browned butter to a heat‑proof bowl and skim off any browned milk solids that have settled at the bottom; they can turn bitter if left in the mix.While the butter cools, whisk together 2 cups of all‑purpose flour, 1 tsp baking powder, and 1 tsp salt in a large mixing bowl. This dry blend ensures even distribution of leavening and prevents clumps. If you prefer a slightly fluffier cookie, sift the flour before mixing; the added aeration will make a subtle difference. Set the bowl aside, and give yourself a mental high‑five because you’ve just set the foundation for texture greatness.
In a separate bowl, combine 1 cup granulated sugar and 1 cup packed brown sugar. Add the cooled browned butter to the sugars and beat with an electric mixer on medium speed until the mixture is light and fluffy, about 2–3 minutes. The sugar crystals will start to dissolve slightly, creating a glossy, slightly thick batter that signals you’re on the right track. Pro tip: If the mixture looks too liquid, give it a quick chill in the fridge for 5 minutes before adding the eggs.
Add 2 large eggs, one at a time, beating well after each addition. Follow each egg with a splash of 1 tsp vanilla extract. The batter should become silky and smooth, with a faint sheen that reflects the browned butter’s caramel hue. Watch Out: Over‑mixing after the eggs can develop gluten, leading to tougher cookies, so stop mixing as soon as the eggs are fully incorporated.
Watch Out: If the batter looks too thick after adding the eggs, gently warm it for 10 seconds in the microwave; this will loosen it without cooking the eggs.Gradually add the dry flour mixture to the wet ingredients, mixing on low speed just until no streaks of flour remain. The dough will be thick but manageable—this is intentional, as a denser dough yields a chewier interior. Avoid over‑mixing; the moment the flour disappears, stop the mixer. At this stage, the dough should feel slightly tacky to the touch, a sign that the butter and sugars have coated the flour evenly.
Fold in 2 cups of dark chocolate chips or chunks using a rubber spatula. Distribute them evenly so every bite promises a melt‑in‑your‑mouth burst of chocolate. If you love pockets of extra chocolate, reserve a handful and press them into the tops of the scoops later on the baking sheet.
Line two large baking sheets with parchment paper. Using a cookie scoop (about 1.5 tbsp), drop rounded mounds onto the parchment, leaving 2 inches of space between each. The dough is thick, so the scoops may need a gentle press to flatten slightly; this ensures even spreading. Okay, ready for the game‑changer? Chill the dough on the sheet for 15 minutes; this step prevents excessive spreading and intensifies the buttery flavor.
Kitchen Hack: If you’re short on time, snap the chilled dough into bite‑size balls and bake; they’ll spread a bit more but still retain that browned‑butter depth.Preheat your oven to 350°F (175°C). Slide the trays into the middle rack and bake for 12‑14 minutes, or until the edges turn a deep golden brown while the centers still look slightly soft. The cookies will continue to firm up as they cool on the sheet—this is where the magic happens. Remove the trays and let the cookies rest for 5 minutes before transferring them to a wire rack; this prevents them from becoming soggy on the bottom.
Finally, let the cookies cool completely on the rack. As they cool, you’ll notice the aromas intensify, filling the kitchen with a buttery, chocolatey perfume that makes the whole house feel like a cozy café. That sizzle when it hits the pan? Absolute perfection. And now the fun part: taste. I dare you to try one and not immediately reach for another. That’s it — you did it. But hold on, I’ve got a few more tricks that'll take this to another level…
Insider Tricks for Flawless Results
The Temperature Rule Nobody Follows
Most home bakers bake cookies at 375°F, thinking higher heat = faster cooking. In reality, that temperature can scorch the browned butter, turning those nutty notes bitter. Keep your oven at 350°F and trust the extra minutes; the lower heat allows the butter to mellow and the sugars to caramelize gently, resulting in a uniform golden edge without a burnt aftertaste. I once baked at 400°F and ended up with a cookie that tasted like burnt popcorn—lesson learned.
Why Your Nose Knows Best
Your nose is a better timer than any kitchen timer when browning butter. When the butter starts to emit a deep, nutty scent and you see a caramel‑brown color, you’re at the perfect stage. If you rely solely on time, you may under‑brown or over‑brown, both of which ruin the flavor. Trust that aromatic cue; it’s the secret weapon of professional pastry chefs.
The 5‑Minute Rest That Changes Everything
Letting the dough rest on the baking sheet for 5‑15 minutes before baking does more than control spread. It allows the flour to fully hydrate, the gluten to relax, and the butter to firm up again, which translates to a chewier interior and a more pronounced butter flavor. Skip this step, and you’ll get a flat, overly crisp cookie that lacks that coveted melt‑in‑the‑mouth center.
Cold Butter, Warm Oven
Even though we’re using browned butter, keeping the dough chilled until it hits the oven creates a steam effect that lifts the edges, giving you that coveted “puffy‑then‑crisp” profile. If you bake the dough straight from room temperature, the cookies spread too much and the texture becomes too thin. A quick chill is the difference between a bakery‑grade cookie and a plain one.
The Chocolate Chunk Placement Trick
When you press an extra chocolate chunk into the top of each dough ball before baking, the heat melts it just enough to create a gooey “chocolate lake” that pools in the center. This subtle tweak gives each bite a burst of molten chocolate without the cookie becoming greasy. I tried this once for a friend’s birthday, and she swore it was the best thing she’d ever tasted.
Creative Twists and Variations
This recipe is a playground. Here are some of my favorite ways to switch things up:
Sea Salt Caramel Swirl
After scooping the dough onto the parchment, drizzle a teaspoon of caramel sauce on top and sprinkle a pinch of flaky sea salt before baking. The salty caramel ribbons create a sweet‑salty contrast that makes the browned butter shine even brighter.
Espresso‑Infused Delight
Dissolve 1 tsp instant espresso powder in the vanilla extract before adding it to the wet mix. The coffee flavor deepens the chocolate’s bitterness, turning the cookie into a sophisticated after‑dinner treat.
Nutty Crunch
Fold in ½ cup toasted chopped hazelnuts or walnuts along with the chocolate chips. The nuts add a delightful crunch and echo the nutty notes already present in the browned butter.
White Chocolate & Cranberry
Swap half of the dark chocolate for white chocolate chips and add ½ cup dried cranberries. The sweet‑tart cranberries cut through the richness, making the cookie perfect for holiday gatherings.
Spiced Pumpkin
Replace ¼ cup of the flour with pumpkin puree, add ½ tsp pumpkin spice, and use a mix of dark and milk chocolate. This variation is perfect for autumn, offering a moist crumb and a warm, comforting spice profile.
Storing and Bringing It Back to Life
Fridge Storage
Place cookies in an airtight container with a slice of bread on top; the bread will absorb excess moisture, keeping the cookies soft for up to a week. If you’re storing them for longer than three days, add a second layer of parchment between the cookies to prevent them from sticking together.
Freezer Friendly
Cool the cookies completely, then arrange them in a single layer on a baking sheet and freeze for 2 hours. Transfer the frozen cookies to a zip‑top freezer bag; they’ll stay fresh for up to three months. When you’re ready to indulge, bake them straight from the freezer at 350°F for 8‑10 minutes—no thawing needed.
Best Reheating Method
To revive day‑old cookies, preheat the oven to 300°F, place the cookies on a parchment‑lined tray, and add a tiny splash of water (about a teaspoon) to the tray’s edge. The steam generated will soften the interior while the oven restores the crisp edge, making them taste as if they were just out of the oven.