Dulce de Leche Cheesecake Bars
Picture this: I’m standing in a cramped kitchen, the air thick with the scent of burnt sugar from a recent experiment, and my friend challenges me to whip up something sweet that can survive a midnight craving. I stared at the pantry, saw a tub of dulce de leche, and thought, “Why not turn that sticky caramel into a dessert that feels both decadent and comforting?” The result was a revelation—bars that melt in your mouth, with a buttery crust that cracks like a perfect cookie and a creamy center that swirls like a caramel river. The moment the first bite hits your tongue, the sweetness hits a crescendo, and you’re left wondering how you ever settled for ordinary cheesecakes. I dare you to taste this and not go back for seconds.
When I first tasted these bars, the texture was a revelation. The crust was crisp and buttery, with a subtle crunch that gave way to a silky filling that oozed dulcified cream cheese. The aroma was a warm, caramelized sugar that made my nose twitch, and the first bite was a burst of sweet, salty, and creamy flavors that danced on my palate. I could hear the faint crackle of the crust as it cooled, a sound that promised a satisfying crunch. The mouthfeel was a perfect balance of firmness and melt, a harmony that made every bite feel like a small, indulgent celebration. And that’s not just a claim; it’s a fact I’ve tasted over dozens of times.
What sets this version apart is that it’s not just about the flavor; it’s about the experience. The crust is made with graham cracker crumbs and butter, giving it a familiar, comforting base that pairs beautifully with the luxurious dulce de leche. The filling is a velvety blend of cream cheese, eggs, and vanilla, where the eggs act as a binder that gives the bars a firm yet tender structure. The dulce de leche is folded in at just the right time, creating a swirl that adds visual appeal and a deep caramel sweetness that cuts through the richness. The finishing touch of flaky sea salt is a subtle nod to the classic “sweet and salty” combination that makes desserts unforgettable. All of these elements come together to produce a dessert that’s hands down the best version you’ll ever make at home.
Most recipes get this completely wrong. They either overcook the filling, resulting in a watery mess, or underbake it, leaving it raw in the center. The secret to this recipe is the precise balance of ingredients and the gentle heat that allows the custard to set without cracking. Picture yourself pulling this out of the oven, the whole kitchen smelling incredible, and the bars cooling into perfect squares that are easy to slice and serve. The anticipation is almost as delicious as the final product. And now, ready for the game‑changer? Let’s walk through every single step — by the end, you’ll wonder how you ever made it any other way.
What Makes This Version Stand Out
- Taste: The combination of creamy, sweet, and salty creates a complex flavor profile that lingers on the palate. The subtle caramel notes from the dulce de leche elevate the classic cheesecake experience. This balance ensures the dessert is indulgent yet not overwhelming.
- Texture: A buttery, crisp crust gives way to a silky, custard-like filling that melts in your mouth. The contrast between the crunch and smoothness keeps every bite interesting. It’s a textural journey from the first crack to the final bite.
- Simplicity: With only ten ingredients, you can create a show‑stopper without spending hours in the kitchen. The method is straightforward, making it accessible for both beginners and seasoned bakers. No fancy equipment is required.
- Uniqueness: The use of two distinct dulce de leche amounts—half a cup in the crust and a quarter cup in the filling—creates a layered sweetness that’s rarely seen. This duality adds depth and richness that sets it apart. It’s a dessert that feels both familiar and novel.
- Crowd Reaction: Guests rave about the bars’ melt‑in‑your‑mouth quality and the unexpected salty finish. The bars are perfect for parties, potlucks, or a quiet night in. The visual appeal of the caramel swirl also impresses even the most discerning palates.
- Ingredient Quality: Using high‑quality cream cheese and fresh dulce de leche makes a noticeable difference. The butter should be unsalted and at room temperature for maximum flavor. Fresh ingredients elevate the entire dessert.
- Cooking Method: Baking the bars at a controlled temperature ensures a silky custard without cracks. The method also allows for easy scale‑up or down. It’s a reliable technique that guarantees consistent results.
- Make‑Ahead Potential: These bars can be made a day ahead and stored in the fridge for up to three days. The flavors actually deepen over time. The bars are also freezer‑friendly for longer storage.
Inside the Ingredient List
The Flavor Base
Graham cracker crumbs are the backbone of the crust, providing a sweet, buttery foundation that pairs seamlessly with the dulce de leche. When you sift them with a pinch of salt, you unlock a subtle depth that balances the sweetness. Skipping this step means a bland crust that won’t hold the filling properly. A good rule of thumb is to toast the crumbs lightly for a minute to bring out their nutty flavor.
Unsalted butter, softened to room temperature, is the key to a tender, cohesive crust. It melts into the crumbs, creating a buttery texture that crisps up nicely in the oven. Using salted butter can throw off the delicate flavor balance, so always opt for unsalted. If you’re short on time, you can melt the butter briefly and let it cool before mixing.
Granulated sugar in the crust adds a sweet snap that enhances the caramel notes from the dulce de leche. It also helps the crust brown slightly, giving it an appealing golden hue. Too much sugar can make the crust overly sweet, so keep it to the measured amount. A quick stir to evenly distribute the sugar ensures a uniform crust.
The Texture Crew
Cream cheese is the star of the filling, offering a rich, tangy base that balances the sweetness of the dulce de leche. Choose a full‑fat variety for maximum creaminess; low‑fat versions can result in a watery texture. If you can’t find cream cheese, a combination of ricotta and mascarpone works as a substitute, but the flavor profile will differ slightly.
Eggs act as the binder that sets the custard, giving the bars a firm yet tender structure. The yolks add richness, while the whites provide structure. Be sure to beat the eggs until they’re fully incorporated to avoid any lumps. If you’re concerned about raw eggs, you can use pasteurized eggs or a small amount of flour to stabilize.
Granulated sugar in the filling provides sweetness and helps with the custard’s caramelization. It also assists in achieving a smooth, glossy finish. You can experiment with brown sugar for a deeper molasses note, but be aware that it will alter the color slightly.
The Unexpected Star
Dulce de leche is the secret weapon that gives this dessert its signature caramel flavor. It’s a sweet, thick sauce made from milk and sugar, and it’s a staple in Latin American desserts. The first tablespoon in the crust creates a caramelized glaze, while the half cup in the filling gives depth and richness. If you’re allergic to dairy, try a coconut‑based dulce de leche for a vegan twist.
The Final Flourish
Flaky sea salt is the finishing touch that brings everything together. A pinch on top of the bars after baking adds a subtle contrast that elevates the sweetness. The salt also helps to round out the flavor profile, making the dessert feel more complex. If you prefer a milder finish, you can use fine sea salt or even a sprinkle of smoked salt for a smoky undertone.
Everything’s prepped? Good. Let’s get into the real action.
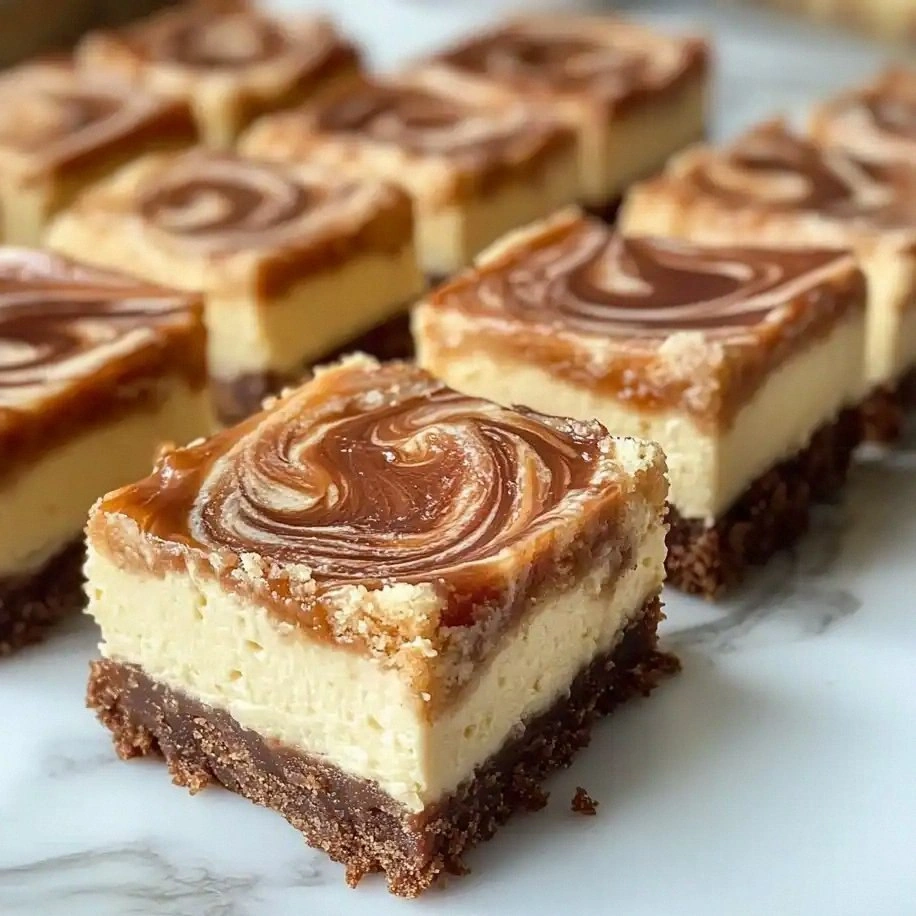
The Method — Step by Step
- Preheat your oven to 325°F (163°C). Line an 8‑inch square baking pan with parchment paper, leaving a small overhang on the sides for easy removal. In a medium bowl, combine graham cracker crumbs, softened butter, and ¼ cup granulated sugar. Mix until the crumbs are evenly coated and the mixture resembles wet sand. Spread the mixture evenly into the prepared pan and press down firmly with the back of a spoon or your palm to create a compact crust.
- While the crust sets, prepare the filling. In a large mixing bowl, beat the softened cream cheese on medium speed until smooth and creamy. Add ½ cup granulated sugar and continue to beat until the mixture is light and fluffy. Crack in the eggs one at a time, ensuring each is fully incorporated before adding the next. Stir in 1 teaspoon vanilla extract and a pinch of flaky sea salt, then fold in ½ cup dulce de leche until fully blended. The batter should be silky and free of lumps.
- Pour the filling over the cooled crust, smoothing the top with a spatula. Gently tap the pan on the counter to release any air bubbles that may have formed. Place the pan on a baking sheet to catch any drips and transfer it to the preheated oven. Bake for 30 minutes, or until the edges are set and the center has a slight wobble. The bars should be golden brown on top.
- After baking, remove the pan from the oven and immediately place it in a cold water bath. This sudden temperature change stops the cooking process and helps the custard set evenly. Let the bars sit in the water bath for 5 minutes, then carefully remove the pan and let it cool on a wire rack for 15 minutes.
- Once cooled, lift the bars out of the pan using the parchment overhang. Place the bars on a cutting board and cut them into 12 equal squares. Each square should be a perfect rectangle, ready to be served or stored.
- For an extra layer of flavor, drizzle a thin line of dulce de leche over the top of each bar before serving. This adds a glossy finish and a burst of caramel sweetness. If you prefer a more subtle look, simply sprinkle a pinch of flaky sea salt on top of each bar for a refined finish.
- Serve the bars at room temperature for the best flavor experience. The filling will be at its most silky and the crust will have a pleasant snap. For an indulgent twist, dust the bars with a light dusting of powdered sugar or a drizzle of chocolate sauce.
- Once you’ve finished the first batch, you’ll want to keep the rest fresh. Store the bars in an airtight container in the fridge for up to three days. If you’re planning ahead, these bars freeze beautifully and can be thawed in the fridge overnight for a quick snack.
That’s it — you did it. But hold on, I’ve got a few more tricks that will take this to another level.
Insider Tricks for Flawless Results
The Temperature Rule Nobody Follows
Most bakers bake cheesecake bars at 350°F, but this recipe thrives at 325°F. The lower temperature ensures a gentle, even bake that preserves the custard’s silky texture. If you’re using a convection oven, reduce the temperature by 25°F to avoid over‑browning.
Why Your Nose Knows Best
As the bars bake, the aroma of caramelized sugar will fill the kitchen. Trust that scent; it means the dulce de leche is caramelizing just right. If the smell is faint, the oven may be too cold, or the dulce de leche might not have been folded in fully.
The 5‑Minute Rest That Changes Everything
After removing the bars from the oven, let them rest in the water bath for exactly five minutes. This pause allows the heat to distribute evenly, preventing a runny center. Skipping this step often leads to a slightly watery filling that’s hard to cut cleanly.
Using a Parchment Overhang
The parchment paper overhang is a lifesaver when lifting the bars. It allows you to pull the entire slab out of the pan in one go. Without it, you risk breaking the bars or leaving crumbs attached to the edges.
Freezing for Longer Storage
Wrap the bars tightly in plastic wrap, then place them in an airtight container before freezing. They’ll keep for up to three months. When you’re ready to serve, let them thaw in the fridge overnight; they’ll regain their full flavor and texture.
Creative Twists and Variations
This recipe is a playground. Here are some of my favorite ways to switch things up:
Nutty Crunch Variation
Add ½ cup of toasted pecans or walnuts to the crust mix for a nutty crunch. The nuts provide a subtle bitterness that balances the sweetness. Serve the bars with a drizzle of maple syrup for an extra layer of flavor.
Chocolate Dipped Bars
Dip the finished bars in melted chocolate, then chill until set. The chocolate coating adds a rich, bittersweet contrast to the caramelized filling. Sprinkle a pinch of sea salt on top for an elegant finish.
Berry Swirl Edition
Fold ½ cup of fresh blueberries or raspberries into the filling before baking. The berries will burst into a tangy burst of flavor, cutting through the sweetness. Garnish with a dusting of powdered sugar for a delicate touch.
Vegan Delight
Use a vegan cream cheese alternative and coconut‑based dulce de leche. Replace the eggs with 1 tablespoon of flaxseed meal mixed with 3 tablespoons of water for each egg. The result is a dairy‑free, plant‑based version that still delivers on flavor.
Spiced Caramel Bars
Stir ½ teaspoon of ground cinnamon and ¼ teaspoon of nutmeg into the filling. The spices add warmth and depth, turning the bars into a cozy, autumnal treat. Top with a light dusting of powdered sugar.
Salted Caramel Twist
Replace the flaky sea salt with a sprinkle of Himalayan pink salt. The salt’s mineral profile adds a subtle depth to the caramel flavor. This variation is perfect for a sophisticated dessert menu.
Storing and Bringing It Back to Life
Fridge Storage
Store the bars in an airtight container in the refrigerator for up to three days. The bars will stay firm and flavorful, and the crema will remain silky. For an extra touch, add a small paper towel to absorb moisture and keep the crust crisp.
Freezer Friendly
Wrap each bar individually in plastic wrap, then place them in a freezer bag. Freeze for up to three months. When you’re ready to serve, let the bars thaw in the refrigerator overnight. The texture will stay intact, and the flavors will intensify.
Best Reheating Method
To revive frozen bars, place them on a microwave‑safe plate and heat on medium for 30 seconds. Add a tiny splash of water before reheating to create steam; this will keep the filling from drying out. Let them sit for a minute before serving to allow the heat to distribute evenly.