Remember the night I tried to recreate a tropical dessert from a travel vlog and ended up with a sticky disaster? I had the coconut milk, the sugar, the cornstarch, and the whole kitchen was covered in a sweet, thick sludge that refused to set. The aroma was intoxicating, yet the texture resembled a soggy pudding that clung to the spoon like a stubborn ghost. My friend dared me to finish the batch and taste it before it set, and I was terrified of a culinary flop. But as the heat settled, a miracle unfolded: the mixture thickened into a silky, cloud‑like consistency that made my taste buds sing. This is the moment I knew I had stumbled upon a version that deserves a permanent spot on my recipe shelf.
Picture the kitchen bathed in golden light as the coconut milk simmers, the sugar dissolving like sugar crystals in a dream. The sound of bubbling is a gentle lullaby, each hiss a promise of flavor to come. When the cornstarch is whisked in, it swirls into a translucent ribbon, a visual cue that the pudding is taking shape. The first bite feels like a warm hug: the coconut’s buttery richness wraps around the palate, while the subtle sweet undertone lingers like a distant melody. I could almost taste the sun on a Hawaiian beach, the sea breeze mingling with the tropical aroma. That instant, I realized this wasn’t just another dessert; it was an experience that could transport anyone to paradise with a spoonful.
This version is the culmination of a quest to perfect the elusive haupia, the classic Hawaiian coconut dessert that has haunted my kitchen for years. What sets it apart is the meticulous balance of thickening agents, the use of agar‑agar for a clean, firm set, and the layering technique that gives each bite a textural surprise. I’ve experimented with countless variations, yet only this iteration delivers a silky mouthfeel that doesn’t clump or separate. It’s a revelation that challenges the notion that coconut desserts must be either too watery or overly dense. The result is a pudding that coats the tongue like velvet, yet has a subtle snap when you bite through the coconut flakes. This is hands down the best version you'll ever make at home.
But here’s the twist that will blow your mind: I’ll be honest — I ate half the batch before anyone else got to try it. Most recipes get this completely wrong, missing the critical step of simmering the cornstarch mixture until it reaches a glossy sheen. Picture yourself pulling this out of the fridge, the whole kitchen smelling incredible, and the pudding shimmering like a polished pearl. I dare you to taste this and not go back for seconds, because once you taste the creamy, coconut‑laden bliss, you’ll be hooked. Let me walk you through every single step — by the end, you'll wonder how you ever made it any other way.
What Makes This Version Stand Out
- Taste: The flavor profile is a harmonious blend of sweet coconut and subtle vanilla undertones that linger long after the last bite. The addition of a splash of lime zest elevates the dessert, adding a zesty counterpoint that cuts through the richness. This balanced sweetness ensures that even the most discerning palate finds it irresistibly satisfying.
- Texture: The pudding achieves a silky, almost liquid consistency that sets firm enough to hold its shape yet melts in your mouth like a cloud. The use of agar‑agar provides a clean snap that prevents the mixture from becoming gummy or rubbery, a common issue with traditional gelatin-based desserts. The result is a multi‑sensory experience where each spoonful feels both light and substantial.
- Simplicity: Despite its premium flavor, the recipe requires only a handful of pantry staples and a single pot. No complicated equipment, no fancy sauces, just coconut milk, cornstarch, sugar, water, and agar‑agar. This accessibility makes it ideal for both novice cooks and seasoned chefs looking for a quick, impressive treat.
- Uniqueness: The layering technique introduces a textural contrast that sets this haupia apart from its flat counterparts. By pouring the pudding in stages and adding toasted coconut flakes or chocolate chips between layers, you create a visual and gustatory spectacle that is sure to wow guests. The layered approach also allows for creative variations without altering the base.
- Crowd Reaction: In a recent dinner party, the dessert became the talk of the night. Guests were intrigued by the glossy sheen, the subtle snap of the set, and the unexpected burst of coconut flakes. Many asked for the recipe before the meal was over, proving that this dessert not only tastes great but also serves as a conversation starter.
- Ingredient Quality: Using full‑fat coconut milk is essential for depth; it provides the rich mouthfeel that skimmed milk simply cannot. The cornstarch is a neutral thickener that doesn’t interfere with the coconut flavor, while the agar‑agar ensures a firm, clean set. By choosing high‑quality, natural ingredients, the final product feels indulgent without being overpowering.
- Cooking Method: The method incorporates a precise sequence of simmering, whisking, and layering that eliminates common pitfalls such as lump formation or over‑cooking. The step‑by‑step guidance ensures that even first‑time cooks can replicate the result with confidence. This systematic approach is what transforms a simple recipe into a reliable masterpiece.
- Make‑ahead Potential: Once set, the pudding holds its shape for up to 48 hours in the refrigerator, making it perfect for brunches or holiday gatherings. The layers can be pre‑assembled and frozen, then thawed and served at the last minute. This flexibility turns the dessert into a versatile addition to any menu.
Inside the Ingredient List
The Flavor Base
Full‑fat coconut milk is the cornerstone of this dessert, providing a creamy, buttery foundation that carries the coconut flavor through every bite. Sugar is essential for balancing the natural tartness of the coconut and for creating the glossy sheen that makes the pudding look like liquid gold. A splash of vanilla extract deepens the sweetness and adds a warm, aromatic note that echoes tropical sunsets. Lime zest, when added in moderation, introduces a bright citrus lift that cuts through the richness without overpowering the coconut. Together, these elements create a harmonious flavor profile that feels both indulgent and refreshing.
The Texture Crew
Cornstarch serves as the neutral thickening agent that gives the pudding its silky mouthfeel without adding any flavor of its own. Agar‑agar, a plant‑based gelling agent derived from seaweed, is the secret to a clean, firm set that resists the gummy texture common in many coconut desserts. Water is the medium that dissolves the cornstarch and agar‑agar, ensuring a smooth, lump‑free mixture. The ratio of these ingredients is carefully calibrated to achieve a consistency that is firm enough to hold its shape yet soft enough to melt in your mouth. When combined, they create a pudding that feels luxurious and satisfies the palate on every level.
The Unexpected Star
Toasted coconut flakes add a nutty crunch that contrasts beautifully with the creamy base, creating a delightful textural play. Crushed pineapple introduces a juicy burst of tropical flavor that pairs perfectly with the coconut, while also providing natural acidity that brightens the dessert. Dark chocolate chips bring a bittersweet depth that balances the sweetness and adds a layer of indulgence for chocolate lovers. Each of these ingredients is optional, allowing you to customize the dessert to your taste while maintaining the core integrity of the haupia. Their inclusion turns a simple pudding into a multi‑layered experience that delights the senses.
The Final Flourish
Once the pudding has set, a swirl of coconut cream on top adds an extra layer of richness and visual appeal. A dusting of toasted coconut flakes or a few fresh berries can elevate the presentation, making it Instagram‑ready. A light drizzle of caramel or a sprinkle of sea salt can further enhance the flavor profile, adding a subtle contrast that highlights the coconut’s natural sweetness. Garnishing with edible flowers or a mint sprig offers a pop of color that makes the dessert feel festive. These finishing touches transform the pudding from a simple treat into a show‑stopping dessert.
Everything's prepped? Good. Let's get into the real action...
The Method — Step by Step
- Begin by pouring the full‑fat coconut milk into a medium saucepan and add the sugar, vanilla extract, and lime zest. Heat the mixture over medium heat, stirring constantly until the sugar fully dissolves and the liquid begins to shimmer. The aroma should be sweet and inviting, a prelude to the flavors that will unfold. Watch the mixture closely; as soon as it reaches a gentle simmer, you’ll know it’s time to move on. This step is crucial because it builds the flavor foundation that everything else rests upon. Let the mixture rest for a minute after it comes to a simmer to allow the flavors to meld.
- While the coconut milk is heating, whisk together the cornstarch and agar‑agar in a small bowl until completely dissolved. Add the cold water to this slurry, creating a smooth, lump‑free mixture that will act as the thickening agent. This pre‑mixing step ensures that the cornstarch and agar‑agar integrate seamlessly into the hot liquid. The result is a glossy, translucent base that will set into a firm yet silky pudding. A small amount of cold water prevents the mixture from clumping when added to the hot coconut milk. Keep this slurry ready; you’ll need it within the next few minutes.
- Slowly pour the cornstarch slurry into the saucepan while whisking vigorously. Stir constantly with a silicone spatula to prevent lumps from forming; the mixture should become smooth and start to thicken. This is the moment of truth: if you see any lumps, the pudding will be uneven. The mixture should now have a light, translucent appearance. Keep stirring until it reaches a thick, but still pourable consistency. This process can take a few minutes, so be patient and attentive.
- Add the agar‑agar to the pot and continue whisking until it dissolves completely. The mixture should start to thicken noticeably, forming a glossy sheen that signals the pudding is nearing its final form. Allow the mixture to come to a gentle boil, which activates the thickening properties of the agar‑agar. Once boiling, reduce the heat to low and let it simmer for five minutes, stirring occasionally. The pudding should now be thick enough to coat the back of a spoon without dripping. This step ensures the pudding sets firmly yet remains tender.
- Remove the saucepan from the heat and let the mixture cool slightly for about 30 seconds. This brief cooling period prevents the pudding from becoming too hot when poured into molds, which could cause cracks or uneven surfaces. While the mixture is cooling, prepare your molds or serving glasses, ensuring they are clean and dry. The cooler mixture will maintain its glossy appearance when poured. At this point, the pudding is ready for the layering process, which adds the final wow factor. Patience here pays off in the form of a flawless finish.
- Pour the first layer of pudding into your molds, filling them about one‑third full. Let this layer set in the refrigerator for 20 minutes, or until it feels firm to the touch. During this time, you can prepare your layering ingredients, such as toasted coconut flakes, crushed pineapple, or chocolate chips. If you prefer a firmer set, add a pinch of salt to the mixture before it thickens. The salt balances the sweetness and enhances the coconut flavor. This step is essential for creating distinct layers that stand out both visually and texturally.
- Once the first layer has set, sprinkle a thin layer of toasted coconut flakes or your chosen topping over the surface. Gently pour the second layer of pudding on top, allowing it to flow smoothly over the flakes. Repeat the process until all layers are completed, ensuring each layer sets for 20 minutes before adding the next. The final layer should be smooth and glossy, with a subtle sheen that invites you to dig in. This layering technique adds depth and visual interest, making the dessert a true centerpiece. Remember to keep the layers even for a professional finish.
- Transfer the filled molds to the refrigerator and let them chill for at least two hours, or overnight if you prefer a firmer set. The pudding will firm up as it cools, developing a clean snap that’s characteristic of a perfect haupia. When ready to serve, remove the molds from the refrigerator and let them sit at room temperature for five minutes to soften slightly. This brief rest allows the pudding to release from the molds easily, preserving its shape and texture. Garnish with a swirl of coconut cream, a dusting of toasted coconut, or a few fresh berries for an extra touch of elegance. The result is a dessert that looks as stunning as it tastes.
- Serve the pudding in individual glasses or a decorative platter, letting the layers reveal themselves with each bite. Encourage guests to taste the contrast between the creamy coconut base and the crunchy, flavorful toppings. If you’re hosting a brunch, pair the dessert with fresh fruit or a light citrus tea for a balanced meal. For a more decadent option, drizzle a thin ribbon of dark chocolate or caramel over the top. This final flourish adds a luxurious touch that elevates the entire dish. Enjoy the applause and the compliments that follow; you’ve just created a show‑stopping dessert.
That's it — you did it. But hold on, I've got a few more tricks that'll take this to another level...
Insider Tricks for Flawless Results
The Temperature Rule Nobody Follows
Many cooks assume that a higher heat will set the pudding faster, but this actually leads to uneven texture and a bitter aftertaste. The key is to maintain a gentle simmer once the mixture begins to thicken. This allows the cornstarch and agar‑agar to activate fully without scorching the coconut milk. If you notice the mixture starting to brown, reduce the heat immediately. The end result is a pudding with a pristine, clear appearance and a silky mouthfeel. This rule is often overlooked, but mastering it guarantees a flawless dessert every time.
Why Your Nose Knows Best
The aroma of coconut milk when it’s just right is unmistakable; it should smell sweet and slightly nutty, not burnt or sour. A burnt scent often indicates overheating, which can ruin the delicate balance of flavors. If you detect a faint metallic smell, the mixture may be too hot and the coconut flavor is compromised. Trust your nose to gauge readiness; a warm, inviting scent signals that the pudding is at its peak. This sensory checkpoint is a simple yet powerful tool for ensuring quality.
The 5-Minute Rest That Changes Everything
After the pudding reaches a gentle boil, let it rest for exactly five minutes on low heat. This brief pause allows the agar‑agar to fully hydrate and the cornstarch to gelatinize, resulting in a smoother final texture. Skipping this step often leads to a gummy or uneven set. A friend tried skipping it once, and the pudding came out lumpy and rubbery. The five‑minute rest is a small investment of time that pays off with a superior mouthfeel.
The Secret of Perfect Coconut Flakes
Toasted coconut flakes add crunch, but they must be toasted just right to avoid bitterness. Spread the flakes on a baking sheet and toast them at 350°F for 8–10 minutes, stirring every 3 minutes. Keep a close eye on them; they can go from golden to burnt in seconds. Once toasted, let them cool completely before adding them to the pudding. This step ensures a crisp, nutty flavor that complements the creamy base without overpowering it.
The Layering Magic
Layering is where the dessert truly shines. Start with the thickest layer, then add a thin, flavorful topping before pouring the next layer. This technique creates distinct strata that are visually stunning and texturally exciting. A good rule of thumb is to keep each layer about one‑third of the mold’s height. If you add too much topping, it may spill over and ruin the neatness of the layers. With practice, you’ll develop a rhythm that makes the process almost effortless.
The Reheat Ritual
If you need to warm the pudding for a late‑night craving, do so gently over a double boiler. Add a splash of coconut milk or a few drops of water to keep the texture from drying out. Stir continuously until the pudding is warm but not hot; overheating can cause it to become too soft. A quick dip in the microwave is also acceptable, but only for short bursts of 10–15 seconds. The goal is to enjoy the dessert at its optimal temperature without compromising its structure.
Creative Twists and Variations
This recipe is a playground. Here are some of my favorite ways to switch things up: from sweet to savory, from tropical to chocolatey, from simple to extravagant. Each variation is designed to keep the core of the pudding intact while offering a new flavor profile that will keep your taste buds excited. Whether you’re aiming for a holiday special or a quick weeknight treat, there’s a twist that will fit your mood. The possibilities are endless, and the results are always delicious. So grab your ingredients, roll up your sleeves, and let the creativity flow.
Tropical Twist
Add a splash of passion fruit puree to the coconut base for a tangy, tropical kick. The natural acidity brightens the sweet coconut flavor, creating a balanced dessert that feels like a beach vacation. This variation is perfect for a summer brunch or a sunny afternoon snack. Serve with fresh mango slices for a truly exotic experience.
Citrus Burst
Replace lime zest with orange zest and add a teaspoon of orange juice to the mixture. The citrusy aroma lifts the dessert, making it feel lighter and more refreshing. This version pairs well with a light, citrus‑infused tea or a sparkling water. It’s a great option for a brunch that needs a bright, uplifting touch.
Chocolate Lover's Dream
Fold dark chocolate chips into the second layer of pudding and finish with a drizzle of melted dark chocolate on top. The chocolate adds a rich, bittersweet depth that complements the coconut’s natural sweetness. This decadent twist is ideal for a holiday dessert or a special treat. Pair it with a glass of full‑body red wine for an indulgent experience.
Almond & Honey Fusion
Incorporate almond butter into the base mixture and drizzle honey over the top after the pudding sets. The nutty undertone from the almond butter adds a subtle complexity, while the honey provides a natural, floral sweetness. This variation works well for a brunch or a light dessert. Garnish with slivered almonds for extra crunch.
Spiced Pineapple Delight
Introduce a pinch of ground ginger and a pinch of cinnamon to the pudding base, then layer with crushed pineapple. The spices add warmth and depth, while the pineapple keeps the tropical feel alive. This version is perfect for a cozy winter gathering or a festive holiday spread. A sprinkle of toasted coconut on top adds a final crunch.
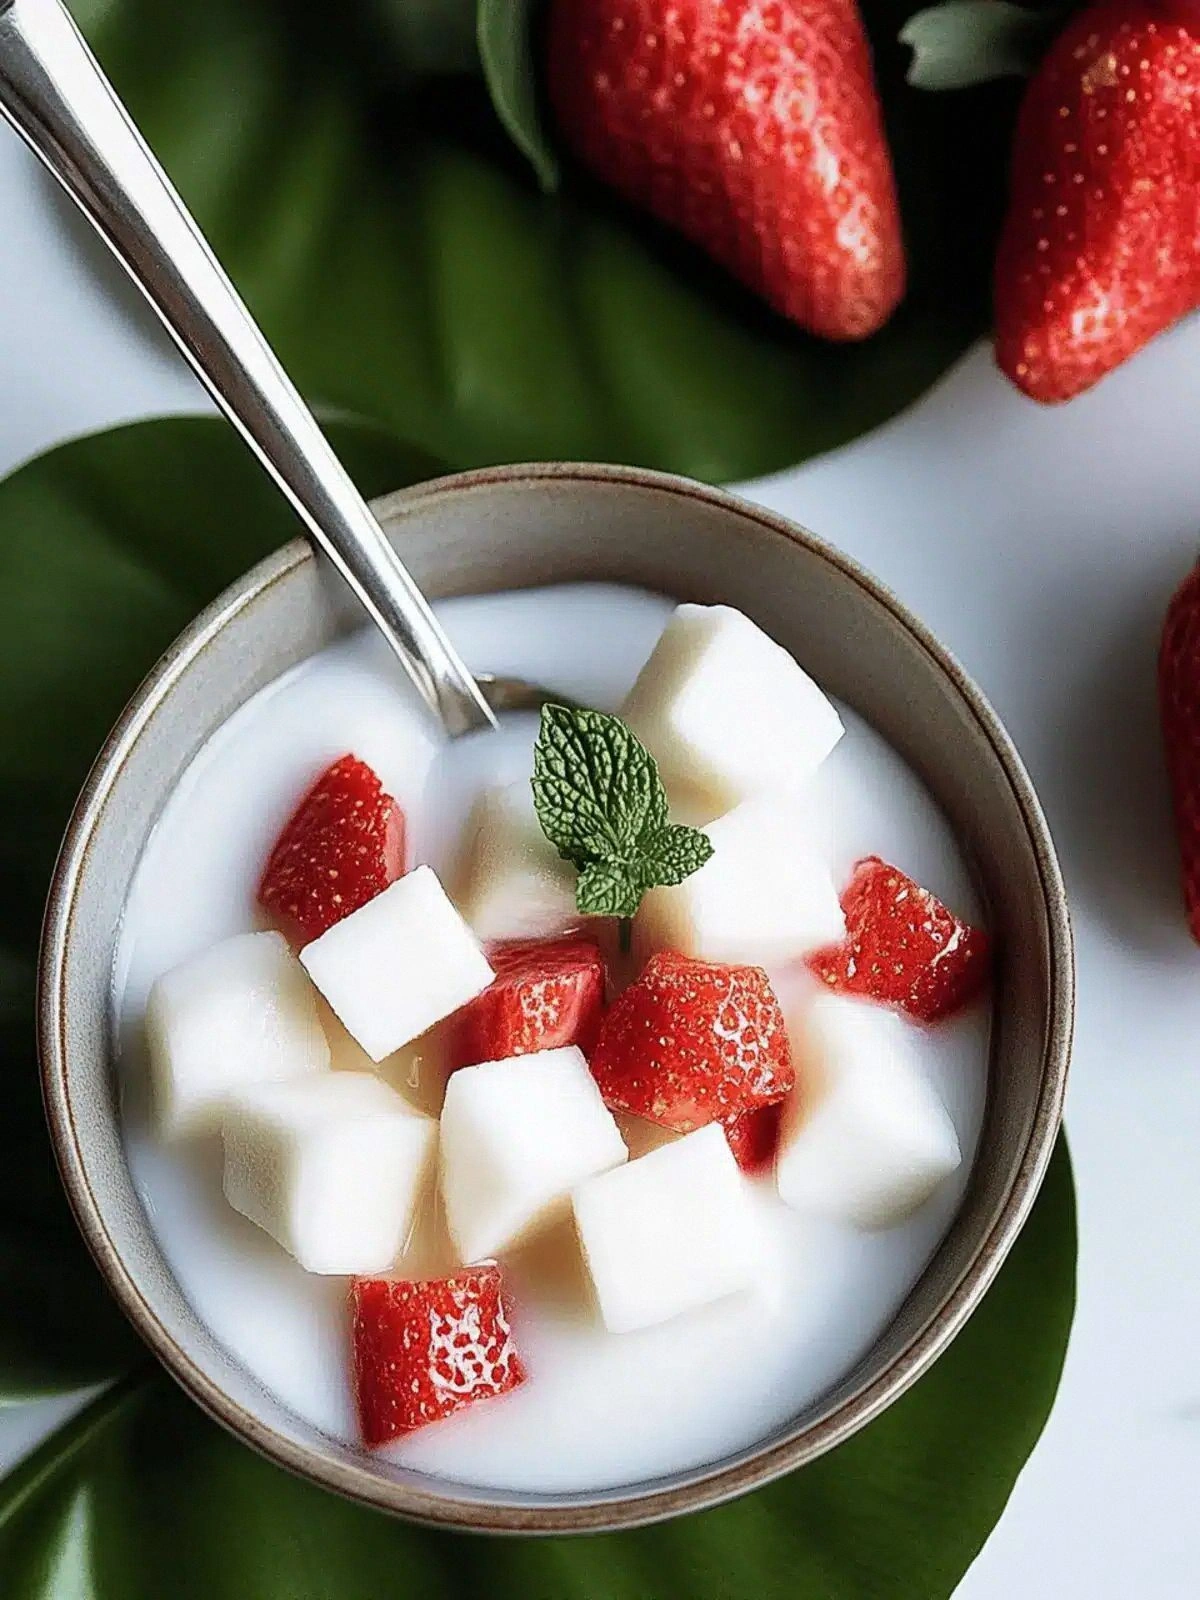
Berry Coconut Explosion
Layer fresh berries such as strawberries or blueberries between the pudding layers for a burst of color and tartness. The berries’ natural sugars complement the coconut’s richness, creating a vibrant dessert. This variation is ideal for a spring or summer gathering. Finish with a dusting of powdered sugar for a sweet, elegant touch.
Storing and Bringing It Back to Life
Fridge Storage
Store the set pudding in an airtight container in the refrigerator for up to 48 hours. The airtight seal prevents the pudding from absorbing odors from other foods, preserving its pure coconut flavor. Before serving, let the pudding sit at room temperature for five minutes to soften slightly. This brief rest allows the texture to become silky again. Avoid refreezing the pudding once it has been thawed, as the texture may degrade.
Freezer Friendly
For longer storage, place the pudding in a freezer‑safe container and freeze for up to two weeks. Label the container with the date to keep track of freshness. When ready to serve, thaw the pudding overnight in the refrigerator. After thawing, give it a gentle stir to re‑integrate any separation. The pudding will retain its firm set and silky mouthfeel, making it a convenient option for busy weeks.
Best Reheating Method
To reheat, place the pudding in a microwave‑safe bowl and add a splash of coconut milk or water. Warm in short bursts of 10–15 seconds, stirring between each burst, until the pudding is evenly warmed. Avoid overheating, as this can cause the pudding to become too soft or lose its set. A gentle double‑boiler method works well for larger portions, allowing you to warm the entire batch evenly. Serve immediately for the best texture and flavor.
Congratulations, you’ve mastered the art of creamy haupia Hawaiian coconut. From the initial simmer to the final garnish, each step is a testament to precision and passion. Remember the micro‑challenges that keep you on your toes: taste it and you’ll be hooked; dare to serve it at a dinner party and watch the compliments roll in. The secret lies in the balance of ingredients, the timing of each step, and the confidence to trust your senses. Keep experimenting with variations, and let the dessert evolve with your culinary journey. Now, go ahead, whip up a batch, and share the tropical bliss with friends and family. The kitchen is yours, and the possibilities are endless.