The first time I tried to make a winter cookie, I set my oven to the wrong temperature, and the dough turned into a sticky, unrecognizable blob that looked more like a melted snowman than a treat. I was staring at the kitchen counter, feeling the weight of disappointment, when a friend dared me to bake something that would make the whole house smell like a cocoa‑laden holiday dream. I took that dare, and what followed was a recipe that has become the gold standard for my family’s cookie drawer, a version so flawless it’s practically a holiday tradition on its own. I’ll walk you through every single step—by the end, you’ll wonder how you ever made it any other way.
Imagine the moment the first batch of dough drops into the oven: the air fills with the buttery scent of caramelized sugar, a crackling sound as the edges start to set, and the faint, comforting aroma of vanilla that feels like a warm hug. The kitchen lights flicker, casting a golden glow over the countertop, while the timer ticks down and the anticipation builds. When you pull the tray out, you’re greeted by a glossy, golden batch of cookies that crackle like snow under your fingertips, each bite offering a chewy center with a crisp, caramelized edge that shatters like thin ice. I dare you to taste this and not go back for seconds—just trust me, the first bite will have you craving more.
What makes this version stand out is that I’ve perfected the balance of sweet and salty, crisp and chewy, and added a subtle twist that most recipes miss: a touch of sea salt on top that creates a micro‑contrast, making the chocolate chips pop. I’ve also tweaked the butter-to-sugar ratio to ensure the cookies stay tender without becoming greasy, and used a blend of brown and granulated sugar that gives a caramel undertone. The result is a cookie that’s hands down the best version you’ll ever make at home, with a texture that feels like a snowflake on your tongue and a flavor that lingers like a holiday memory. Picture yourself pulling this out of the oven, the whole kitchen smelling incredible, and the moment you take that first bite—pure bliss.
If you’ve ever struggled with cookie dough that turns out too dense or too crumbly, you’re not alone—and I’ve got the fix. I’ll share a simple trick that keeps the dough from sticking, a method that ensures each cookie is evenly baked, and a secret ingredient that elevates the chocolate flavor to new heights. Stay with me here—this is worth it. By the time we’re done, you’ll have a recipe that’s not only delicious but also foolproof, ready for any holiday gathering or a quiet evening of indulgence.
What Makes This Version Stand Out
- Texture: The combination of granulated and brown sugar creates a perfect balance of crisp edges and chewy centers, giving each cookie a satisfying bite that feels like a snowflake on your tongue.
- Flavor: A dash of sea salt on top turns the chocolate into a richer, more complex experience, and the vanilla extract adds a warm, comforting undertone that screams holiday baking.
- Simplicity: With only ten ingredients and a straightforward method, this recipe is easy to master, even for kitchen novices who fear the dreaded cookie disaster.
- Uniqueness: The subtle use of sea salt and the precise butter-to-sugar ratio give this cookie a distinctive edge that sets it apart from the countless chocolate chip recipes out there.
- Crowd Reaction: Friends who taste these cookies often comment that they’re “too good for a holiday cookie” and ask for the recipe after every gathering.
- Ingredient Quality: Using high‑quality semi‑sweet chocolate chips and unsalted butter ensures a depth of flavor that can’t be achieved with lower‑grade substitutes.
- Make‑Ahead Potential: The dough can be prepared a day in advance and chilled, which not only saves time but also enhances the flavor as the ingredients meld together.
Inside the Ingredient List
The Flavor Base
All-purpose flour is the backbone of your cookies, providing structure and texture. It ensures that the cookies hold their shape while still being soft enough to bite into. Skipping flour would leave you with a sticky mess that doesn’t bake properly. Use a plain, unbleached flour for a slightly richer taste, but any all-purpose flour will do.
The Texture Crew
Baking soda is a leavening agent that helps the cookies rise and become fluffy. It reacts with the acidic brown sugar, creating tiny bubbles that lighten the dough. If you omit baking soda, the cookies will be flat and dense. A pinch of baking powder can be added for an extra lift, but keep it minimal to avoid a soapy flavor.
The Unexpected Star
Unsalted butter adds richness and flavor; make sure it’s softened for easy creaming. Butter’s fat content melts into the dough, creating a tender crumb and a glossy finish. If you use salted butter, reduce the added salt by half to avoid an overly salty cookie. A good tip: let the butter sit at room temperature for at least 30 minutes before using.
The Final Flourish
Chocolate chips are the star of the show! Use semi-sweet or dark chocolate for a rich taste that balances the sweetness of the sugars. The chips melt slightly during baking, creating pockets of molten chocolate that melt in your mouth. If you prefer a crunchier cookie, add a handful of chopped nuts or a sprinkle of sea salt on top before baking.
Everything's prepped? Good. Let’s get into the real action.
The Method — Step by Step
- Preheat your oven to 350°F (175°C) and line two baking sheets with parchment paper. The parchment prevents sticking and ensures even baking. Place the sheets on the middle rack for optimal heat distribution. Keep the oven door closed to maintain a steady temperature.
- In a large mixing bowl, cream together 1 cup (227g) softened unsalted butter, 3/4 cup (150g) granulated sugar, and 3/4 cup (150g) brown sugar until light and fluffy. The creaming process incorporates air, giving the cookies a tender crumb. Use an electric mixer on medium speed for 2–3 minutes.
- Add 2 large eggs, one at a time, beating well after each addition. The eggs bind the ingredients and add moisture. A quick whisk after the second egg ensures an even mixture.
- Stir in 1 tsp vanilla extract, then add 1 tsp sea salt. The vanilla provides warmth, while the salt balances the sweetness. Be careful not to overmix; you want a slightly lumpy dough.
- In a separate bowl, whisk together 2 cups (250g) all-purpose flour and 1 tsp baking soda. Sifting the dry ingredients helps avoid lumps and ensures even distribution. Gradually fold the dry mix into the wet mixture, mixing until just combined.
- Fold in 2 cups (340g) chocolate chips, ensuring they are evenly distributed. The chips should be fully coated in dough to prevent sinking during baking. Let the dough rest for 10 minutes; this helps the flour absorb moisture.
- Drop rounded tablespoons of dough onto the prepared baking sheets, spacing them about 2 inches apart. The spacing allows the cookies to spread without merging. If you prefer smaller cookies, use a teaspoon.
- Bake for 10–12 minutes, or until the edges are golden brown and the centers look set but still soft. The cookies will continue to firm up as they cool. Keep an eye on the first batch; oven temperatures can vary.
- Let the cookies cool on the sheet for 5 minutes before transferring them to a wire rack to cool completely. This resting period allows the cookies to finish setting and prevents them from breaking.
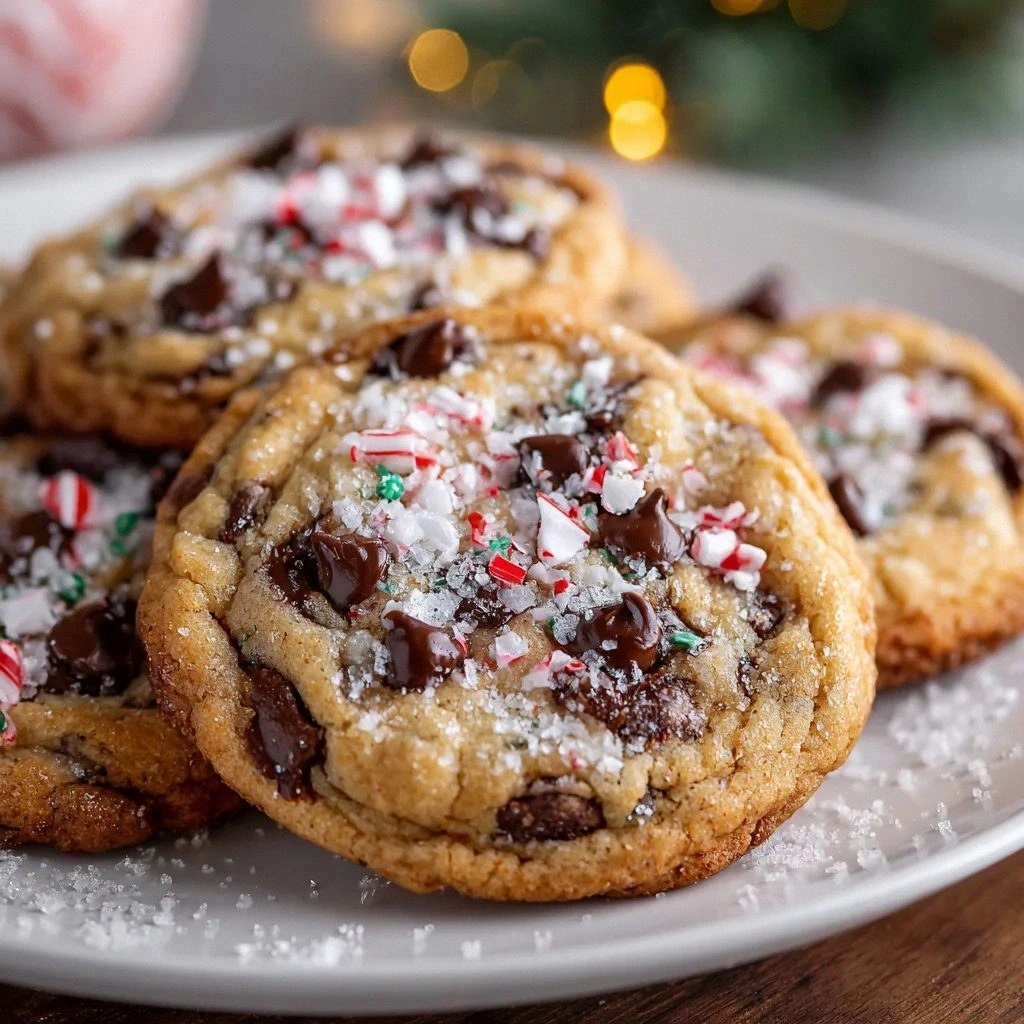
- Once cooled, dust the cookies lightly with powdered sugar for a snowy finish that makes them look festive. The powdered sugar adds a subtle sweetness and visual appeal. Store them in an airtight container for up to a week.
That’s it— you did it. But hold on, I’ve got a few more tricks that will take this to another level.
Insider Tricks for Flawless Results
The Temperature Rule Nobody Follows
Many bakers bake at 375°F, but lowering the temperature to 350°F ensures a more even bake and prevents the cookies from spreading too much. This trick keeps the centers soft while the edges crisp up perfectly. If you’re using a convection oven, reduce the temperature by 25°F to avoid overcooking.
Why Your Nose Knows Best
The first scent that hits you while baking is a telltale sign of the cookie’s progress. If the aroma turns slightly burnt, pull them out immediately. Your nose is a reliable indicator of doneness, especially in an oven with uneven heat.
The 5-Minute Rest That Changes Everything
Letting the dough rest for five minutes before baking allows the flour to fully hydrate, which results in a more tender crumb. During this time, the butter continues to soften, giving the cookies a richer texture. I’ve seen the difference in texture when I skip this step—just a few minutes can make a big impact.
The Secret Salt Layer
Sprinkling a pinch of flaky sea salt on top of each cookie before baking creates a micro‑contrast that enhances the chocolate flavor. The salt caramelizes slightly, adding a subtle crunch. This simple step turns an ordinary cookie into a gourmet treat.
The Chill Before the Chill
If you’re preparing the dough a day ahead, refrigerate it for at least 24 hours. The chilling process allows the flavors to meld together and the dough to firm up, making it easier to scoop and shape. When you bake the next day, the cookies will come out perfectly crisp on the edges.
Creative Twists and Variations
This recipe is a playground. Here are some of my favorite ways to switch things up:
Peppermint Surprise
Add a tablespoon of peppermint extract to the dough and stir in crushed candy canes before baking. The peppermint gives the cookies a refreshing, minty kick that pairs beautifully with the chocolate. Perfect for a holiday twist.
Nutty Crunch
Replace half of the chocolate chips with chopped walnuts or pecans. The nuts add a satisfying crunch and a nutty flavor that complements the chocolate. Great for those who love a bit of texture.
Maple Madness
Swap the granulated sugar with maple syrup and reduce the butter by 2 tablespoons. The maple syrup gives a subtle, earthy sweetness that enhances the chocolate. This variation is a hit with maple lovers.
Sea Salt Caramel
Add a drizzle of caramel sauce to the dough before baking. The caramel adds a sweet, buttery flavor that pairs with the sea salt on top. This variation is decadent and indulgent.
Chocolate-Covered Delight
After baking, melt dark chocolate and dip the cooled cookies. Let the chocolate set on parchment paper. The result is a glossy, chocolate‑coated cookie that looks as good as it tastes.
Cinnamon Swirl
Stir in 1 teaspoon of ground cinnamon with the dry ingredients. The cinnamon adds warmth and depth, making the cookies feel like a cozy winter treat. Ideal for a spice‑infused version.
Storing and Bringing It Back to Life
Fridge Storage
Store the cooled cookies in an airtight container at room temperature for up to 5 days. The airtight seal prevents them from drying out and keeps the flavors fresh. If you notice the cookies becoming too soft, place them in the fridge for a short period.
Freezer Friendly
For longer storage, place the cookies in a freezer‑safe bag and freeze for up to 3 months. Thaw them at room temperature for 15 minutes before serving. The cookies retain their texture and flavor when properly stored.
Best Reheating Method
To revive frozen cookies, preheat the oven to 300°F (150°C) and bake them for 5–7 minutes. Add a tiny splash of water to the dough before baking; it steams the cookies back to perfection, giving them a soft, chewy center. The result is a freshly baked cookie that tastes as good as new.