I remember the night I tried to make a batch of granola bars for a friend who insisted on a vegan snack that could survive the apocalypse. The kitchen was a chaotic symphony of clattering pans, a burnt maple syrup, and a handful of dates that had turned into a sticky, blackened mess. I stared at the charred edges, feeling the sting of disappointment that could have easily turned this into a culinary failure. But the moment the scent of toasted oats and nutty caramel hit my nose, I realized I had stumbled upon a secret that could save every granola bar disaster ever. I was about to rewrite the entire narrative of what a vegan granola bar could taste like.
Picture this: a warm, buttery aroma that drifts through the air like a promise, the crunch of toasted oats that crackle under your teeth, a sweet glaze that coats your tongue like velvet, and a subtle hint of vanilla that lingers like a memory. The texture is a perfect marriage of chewy dates and crisp seeds, each bite delivering a burst of energy that feels like a high‑five for your morning routine. You can almost hear the faint hiss as the coconut oil melts, the gentle pop of the oats as they toast, and the satisfying sigh of someone finally enjoying a snack that doesn’t feel like a compromise. The first bite is a revelation, and the second is a confession that you’ve never tasted anything quite like this.
What sets this version apart is that it’s not just another recipe; it’s a manifesto for flavor. I’ve stripped away the fluff, added a punch of real ingredients, and introduced a technique that turns ordinary oats into a caramelized crunch that will make you question all other granola bars you’ve ever tasted. This isn’t just a snack; it’s a portable, protein‑rich, guilt‑free energy bar that will have people asking, “Where did you learn this?” I dare you to taste this and not go back for seconds. It’s hands down the best version you’ll ever make at home, and it’s going to become a staple in your pantry.
Hold tight, because the next few minutes are going to reveal a technique that most recipes get completely wrong. Picture yourself pulling this out of the oven, the whole kitchen smelling incredible, the bars glistening with a glossy, caramel sheen, and the edges crisping to a golden perfection. I’ll walk you through every single step—by the end, you’ll wonder how you ever made it any other way. Let’s dive in.
What Makes This Version Stand Out
- Flavor: The combination of toasted coconut oil and maple syrup creates a caramelized glaze that’s both sweet and savory, turning each bite into a flavor explosion. The subtle vanilla and cinnamon notes elevate the nutty base, giving the bars depth without overpowering the natural ingredients.
- Texture: The careful balance of chewy dates and crisp seeds produces a satisfying contrast that keeps your mouth moving. The oats are toasted to a golden crisp, yet remain tender enough to hold the mixture together without becoming brittle.
- Ingredient Quality: Using high‑quality, unroasted almonds and cashews preserves their natural oils, ensuring a richer flavor profile and healthier fat content. The dates are pitted and chopped to distribute sweetness evenly throughout the bars.
- Make‑Ahead Potential: This recipe is designed for batch cooking; the bars stay fresh for a week in the fridge and can be frozen for months. The glaze sets firmly, preventing the bars from becoming soggy even after storage.
- Nutrition: Packed with plant‑based protein, fiber, and healthy fats, each bar delivers a balanced macro profile that fuels your day. The natural sugars from dates and maple syrup keep the energy steady without a sugar crash.
- Versatility: The base can be customized with seasonal nuts or dried fruits, making it a canvas for experimentation. Whether you’re craving a chocolatey twist or a tropical flavor, the core remains solid.
- Ease of Preparation: No fancy equipment is needed—just a saucepan, a baking sheet, and a spatula. The process is straightforward, even for beginners.
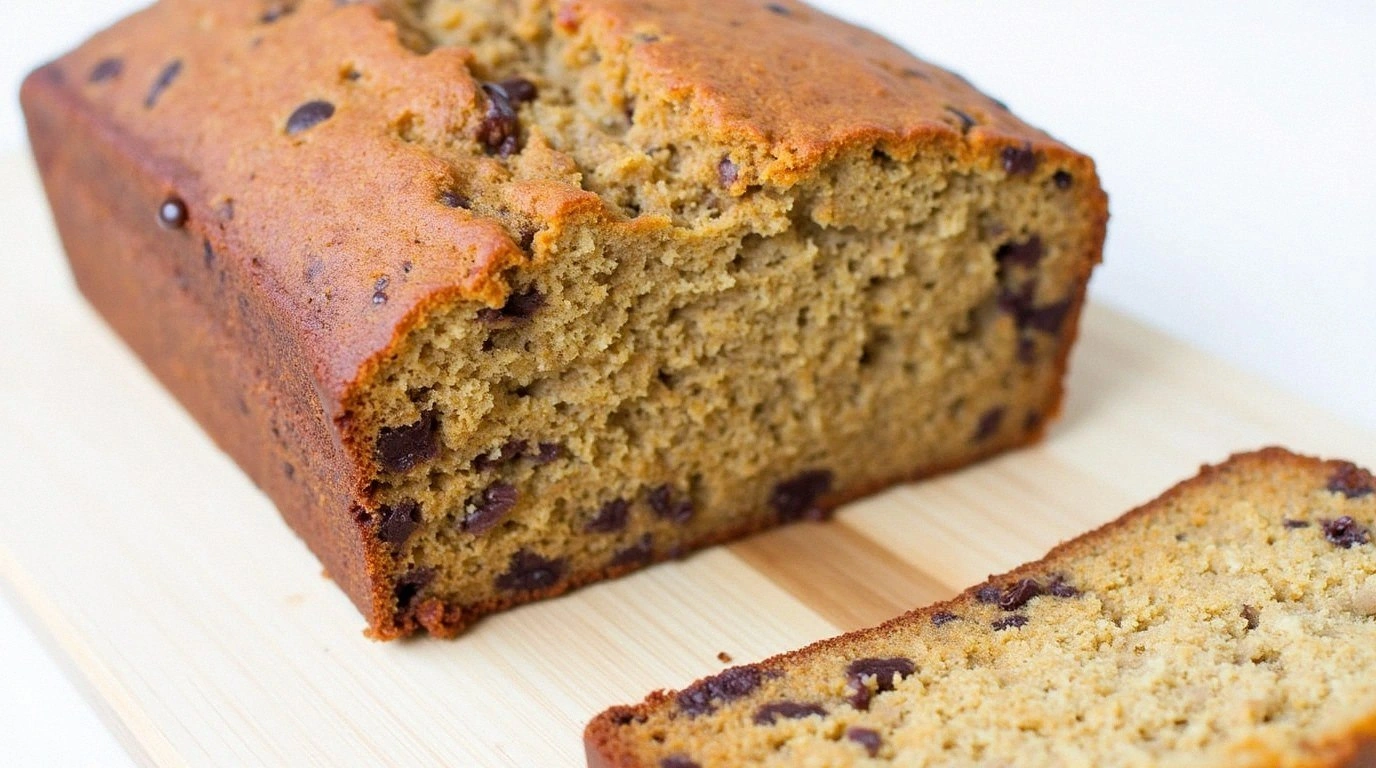
- Visual Appeal: The bars have a glossy finish and a slightly caramelized edge that makes them Instagram‑ready. The natural colors of nuts and seeds create an attractive contrast.
Alright, let's break down exactly what goes into this masterpiece...
Inside the Ingredient List
The Flavor Base
Maple syrup is the sweet backbone of this recipe. It not only sweetens the mixture but also contributes a subtle caramel flavor that complements the toasted coconut oil. Skipping maple syrup would result in a noticeably drier, less cohesive bar. If you’re looking for a lower‑sugar option, a splash of agave nectar can substitute, though it will alter the caramel note slightly.
Coconut oil is essential for binding and adds a hint of tropical richness. Its neutral taste allows the nuts and seeds to shine without overpowering them. If you prefer a dairy‑free alternative, you can use grapeseed oil, which has a mild flavor and a higher smoke point.
The Texture Crew
Rolled oats are the foundation of the bars, providing structure and a chewy bite. Choosing steel‑cut oats would give a nuttier texture but would require longer cooking times, so rolled oats strike the perfect balance. If you’re allergic to oats, you can replace them with quinoa flakes for a gluten‑free option.
Mixed nuts—almonds, cashews, and walnuts—add crunch and protein. They also bring a buttery flavor that enhances the overall richness. If you’re on a low‑fat diet, trim the nuts to just almonds, which have a lower fat content.
Pumpkin seeds and sunflower seeds provide a delightful crunch and a boost of magnesium and zinc. They also contribute a subtle earthy undertone that balances the sweetness. For a nut‑free version, increase the seed portion and add a tablespoon of chia seeds for extra fiber.
The Unexpected Star
Dates are the secret sweetener that binds the mixture together. Their natural sugars create a caramelized glaze when heated, and they add a chewy texture that contrasts with the crunchy seeds. If you can’t find dates, a small amount of mashed banana or a handful of dried apricots can mimic the moisture and sweetness.
The Final Flourish
Dried cranberries and raisins add bursts of tartness and natural sweetness, creating a multi‑layered flavor profile. They also introduce a chewy texture that complements the crunch of nuts and seeds. If you prefer a less sugary option, opt for unsweetened dried figs or chopped dried apricots.
A pinch of sea salt is crucial for balancing the sweetness and enhancing the nutty flavors. Skipping salt will result in a flat, overly sweet taste. If you’re watching sodium, a dash of Himalayan pink salt can provide the same flavor lift with a mineral boost.
Ground cinnamon adds warmth and depth, tying the flavors together. It also offers anti‑inflammatory benefits. If you’re cinnamon‑sensitive, a dash of nutmeg or cardamom can provide a similar aromatic profile.
Everything's prepped? Good. Let's get into the real action...

The Method — Step by Step
- Prep the pan: Line a 9x9 inch baking pan with parchment paper, leaving a small overhang on each side for easy removal. Heat a large saucepan over medium heat and add the coconut oil. As the oil melts, it should emit a subtle, nutty aroma that signals readiness.
- Toast the oats: Pour the rolled oats into the pan, stirring constantly for 5–7 minutes until they turn a golden brown and release a toasted fragrance. The oats should sound slightly crisp when tapped, indicating they’re ready for the next step.
- Blend the sweetener: In a separate bowl, mash the pitted dates into a smooth paste using a fork or immersion blender. Stir in the maple syrup, vanilla extract, and cinnamon until the mixture is glossy and well‑combined.
- Combine wet and dry: Pour the date‑maple mixture over the toasted oats, stirring vigorously until every oat is coated. The mixture should feel slightly sticky but not wet; you’ll know it’s right when the oats clump together when pressed.
- Incorporate nuts and seeds: Add the chopped nuts, pumpkin seeds, sunflower seeds, dried cranberries, and raisins. Stir until the mixture is uniform. Watch Out: If the mixture is too dry, add a teaspoon of coconut oil to bring it together; if it’s too wet, add a tablespoon of oats to absorb excess moisture.
- Press into pan: Transfer the mixture to the prepared pan, using a spatula or the back of a spoon to press it firmly and evenly. The edges should be tight and the surface smooth; if there are gaps, press again to fill them.
- Chill for set: Place the pan in the refrigerator for at least 30 minutes, or until the bars are firm enough to cut. This step is crucial for achieving clean, sliceable bars.
- Cut and serve: Lift the parchment overhang, place the slab on a cutting board, and slice into bars. Store any leftovers in an airtight container in the fridge for up to a week.
That's it — you did it. But hold on, I've got a few more tricks that'll take this to another level. Stay tuned for insider tips that will elevate your granola bars from good to unforgettable.
Insider Tricks for Flawless Results
The Temperature Rule Nobody Follows
Many bakers overlook the importance of oil temperature when caramelizing the date syrup. Heat the coconut oil until it just begins to bubble, then add the date mixture; this ensures a smooth glaze without scorching. I’ve seen bars that turn out mushy when the oil is too hot, so keep the heat low and steady.
Why Your Nose Knows Best
Before you press the mixture into the pan, give it a quick sniff. A faint, sweet aroma indicates the dates have fully blended with the maple syrup. If it smells more like raw sugar, give it a minute longer on the stove to develop that caramel note.
The 5-Minute Rest That Changes Everything
After pressing the bars into the pan, let them rest at room temperature for 5 minutes before refrigerating. This brief rest allows the mixture to set slightly, making the bars easier to slice. Skipping this step can result in uneven cuts.
The Secret Salt Trick
A pinch of sea salt can transform the flavor profile by enhancing the natural sweetness of the dates. I’ve added a dash of Himalayan pink salt for a mineral boost; it also gives the bars a subtle sparkle on the surface.
The Quick Chill Trick
If you’re in a hurry, place the pan in a shallow freezer for 10 minutes instead of the fridge. The bars will set fast, but be careful not to over‑freeze, or the mixture may become crumbly.
The Final Press
Use the back of a spoon to press down on the bars after they’ve set. This ensures a tight, cohesive texture that holds together when you bite. I’ve found that a firm press eliminates the dreaded “crumbly” bite that can ruin a good bar.
Creative Twists and Variations
This recipe is a playground. Here are some of my favorite ways to switch things up:
Tropical Paradise
Swap the dried cranberries for shredded coconut and add a handful of chopped dried mango. The tropical fruit pairs beautifully with the coconut oil, creating a beach‑inspired flavor profile that’s perfect for summer snacking.
Chocolate‑Loaded Delight
Fold in 1/2 cup of dark chocolate chips after the mixture has cooled slightly. The chocolate will melt into the bars, adding a rich, indulgent touch while still keeping the bars vegan.
Spiced Up Energy
Add a pinch of cayenne pepper and a teaspoon of ginger powder to the oat mixture. The heat and spice complement the sweetness, giving the bars an unexpected kick that’s great for post‑workout fuel.
Nut‑Free Power
Omit the nuts entirely and increase the seed portion to 1 cup of mixed seeds. Add a tablespoon of chia seeds for extra fiber and a slight gel-like texture that binds the bars together.
Savory Snack
Replace the maple syrup with a splash of soy sauce and add a teaspoon of dried thyme. The savory notes transform the bars into a snack that pairs well with salads or a light soup.
Berry Burst
Incorporate a cup of freeze‑dried blueberries into the mixture for a burst of natural sweetness and a pop of color. The berries soften during the cooking process, creating a chewy, jam‑like texture.
Storing and Bringing It Back to Life
Fridge Storage
Place the bars in an airtight container in the refrigerator for up to a week. The cool environment keeps the coconut oil solid, maintaining the bars’ firmness and preventing them from becoming sticky.
Freezer Friendly
Wrap each bar in parchment paper before freezing to avoid sticking. Frozen bars can be stored for up to three months; just let them thaw at room temperature for 15 minutes before eating.
Best Reheating Method
To revive a frozen bar, place it in the microwave for 10–15 seconds, or heat it in a dry skillet over low heat until it’s warm and fragrant. Adding a tiny splash of water before reheating steams the bar back to perfection, restoring its chewy texture.