I was in a kitchen that smelled like burnt toast, my phone buzzing with a friend’s text: “I’m craving something spicy and comforting. Think Thai, but with a twist.” I stared at the burnt crust on my skillet, realizing I had no idea how to turn that disaster into a dish that would make me say, “I dare you to taste this and not go back for seconds.” The moment felt like a culinary cliffhanger—one wrong turn and the entire plan would crumble like a cookie left too long in the oven. But I had a secret weapon: a Panang curry paste that promised depth and a peanut butter that whispered sweet, nutty undertones. The aroma that began to unfurl as I diced the onion was the first hint of the symphony I was about to orchestrate.
Picture this: the first sizzle of coconut oil in a hot pan, the onion releasing a caramelized perfume that fills the kitchen like a warm hug. The garlic joins, crackling with a sound that almost sounds like applause. The green and red bell peppers add a splash of color, their crunch a contrast to the silky coconut milk that will soon follow. My taste buds are already tingling, anticipating a blend of sweet, savory, and a hint of nutty richness that only peanut butter can deliver. The lemongrass and galangal, those fragrant aromatics, promise a depth that will linger on the palate long after the last bite.
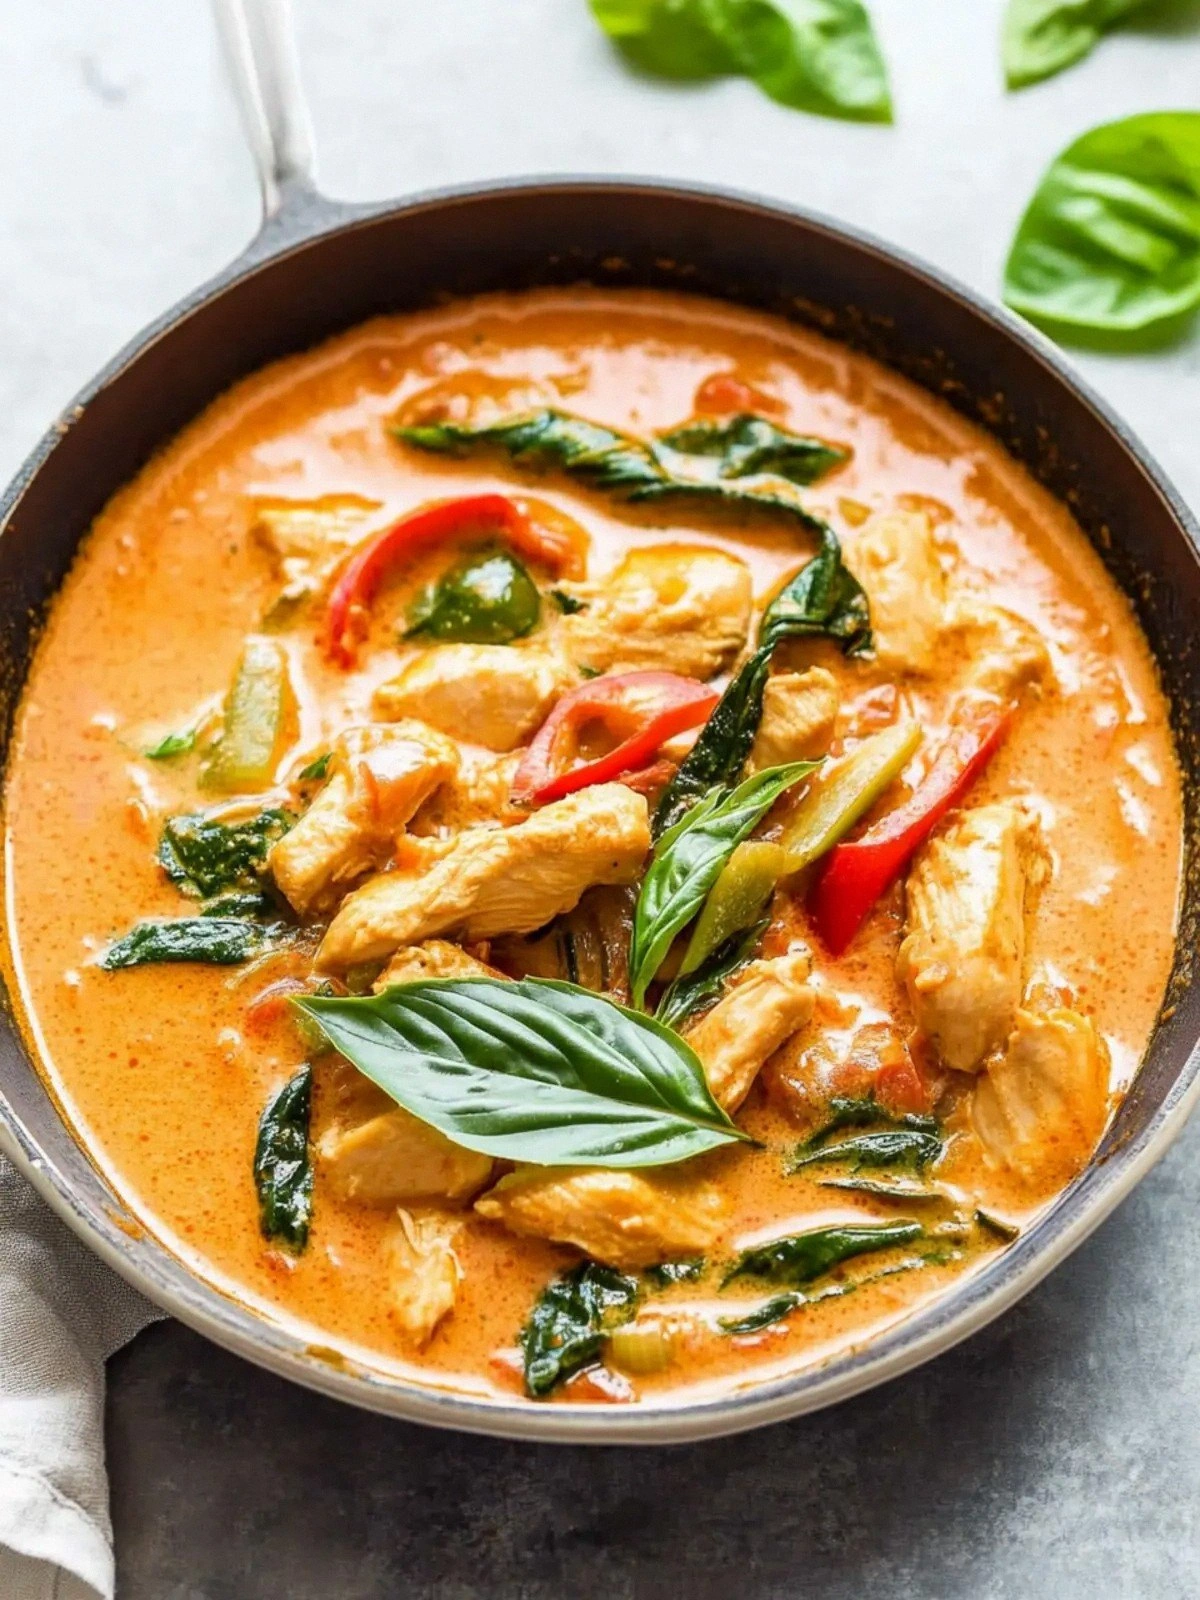
What makes this version stand out is that I didn’t just follow a recipe; I reimagined every component to create a dish that feels both authentic and entirely my own. I took the boldness of Panang curry paste and balanced it with the subtlety of nutmeg and the earthy sweetness of palm sugar. I replaced the usual coconut oil with a splash of peanut butter, turning the sauce into a velvety, nutty glaze that coats the chicken like velvet. The result is a dish that is comforting yet daring, familiar yet surprising—an invitation to indulge without guilt. It’s a recipe that will have your family asking for a second plate, and maybe a third, because this is hands down the best version you’ll ever make at home.
So, if you’ve ever struggled with a Thai curry that feels either too bland or too overpowering, you’re not alone—this is the fix you’ve been waiting for. I’ll walk you through every single step, from the first sizzle to the final garnish, and by the end, you’ll wonder how you ever made it any other way. Let’s dive in and turn a kitchen disaster into a culinary triumph.
What Makes This Version Stand Out
- Taste: The combination of Panang paste, peanut butter, and palm sugar creates a sweet-salty-simmering profile that’s unmistakably Thai yet uniquely comforting.
- Texture: The creamy coconut milk and peanut butter yield a silky sauce that clings to every bite, while the chicken remains tender and juicy.
- Simplicity: Only 17 ingredients, most of which you probably already have in your pantry; no exotic spices or hard-to-find components.
- Uniqueness: The subtle nutmeg powder adds a warm, almost cinnamon-like warmth that sets this curry apart from standard Panang.
- Crowd Reaction: Friends who are skeptical about Thai food will find this dish approachable, and those who love spice will be blown away.
- Ingredient Quality: Fresh bell peppers, lemongrass, and kaffir lime leaves give the dish depth that can’t be replicated with dried alternatives.
- Cooking Method: Quick sauté followed by a gentle simmer ensures the flavors meld without overcooking the chicken.
- Make‑Ahead Potential: The sauce can be stored for up to 3 days, and the chicken can be cooked ahead, making this a perfect weeknight dinner.
Alright, let’s break down exactly what goes into this masterpiece…
Inside the Ingredient List
The Flavor Base
The onion and garlic are the bedrock of any good curry; they caramelize into a sweet, savory foundation that carries the rest of the flavors. If you skip them, the sauce will feel flat, lacking that essential depth that comes from a well‑sautéed base. For a vegetarian version, simply omit the chicken and replace it with tofu or tempeh, but keep the onion and garlic to maintain the flavor core.
The Thai Panang curry paste is the star of the show, delivering that signature mild heat and complex spice profile. When you first open the jar, you’ll notice the aroma of cumin, coriander, and fresh chilies; this is the essence of Thai comfort. If you can’t find Panang paste, you can craft a quick substitute by blending equal parts red curry paste with a tablespoon of peanut butter and a pinch of sugar.
The coconut milk provides body and richness, creating a silky sauce that coats the chicken like velvet. The 400 ml volume is ideal for a 4‑serving dish; too little and the sauce will be thin, too much and it will become overly watery. If you prefer a lighter version, use light coconut milk or mix half coconut milk with half chicken broth.
The Texture Crew
Boneless chicken thighs are the meat of choice because they stay moist and flavorful, even after simmering. The fat content keeps the dish from drying out. If you’re a fan of lean protein, use chicken breast but be cautious not to overcook, or the meat will become rubbery.
The bell peppers add a crisp bite that contrasts beautifully with the silky sauce. Their sweetness balances the savory and spicy elements, while the green pepper’s slightly bitter undertone adds depth. If you’re allergic to bell peppers, substitute with carrots or zucchini for a similar crunch.
The kaffir lime leaves bring an unmistakable citrusy brightness that lifts the entire dish. They’re a must‑have for authentic flavor; if you can’t find them, a few drops of lime zest can provide a hint of that elusive aroma. Keep them whole to avoid a bitter taste when they’re over‑steamed.
The Unexpected Star
Peanut butter is the unexpected star that transforms this curry into something extraordinary. It adds a creamy, nutty depth that balances the heat from the curry paste and the sweetness from the palm sugar. A small amount—just 2 tablespoons—creates a complex flavor profile that feels both exotic and comforting. If you’re wary of peanut allergies, you can replace it with almond butter or cashew paste.
Nutmeg powder, used sparingly (¼ teaspoon), provides a warm, slightly sweet undertone that is often missing in standard Thai curries. Its aroma is reminiscent of freshly baked bread, adding an unexpected layer of comfort. If you’re not a fan of nutmeg, you can omit it without compromising the overall flavor.
The Final Flourish
Fresh Thai basil leaves are the finishing touch that brings the dish together. Their peppery flavor cuts through the richness of the sauce, adding a bright, herbal note that lifts the palate. Toss them in at the end, just before serving, to preserve their vibrant color and aroma. If you don’t have Thai basil, regular basil or mint can be used, but the flavor will differ.
Everything’s prepped? Good. Let’s get into the real action…
The Method — Step by Step
- Heat a large skillet over medium heat and add the coconut oil. Once the oil shimmers, add the sliced onion and a pinch of salt. The onion should soften and turn translucent in about 3–4 minutes, releasing a sweet aroma that will set the stage for the rest of the dish. Keep the heat steady to avoid burning.
- Add the minced garlic and sliced lemongrass to the skillet. Sauté for 1 minute until the garlic is fragrant and the lemongrass releases its citrusy scent. This is the moment of truth—if you notice a sharp, bitter bite, reduce the heat or remove the lemongrass immediately.
- Stir in the Panang curry paste, stirring constantly to coat the aromatics. Let the paste toast for 2 minutes, allowing the spices to bloom. You should hear a subtle sizzle and see the oil begin to separate from the paste, indicating that the flavors are developing.
- Introduce the sliced bell peppers and diced onion, cooking for another 2 minutes until the peppers start to soften but still hold their crunch. This step adds a fresh, sweet contrast to the rich sauce.
- Pour in the coconut milk, stirring to combine. Bring the mixture to a gentle simmer, letting the sauce thicken slightly. The temperature should be low enough to avoid boiling, which can cause the coconut milk to split.
- Add the chicken thighs, turning them to coat with the sauce. Reduce the heat to low and let the chicken simmer for 10 minutes, allowing the juices to mingle with the flavors. The chicken should be cooked through, with a firm yet tender texture.
- Stir in the peanut butter, fish sauce, palm sugar, nutmeg powder, and kaffir lime leaves. The sauce should become glossy and the peanut butter should meld into a smooth, nutty glaze. Taste and adjust seasoning if needed—more fish sauce for saltiness, more sugar for sweetness.
- Finish with a handful of Thai basil leaves, tossing them in just before serving. The basil’s fresh aroma will brighten the dish and add a herbal layer. Plate the curry over steaming jasmine rice or cauliflower rice for a low‑carb option.
That’s it— you did it. But hold on, I’ve got a few more tricks that’ll take this to another level.
Insider Tricks for Flawless Results
The Temperature Rule Nobody Follows
Many cooks over‑simmer the curry, causing the coconut milk to separate and the sauce to become watery. Keep the heat low and let the flavors meld slowly. This low‑heat approach ensures the peanut butter stays creamy and the chicken remains juicy. If you’re in a rush, use a lid to trap steam and accelerate the cooking, but remove it before the sauce thickens.
Why Your Nose Knows Best
A seasoned chef’s nose is the ultimate judge of doneness. As the curry simmers, you’ll notice the aroma shift from sharp spices to a mellow, nutty perfume. When the scent feels balanced and inviting, it’s a sign the flavors have harmonized. If you’re unsure, taste a small spoonful— the sauce should be fragrant but not overpowering.
The 5‑Minute Rest That Changes Everything
After you finish cooking, let the curry rest for five minutes before serving. This allows the flavors to settle and the sauce to thicken slightly. During this brief pause, the peanut butter will re‑emulsify, giving the dish a silky finish. I’ve seen people skip this step and end up with a sauce that feels thin; the rest makes a noticeable difference.
Stirring Technique for Even Coating
When adding the curry paste, stir in a clockwise motion to prevent sticking. A gentle, continuous stir ensures the paste distributes evenly, avoiding hot spots that can burn. This simple technique guarantees every piece of chicken is coated in that luscious, nutty glaze.
Using Fresh Herbs for a Bright Finish
Fresh Thai basil is essential for that bright, peppery finish. If you can’t find Thai basil, use regular basil but add a splash of lime juice to mimic the citrusy brightness. The key is to toss the basil at the last minute so it doesn’t wilt and lose its vibrant color.
Creative Twists and Variations
This recipe is a playground. Here are some of my favorite ways to switch things up:
Spicy Kick Edition
Add an extra tablespoon of red curry paste or a handful of sliced fresh chilies for a fiery version. The heat will complement the nutty base, creating a layered spicy profile that excites the palate.
Vegetarian Delight
Swap the chicken for firm tofu, searing it first until golden before adding it to the curry. The tofu will absorb the sauce’s flavors, offering a protein‑rich, plant‑based alternative.
Low‑Carb Version
Serve over cauliflower rice instead of jasmine rice to keep the dish low in carbs. The cauliflower’s mild flavor complements the curry without overpowering it.
Seafood Fusion
Replace the chicken with shrimp or scallops. Cook them briefly in the sauce, just until pink, to preserve their delicate texture.
Breakfast Twist
Use leftover curry as a flavor bomb for scrambled eggs. Stir the curry into the eggs just before they set, creating a savory, Thai‑inspired breakfast.
Storing and Bringing It Back to Life
Fridge Storage
Store the curry in an airtight container for up to 3 days in the refrigerator. The flavors deepen over time, making the dish even more delicious the next day. When you’re ready to eat, reheat gently on the stove, adding a splash of water to restore moisture.
Freezer Friendly
For longer storage, freeze the curry in freezer‑safe containers for up to 2 months. Thaw overnight in the refrigerator before reheating. The coconut milk may separate slightly; stir thoroughly before serving.
Best Reheating Method
Reheat the curry on low heat, stirring occasionally until it reaches a gentle simmer. Add a tiny splash of water or coconut milk to re‑emulsify the sauce, ensuring it’s silky and glossy. Serve immediately over hot rice for the best experience.