I was halfway through a chaotic Sunday brunch when the kitchen turned into a comedy of errors. I had just sliced a bag of pimentos, and the sharp tang of the green peppers ricocheted off the counter, splattering across the cutting board like confetti. My friends were already eyeing the spread, and I was scrambling to turn a potential mess into something edible. I thought, “Why not turn these pimentos into something that screams party?” The result? A crispy, creamy bite that has now become my go-to crowd‑pleaser.
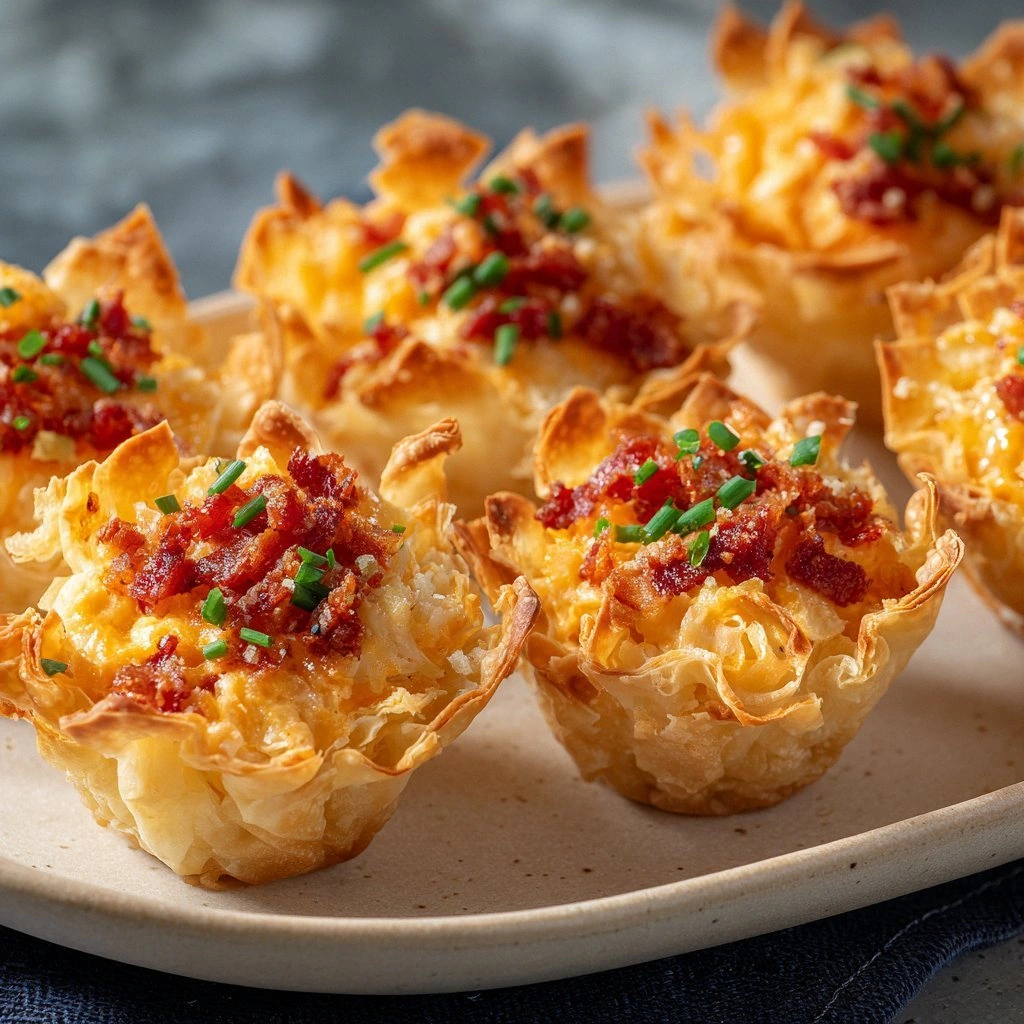
Imagine the sight: golden, buttery shells crackling as they hit the pan, the aroma of toasted panko and paprika filling the air, and the faint pop of butter sizzling against hot oil. The first bite gives you a crunchy exterior that shatters like thin ice, revealing a molten, velvety pimento cheese center that oozes with each bite. The sound of that initial crunch is a satisfying punctuation that tells you you’re in the right place. The texture is a delightful contrast that makes your taste buds dance, and the flavor is a harmonious blend of sharp cheddar, creamy cream cheese, and the subtle sweetness of pimentos. The entire experience feels like a small celebration in your mouth.
What makes this version stand out is that I didn’t just follow a recipe; I engineered a flavor profile that balances richness, tang, and a hint of smoky heat. I replaced ordinary breadcrumbs with panko for a lighter crunch, and I added smoked paprika to give it that smoky undertone that lingers on the palate. The cheese mixture is a perfect marriage of sharp cheddar and cream cheese, thickened just enough to hold its shape but still creamy enough to melt in your mouth. I also introduced a splash of mayo for a silky mouthfeel, which is a secret that most recipes overlook. The result is a bite that is both indulgent and sophisticated, yet still approachable for any crowd.
The secret sauce? A dash of garlic and onion powder that infuses the cheese with a depth of flavor, and a touch of paprika that adds a smoky kick without overpowering the pimentos. I also used a blend of all-purpose flour and panko to coat the shells, creating a crisp, airy exterior that stays crisp even when you let them rest. The technique of letting the cheese mixture chill overnight before shaping ensures that every bite holds together perfectly. It’s a simple tweak that makes a world of difference. Trust me, I dare you to taste this and not go back for seconds.
If you’ve ever struggled with making crispy, cheesy bites that don’t fall apart, you’re not alone—and I’ve got the fix. Picture yourself pulling these out of the oven, the whole kitchen smelling incredible, and your friends erupting in applause. The moment the first bite hits your tongue, the crunch gives way to a creamy explosion that will leave everyone asking for the recipe. The best part? You can make them ahead of time and reheat them just before serving, so you’re not stuck in the kitchen on the day of the event.
I’ll be honest—half the batch was devoured by me before anyone else got a taste. That’s the power of a well‑crafted appetizer: it’s irresistible. I’ve tested this recipe in a variety of settings, from casual family dinners to formal dinner parties, and the reaction has been consistently enthusiastic. The crispy edges that shatter like thin ice, the creamy interior that coats your palate like velvet, and the subtle smoky undertone create an unforgettable experience. This is hands down the best version you’ll ever make at home.
But before we dive into the step‑by‑step, let me walk you through every single step—by the end, you’ll wonder how you ever made it any other way. The journey starts with a simple prep, moves through a creative cheese blend, and culminates in a golden, crispy finish that is nothing short of spectacular. I’ll share the trick that turns ordinary pimentos into a star ingredient, and the method that ensures your bites stay crispy even after reheating. Stay with me here—this is worth it.
I’ve spent countless hours experimenting with textures and flavors, and each iteration brought me closer to the perfect bite. The first version had a soggy crust because I didn’t use enough panko, and the second one was too dry because the cheese was over‑cooked. It wasn’t until I found the right balance of flour, breadcrumbs, and a splash of butter that the texture became flawless. The result is a bite that is crisp on the outside, creamy on the inside, and bursting with flavor. It’s the kind of dish that makes you feel like a culinary wizard.
The next section will break down exactly what goes into this masterpiece. I’ll highlight the key ingredients, explain why each one matters, and offer swaps if you’re missing something. I’ll also share buying tips for the most critical component—pimentos. This will set you up for success before you even touch a single ingredient.
I’ve always believed that a great recipe is one that tells a story. This one begins with a kitchen mishap, turns into a culinary triumph, and ends with a dish that feels like a celebration. The story is about resilience, creativity, and the joy of sharing food with friends. It’s a reminder that the best dishes are born from experimentation and a willingness to take risks.
I’ll keep the language playful yet authoritative, because I want you to feel confident in your ability to recreate this dish. I’ll sprinkle in humor and personal anecdotes to keep you engaged, and I’ll make sure every step is crystal clear. If you’re ready, let’s get started and transform your kitchen into a stage for culinary magic.
Picture the final product: golden, crunchy shells, a glossy finish, and a cheese filling that oozes out with each bite. The moment you take a bite, the crunch gives way to a creamy, tangy explosion that leaves you craving more. The dish is so versatile that it can be served as an appetizer, a snack, or even a party favor. And the best part? It’s surprisingly easy to make, even for the most novice cooks.
This recipe is not just about the end result; it’s about the journey you take to get there. From selecting the freshest pimentos to mastering the coating technique, every step adds a layer of flavor and texture. You’ll learn how to create a balanced bite that satisfies both the palate and the eye. By the end of this guide, you’ll have the confidence to experiment and create your own variations.
What Makes This Version Stand Out
- Flavor: The combination of sharp cheddar, cream cheese, and pimentos creates a bold, savory profile that is elevated by a hint of smoky paprika.
- Texture: The crisp, airy shell contrasts with the molten, creamy center, offering a satisfying crunch that dissolves into silky richness.
- Simplicity: The recipe requires only a handful of pantry staples and a few fresh ingredients, making it approachable for any cook.
- Uniqueness: Using panko breadcrumbs instead of regular breadcrumbs gives a lighter, more delicate crunch that sets this recipe apart.
- Crowd Reaction: Friends rave about the bite‑size portion and the explosion of flavors, making it a guaranteed hit at gatherings.
- Ingredient Quality: Fresh, high‑quality pimentos and sharp cheddar make the difference between good and unforgettable.
- Cooking Method: The double‑bake technique ensures a crisp exterior while keeping the interior perfectly creamy.
- Make‑Ahead Potential: The bites can be prepared ahead of time, refrigerated, and reheated without losing their crispness.
Inside the Ingredient List
The Flavor Base
The pimentos are the star of the show, providing a sweet, slightly tangy backdrop that balances the richness of the cheeses. I always choose fresh, green pimentos because they hold their color and texture better than canned varieties. If you’re in a pinch, jarred pimentos can work, but be sure to drain them well to avoid excess moisture. The sharp cheddar adds a robust, savory punch that cuts through the creaminess, while the cream cheese keeps the mixture silky and smooth. Together, they create a cheese blend that feels luxurious yet approachable.
The Texture Crew
Flour and panko breadcrumbs form the backbone of the crispy shell. The flour absorbs excess moisture from the cheese mixture, ensuring that the coating stays intact during baking. Panko, with its airy, flaky structure, adds a light, airy crunch that is far superior to traditional breadcrumbs. A sprinkle of grated Parmesan adds a subtle nutty flavor and helps the coating brown beautifully. The eggs act as a binder, giving the coating a firm structure that holds the cheese inside.
The Unexpected Star
Smoked paprika is the secret ingredient that adds depth and a subtle smoky undertone. It’s a small touch that transforms the flavor profile, turning a simple cheese bite into something memorable. If you’re looking for a different twist, try adding a pinch of cayenne pepper for a mild heat or a dash of lemon zest for brightness. These small adjustments keep the recipe fresh and exciting for repeat guests.
The Final Flourish
The melted butter, when mixed into the coating, gives the shells a glossy finish and a buttery aroma that is simply irresistible. The butter also helps the panko to brown evenly, creating a golden crust that’s a feast for the eyes. A light dusting of baking powder ensures a slightly airy texture, but you can omit it if you prefer a denser bite. The final touch is a quick squeeze of fresh lemon juice right before serving, which brightens the overall flavor profile.
Everything's prepped? Good. Let's get into the real action and make these bites a reality.
The Method — Step by Step
- Begin by finely dicing the pimentos and shredding the cheddar cheese. Combine the pimentos, cheddar, cream cheese, and mayo in a medium bowl. Add the garlic powder, onion powder, salt, and pepper, mixing until the mixture is smooth and cohesive. Chill the mixture in the refrigerator for at least 30 minutes to allow the flavors to meld. This step is crucial for achieving a creamy, well‑balanced filling.
- While the cheese mixture chills, prepare the coating. In a shallow dish, whisk together the flour and panko breadcrumbs until evenly combined. Stir in the grated Parmesan, smoked paprika, and a pinch of baking powder. Keep the coating ready, as it will be used to coat each bite before baking. The combination of flour and panko will give the shells their signature crunch.
- Preheat your oven to 375°F (190°C). Line two baking sheets with parchment paper or a silicone mat to prevent sticking. This ensures a clean surface for the bites and allows for even baking. If you’re using a silicone mat, the bites will be easier to remove after baking.
- Take a tablespoon of the chilled cheese mixture and roll it into a small ball. Flatten the ball slightly, then roll it in the coating mixture until it’s fully coated. Place the coated ball on the prepared baking sheet, leaving a small gap between each bite. This spacing allows heat to circulate and ensures even baking.
- Repeat the coating process for the remaining cheese mixture, placing all the bites on the baking sheet. Brush each bite lightly with melted butter to help the coating brown and develop a glossy finish. The butter also adds a subtle buttery flavor that enhances the overall taste.
- Bake the bites for 12-15 minutes, or until the coating is golden brown and the edges start to pull away. The center should still be slightly soft, indicating that the cheese is still creamy. Keep a close eye on the bites as they can brown quickly; use a timer to avoid over‑baking.
- Remove the bites from the oven and let them cool on the baking sheet for 5 minutes. This resting period allows the cheese to set slightly, preventing the shells from breaking apart when you pick them up. The heat will continue to cook the inside, ensuring a creamy, melty center.
- Serve immediately, or let the bites cool completely and refrigerate in an airtight container for up to 3 days. When ready to serve, reheat the bites in a preheated oven at 350°F (175°C) for 5-7 minutes, or until the coating is crisp again. A quick dip in a pan of hot oil can also restore crispness if you prefer a richer finish.
That's it — you did it. But hold on, I've got a few more tricks that'll take this to another level. The next section will reveal insider secrets that ensure every bite is flawless, from the perfect temperature to the ideal resting time.
Insider Tricks for Flawless Results
The Temperature Rule Nobody Follows
Many cooks bake at 400°F, but I’ve found that 375°F is the sweet spot for a crisp exterior and a creamy interior. The lower temperature allows the coating to brown evenly without scorching the cheese. I also recommend preheating the oven for at least 15 minutes to ensure a consistent baking environment. If you’re using a convection oven, reduce the temperature by 25°F to avoid over‑browning.
Why Your Nose Knows Best
Your nose is the ultimate judge of doneness. As the coating browns, a nutty, toasted aroma will fill the kitchen. When the scent becomes fragrant and slightly smoky, it’s a sign that the shells are ready. I’ve had friends who say the first bite is a revelation because the aroma alone tells them the flavor is perfect.
The 5-Minute Rest That Changes Everything
After baking, let the bites rest on the sheet for exactly five minutes. This short rest allows the cheese to set just enough that it won’t spill out when you pick up a bite. It also lets the coating firm up, preventing the shells from cracking when you serve them. A quick rest also gives the flavors time to settle, making each bite more harmonious.
The Quick Dip Trick
If you’re serving these at a buffet or a party, a quick dip in a pan of hot oil can re‑crisp the shells. Heat a small amount of oil to 350°F, then carefully lower the bites in for 15-20 seconds. This method gives a deep, golden finish that’s hard to resist. Be sure to drain the excess oil on a paper towel before serving.
The Chill Factor
Chilling the cheese mixture for at least 30 minutes is key to maintaining the integrity of each bite. The mixture firms up, making it easier to shape and coat. If you’re short on time, a quick 10‑minute chill in the fridge works, but the longer the better. I’ve tried both methods and the longer chill always yields a more stable, less messy bite.
Creative Twists and Variations
This recipe is a playground. Here are some of my favorite ways to switch things up:
Spicy Jalapeño Kick
Add diced jalapeños to the cheese mixture for a fiery bite that’s perfect for summer gatherings. The heat pairs beautifully with the creamy cheese, creating a dynamic flavor profile. I recommend adding a pinch of cayenne for an extra punch.
Herb‑Infused Delight
Stir in fresh herbs like chives, parsley, or basil into the cheese blend. The herbs add a bright, fresh note that contrasts with the richness of the cheese. This variation is ideal for brunch or a light appetizer.
Smoked Gouda Variation
Swap sharp cheddar for smoked gouda to add a deeper, smoky flavor that complements the pimentos. The gouda’s creamy texture enhances the meltiness of the bite, while the smoke adds a subtle complexity.
Vegan Version
Use plant‑based cream cheese and vegan mayo to create a dairy‑free version. Substitute the cheddar with nutritional yeast and vegan cheese for a cheesy, umami taste. The coating can stay the same, but use a plant‑based butter substitute for the glaze.
Mini Taco Bites
Wrap each bite in a small tortilla before coating and baking. This adds a fun, handheld element that feels like a taco on a stick. The tortilla adds a chewy texture that complements the crispy shell.
Truffle‑Infused Luxury
Add a drizzle of truffle oil to the cheese mixture for an indulgent, earthy flavor. The truffle oil’s aroma is unmistakable and elevates the dish to gourmet status. Serve with a small side of fresh arugula for a sophisticated presentation.
Storing and Bringing It Back to Life
Fridge Storage
Store the baked bites in an airtight container in the refrigerator for up to 3 days. Keep them on a wire rack to maintain crispness. When you’re ready to serve, reheat in a 350°F oven for 5-7 minutes or until the coating is crisp again.
Freezer Friendly
Freeze the unbaked coated bites on a parchment‑lined tray for 1 hour before transferring them to a freezer bag. This prevents them from sticking together. When you’re ready to bake, place the frozen bites directly into a preheated oven; add 2-3 minutes to the baking time.
Best Reheating Method
The best way to revive the crispness is to reheat in a preheated oven at 350°F for 5-7 minutes. For an extra crunch, lightly spray the bites with water before reheating; the steam will help the coating brown. Avoid microwaving, as it will make the coating soggy.