Picture this: a Thanksgiving table, golden pumpkin pies steaming, family chatter humming, and in the corner, a kitchen disaster that could have been a recipe for disaster. I was halfway through a batch of traditional mini cheesecakes when the oven door slipped open, and the batter—halfway through its silky, pumpkin‑laden dream—spilled onto the counter. I laughed, then scooped it up, and decided to turn that mess into a masterpiece. The result? A mini cheesecake that sings with autumn spices, a crust that crunches like crisp leaves, and a filling so smooth it melts into your mouth like a warm hug.
I’ve tasted my fair share of pumpkin‑filled desserts, but this version feels like a secret handshake between tradition and innovation. The first bite is a burst of sweet‑spicy pumpkin, followed by a gentle tang from the cream cheese, all wrapped in a buttery graham crumb base that holds its own against the rich filling. The aroma—spiced pumpkin, vanilla, and a hint of lemon zest—fills the kitchen, pulling everyone to the counter for a quick taste test. The texture is a delicate balance: the crust is firm yet buttery, the filling silky but firm enough to hold its shape on a mini ring mold. That sizzle when it hits the pan? Absolute perfection.
What sets this version apart is the subtle twist of incorporating a touch of citrus zest and a whisper of maple syrup, elevating the pumpkin’s earthy sweetness into something truly memorable. I dare you to taste this and not go back for seconds—once you try it, you’ll wonder why you ever settled for the ordinary. If you’ve ever struggled with making mini cheesecakes that don’t fall apart, you’re not alone; the trick is in the balance of wet and dry, the right baking temperature, and a cooling ritual that I’ll walk you through step by step. This isn’t just a recipe; it’s a ritual that turns your kitchen into a sanctuary of comfort.
Let me walk you through every single step—by the end, you’ll wonder how you ever made it any other way. From selecting the finest pumpkin puree to mastering the perfect crust texture, each detail is crafted to bring out the best in every bite. I’ll share the little hacks that saved me from a ruined batch, the sensory checkpoints that tell you when it’s ready, and the variations that let you customize the flavor to your taste. Ready to turn your Thanksgiving dessert game into a legend? Let’s dive in.
What Makes This Version Stand Out
- Flavor: The pumpkin puree is blended with maple syrup and a pinch of lemon zest, creating a sweet‑spicy profile that feels both familiar and refreshing.
- Texture: A buttery graham cracker crust offers a crisp bite that contrasts beautifully with the silky filling.
- Balance: The ratio of cream cheese to pumpkin is calibrated to keep the filling rich but not overpowering.
- Ease: No complex steps—just a few ingredients and a straightforward baking process that even novice bakers can master.
- Make‑ahead: The cheesecakes can be assembled and refrigerated up to 24 hours before baking, making it ideal for last‑minute Thanksgiving prep.
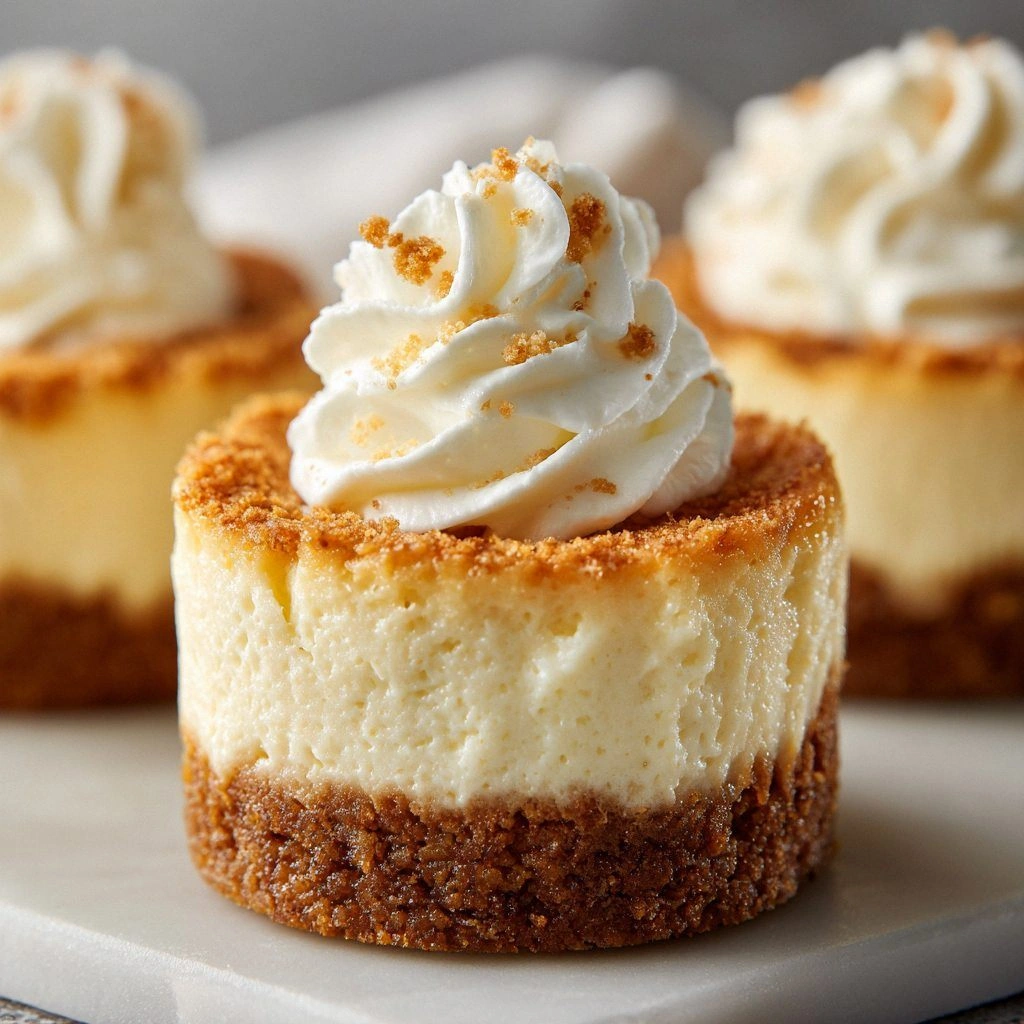
- Presentation: Each mini cheesecake sits in a clear ring mold, showcasing its creamy interior and inviting golden crust.
- Versatility: The base can be swapped for a gingerbread or pecan crust, giving you endless flavor options.
- Audience: Whether you’re feeding a crowd or just treating yourself, these mini delights satisfy all palates.
Alright, let’s break down exactly what goes into this masterpiece…
Inside the Ingredient List
The Flavor Base
Pumpkin puree is the heart of this cheesecake, providing a natural sweetness and a silky texture when blended with cream cheese. I use a puree that’s been cooked until smooth, so it doesn’t add any gritty texture. If you’re short on time, canned puree works fine, but fresh pumpkin gives that bright, earthy flavor that’s hard to beat. Skipping pumpkin would turn this into a plain cheesecake, losing the quintessential Thanksgiving vibe.
The Texture Crew
Cream cheese is the backbone of the filling, giving it richness and a slightly tangy counterpoint to the pumpkin’s sweetness. I recommend room‑temperature cream cheese for easier mixing. Heavy cream is added to lighten the filling, preventing it from becoming too dense. The graham cracker crumbs, combined with melted butter, form the crust that offers a buttery crunch; the crumbs must be fine enough to bind properly but coarse enough to keep the crust from becoming too soft.
The Unexpected Star
Maple syrup and a pinch of lemon zest are the secret weapons that elevate this recipe. Maple syrup replaces part of the sugar, adding depth and a subtle caramel note that pairs beautifully with pumpkin. Lemon zest brightens the overall flavor profile, cutting through the richness and adding a fresh, citrusy lift that makes each bite feel airy. If you’re allergic to maple, a touch of honey can serve as a suitable substitute.
The Final Flourish
Pumpkin pie spice—cinnamon, nutmeg, ginger, cloves, and allspice—injects warmth and complexity into the filling. Vanilla extract rounds out the flavor, adding a silky sweetness that ties all the elements together. A dash of salt balances the sweetness, preventing the cheesecake from tasting flat. If you want a vegan version, replace cream cheese with a dairy‑free alternative and use coconut cream instead of heavy cream.
Everything’s prepped? Good. Let’s get into the real action…
The Method — Step by Step
- Prep the crust: Combine 1 cup graham cracker crumbs, 2 tbsp melted butter, and a pinch of salt in a bowl. Press the mixture into the bottom of a 9-inch springform pan, ensuring an even layer. Chill in the fridge for 10 minutes to set the crust. This step is crucial; a firm base prevents the filling from leaking.
- Blend the filling: In a stand mixer, beat 8 oz softened cream cheese until smooth. Add 1/2 cup sugar, 1/2 cup pumpkin puree, 1 tsp maple syrup, 1 tsp vanilla, and 1 tsp lemon zest. Mix until creamy. The mixture should be light, airy, and free of lumps; this ensures a silky texture.
- Add spices: Sprinkle in 1 tsp pumpkin pie spice and a pinch of salt. Blend again until fully incorporated. The spices should permeate the mixture without clumping, giving that warm, comforting aroma.
- Incorporate the egg: Beat in 1 large egg, one at a time, ensuring each is fully blended before adding the next. This step binds the filling and gives it a firm structure. Skipping the egg will result in a softer, less stable cheesecake.
- Lighten with cream: Stir in 2 tbsp heavy cream until the mixture is silky. The cream adds moisture and helps prevent the filling from becoming too dense.
- Fill the molds: Spoon the filling into the chilled crust, filling each mini ring mold about 3/4 full. Tap the pan lightly to remove air pockets. This ensures a smooth top and prevents cracks during baking.
- Bake at 325°F (163°C): Place the springform pan in a larger baking dish filled with 1 inch of hot water (bain-marie). Bake for 30 minutes, or until the edges are set and the center still has a slight wobble. The water bath keeps the cheesecake from cracking and ensures even cooking.
- Cool and chill: Remove the cheesecake from the oven, let it cool in the pan on a wire rack for 15 minutes, then refrigerate for at least 4 hours or overnight. This chilling step is vital for the cheesecake to set properly.
- Serve: Run a knife around the edge to release the cheesecake, then lift it out of the mold. Top with a dollop of whipped cream if desired. Serve chilled for the best experience.
That’s it — you did it. But hold on, I’ve got a few more tricks that will take this to another level…
Insider Tricks for Flawless Results
The Temperature Rule Nobody Follows
Baking at a slightly lower temperature (325°F vs 350°F) prevents the edges from overcooking while keeping the center moist. I’ve tried 350°F and the cheesecake cracked on the top. Keep the oven preheated and avoid opening the door during the first 20 minutes; the temperature drop can ruin the rise.
Why Your Nose Knows Best
When the cheesecake starts to smell like toasted pumpkin and cinnamon, you’re halfway there. A fragrant kitchen is a sign that the spices are blooming. If the aroma feels flat, add a pinch more pumpkin pie spice or a dash of vanilla to revive the flavor.
The 5-Minute Rest That Changes Everything
After removing the cheesecake from the oven, let it sit for 5 minutes before moving it to a wire rack. This brief pause allows the interior to set, reducing cracks. A friend tried skipping this step once, and the result was a lopsided, uneven surface.
Avoiding Cracks: The Water Bath Trick
The bain-marie keeps the heat gentle and even, preventing the outer crust from browning too quickly. If you don’t have a baking dish for the water bath, wrap the pan in foil and place it in a larger pan with a bit of water. The trick is to keep the water level steady throughout baking.
Chill Time: The Secret to a Firm Bite
Refrigerate the cheesecake for at least 4 hours, but overnight is ideal. The fat in the cream cheese solidifies, giving the cheesecake a firm yet creamy bite. Skipping this step results in a runny, unstable dessert.
Serving Size Adjuster
If you’re serving a large crowd, simply double the recipe and bake in two pans. The baking time remains the same, but keep an eye on the edges. For a single serving, use a small ramekin and bake at 300°F for 20 minutes.
Creative Twists and Variations
This recipe is a playground. Here are some of my favorite ways to switch things up:
Pecan Crunch Variation
Replace the graham cracker crust with a pecan crust made from crushed pecans, butter, and a splash of maple syrup. The nutty crunch pairs beautifully with the pumpkin filling and adds a buttery depth.
Gingerbread Twist
Swap the graham crackers for gingerbread crumbs and add a pinch of ground ginger to the filling. The spicy gingerbread base creates a cozy, holiday vibe that’s perfect for Thanksgiving.
Chocolate Swirl
Fold in 1/4 cup of melted dark chocolate into the filling for a chocolate‑pumpkin swirl. The chocolate adds richness and a slightly bitter counterpoint that balances the sweetness.
Cranberry Burst
Stir in 1/4 cup of dried cranberries into the filling, or top each mini with a spoonful of cranberry compote. The tartness cuts through the creamy richness, adding a festive pop.
Lemon Zest Surprise
Increase the lemon zest to 2 tsp and add a tablespoon of lemon juice to the batter. The citrus brightens the entire dessert, giving it a refreshing finish that feels lighter.
Vegan Edition
Use dairy‑free cream cheese, coconut cream, and a plant‑based sweetener. The texture remains silky, and the pumpkin flavor shines through without dairy.
Storing and Bringing It Back to Life
Fridge Storage
Store the finished mini cheesecakes in an airtight container for up to 3 days. Keep them refrigerated to maintain the creamy texture and prevent spoilage.
Freezer Friendly
Wrap each cheesecake individually in plastic wrap, then place in a freezer bag. Freeze for up to 2 months. Thaw overnight in the fridge before serving.
Best Reheating Method
To revive a frozen cheesecake, let it thaw in the fridge, then warm it in a 200°F (93°C) oven for 5 minutes. Add a splash of water to the pan before reheating to create steam, which keeps the filling moist and prevents it from drying out.