I remember the night it all started: a midnight craving for something sweet, a half‑filled freezer, and a stubborn cookie dough that refused to bake. I had the dough, the ice cream, and an absurd amount of imagination. I stared at the oven, then at the freezer, then at the kitchen counter and declared, “This is going to be the best ice‑cream sandwich I’ve ever made.” The result was a crispy, buttery cookie shell that held a scoop of vanilla ice cream so perfectly that each bite was a miniature fireworks show. The crunch of the cookie, the cold melt of the ice cream, the faint hint of vanilla and chocolate – all dancing together in a single, unforgettable flavor profile.
Picture the aroma of freshly baked cookies filling the air, the gentle hum of the fridge humming in the background, and that unmistakable cold snap when you press a sandwich together. The texture is a paradox: the cookie is golden, slightly chewy, with a crisp edge that shatters like thin ice when you bite, while the ice cream inside is creamy, slightly firm, and melts into a silky drizzle that coats your tongue like velvet. The sight is a golden‑brown masterpiece, the sound a faint crackle as the cookie cools, and the taste a symphony of sweet, buttery, and creamy notes. If you’ve ever struggled with a cookie that turns out too soft or an ice cream that’s too hard, you’re not alone – and this recipe has the fix.
What makes this version stand out is that it’s not just a cookie sandwich. It’s a carefully engineered balance between dough and ice cream, a method that ensures the cookie stays crisp but not brittle, the ice cream stays cold but not hard, and the whole thing feels like a handheld dessert that you can take on a picnic or serve at a party. The secret? A pinch of baking soda for lift, a dash of vanilla extract for depth, and a precise baking time that locks in moisture. And the twist – a splash of espresso powder in the dough – gives a subtle coffee undertone that elevates the vanilla to something more complex. This is hands down the best version you’ll ever make at home.
I dare you to taste this and not go back for seconds. The first bite will have you questioning how you ever ate ice cream sandwiches that weren’t just a mess of cookie and ice cream. If you’re ready to level up your dessert game, let me walk you through every single step – by the end, you’ll wonder how you ever made it any other way.
What Makes This Version Stand Out
- Flavor Depth: The subtle espresso addition in the cookie dough brings a layered richness that pairs beautifully with the vanilla ice cream.
- Texture Balance: The cookies are crisp on the edges and chewy in the center, ensuring they don’t crumble when pressed against the ice cream.
- Easy Prep: All ingredients are pantry staples, and the process takes less than an hour from start to finish.
- Crowd‑Pleaser: These sandwiches are perfect for parties, school lunches, or a comforting treat after a long day.
- Ingredient Quality: Using high‑quality butter and real vanilla extract elevates the overall flavor profile.
- Make‑Ahead Friendly: You can bake the cookies in advance, freeze the ice cream, and assemble them just before serving.
- Customization: Swap vanilla for chocolate ice cream, add nuts to the dough, or drizzle caramel for a personal touch.
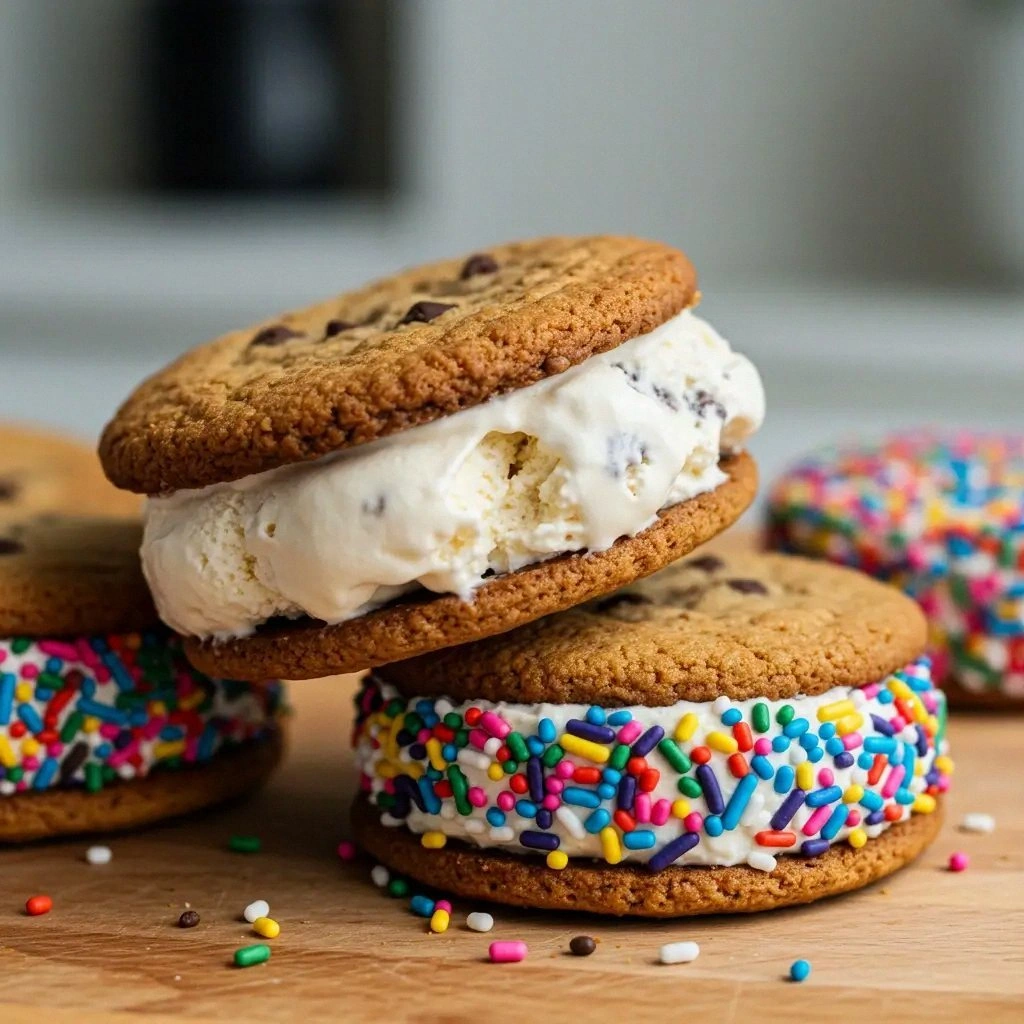
- Visual Appeal: The golden‑brown cookies and the glossy ice cream create an Instagram‑ready dessert.
Alright, let's break down exactly what goes into this masterpiece...
Inside the Ingredient List
The Flavor Base
The foundation of any great cookie sandwich is the dough. In this recipe, we combine 2 cups of all‑purpose flour with 1 cup granulated sugar and 1 cup packed brown sugar. The brown sugar adds depth and caramel notes that contrast with the vanilla ice cream. If you skip the brown sugar, the cookies will taste a little flat and lack that subtle molasses undertone.
The 1 cup of unsalted butter, softened, provides richness and keeps the cookie tender. Using butter instead of margarine gives a cleaner, buttery flavor that doesn’t get lost in the sweetness. If you’re watching calories, you can replace half the butter with Greek yogurt, but the texture will shift slightly toward a denser crumb.
The Texture Crew
Baking soda (1 tsp) and baking powder (1 tsp) are essential for lift and structure. The soda reacts with the acidic brown sugar to create tiny bubbles that keep the cookie from becoming too dense. The baking powder ensures a gentle rise even if you use a slightly lower baking temperature.
Salt (1 tsp) balances the sweetness, allowing the chocolate chips and vanilla to shine. A pinch of salt in the ice cream layer can also enhance the overall flavor, but we keep it minimal to maintain the dessert’s lightness.
The Unexpected Star
A teaspoon of espresso powder is the secret weapon in this recipe. It’s not enough to taste like coffee on its own, but it brings a subtle, earthy complexity that pairs beautifully with vanilla. If you’re a coffee lover, this is the moment you’ll feel a rush of nostalgia. If you’re not a fan, you can omit it – the cookie will still be delicious, just slightly less layered.
The Final Flourish
The 4 cups of vanilla ice cream are the heart of the sandwich. Use a high‑quality brand with real vanilla beans for the best flavor. If you prefer chocolate, swap it out entirely or use a mix of both for a swirl effect. The ice cream’s consistency is critical: if it’s too soft, it will leak; if it’s too hard, it will be difficult to bite through the cookie.
Everything's prepped? Good. Let's get into the real action...
The Method — Step by Step
- Preheat the oven to 350°F (175°C). Let the oven warm while you mix the dough. A properly preheated oven ensures even baking. The cookies should bake for 12–14 minutes, golden around the edges. If you notice the edges browning too quickly, lower the temperature by 25°F.
- Whisk dry ingredients. In a large bowl, sift together 2 cups flour, 1 tsp baking soda, 1 tsp baking powder, and 1 tsp salt. Sifting removes lumps and ensures a smooth dough. This step is crucial for a consistent crumb.
- Beat butter and sugars. In a separate bowl, cream 1 cup softened butter with 1 cup granulated sugar and 1 cup brown sugar until light and fluffy. This usually takes about 3 minutes on medium speed. The creamed butter traps air, giving the cookies a tender texture.
- Incorporate espresso powder. Add 1 tsp espresso powder to the creamed butter mixture. Stir until fully blended. This step is where the flavor depth starts to build.
- Combine wet and dry. Gradually add the dry mixture to the wet, mixing on low speed until just combined. Overmixing can result in tough cookies. The dough should be soft but not sticky.
- Add chocolate chips. Fold in 1 cup chocolate chips. The chips add pockets of melty chocolate that contrast with the cookie’s crunch. If you prefer a cleaner flavor, omit the chips.
- Shape and bake. Drop tablespoon‑sized balls onto a parchment‑lined baking sheet, spacing them 2 inches apart. Flatten slightly with the back of a spoon. Bake for 12–14 minutes, or until the edges are golden and the centers are set. Watch the cookies closely; they’re done when they look firm but still slightly soft in the middle.
- Cool the cookies. Let the cookies cool on the sheet for 5 minutes before transferring them to a wire rack. This prevents them from becoming too soft when they’re still hot.
- Assemble the sandwiches. Once the cookies are cool, scoop a generous portion of vanilla ice cream onto one cookie. Place a second cookie on top and press gently to spread the ice cream evenly. If the ice cream is too soft, chill it for 10 minutes first.
- Freeze or serve immediately. For best results, wrap each sandwich in plastic wrap and freeze for at least 30 minutes before serving. This keeps the ice cream from melting too quickly.
That's it — you did it. But hold on, I've got a few more tricks that'll take this to another level...
Insider Tricks for Flawless Results
The Temperature Rule Nobody Follows
Many people bake cookies at 375°F, but that can cause the edges to brown too quickly, leaving the center undercooked. Baking at 350°F gives the cookies a chance to rise evenly. If your oven runs hot, use an oven thermometer to verify the actual temperature.
Why Your Nose Knows Best
Before you scoop the ice cream, give the cookie a quick sniff. A fresh, buttery aroma indicates the right balance of butter and sugar. If it smells more like raw flour, you might have overmixed the dough.
The 5‑Minute Rest That Changes Everything
Let the cookies rest on the sheet for 5 minutes after baking. This step allows the steam to escape, preventing the cookies from becoming soggy. It also gives the cookie a slight crust that holds the ice cream better.
Use a Silicone Mat for Easy Cleanup
A silicone baking mat keeps the cookies from sticking and makes cleanup a breeze. The non‑stick surface also ensures even heat distribution, reducing the chance of hot spots.
Freeze the Sandwiches in a Tray
If you’re making a large batch, freeze the sandwiches on a tray before wrapping them individually. This prevents them from sticking together and makes portion control easier.
Creative Twists and Variations
This recipe is a playground. Here are some of my favorite ways to switch things up:
Nutty Delight
Add ½ cup chopped walnuts or pecans to the dough. The crunch complements the cookie’s chewiness and adds a nutty flavor that pairs well with the vanilla ice cream.
Caramel Swirl
Drizzle caramel sauce between the cookie and the ice cream. The sweet, buttery caramel adds a decadent layer and a glossy finish.
Minty Fresh
Replace vanilla ice cream with mint chocolate chip ice cream and add a few drops of mint extract to the dough. The result is a refreshing, cool sandwich perfect for hot days.
Spiced Cookie
Incorporate ½ tsp cinnamon and a pinch of nutmeg into the dry mix. The warm spices give the cookie a comforting, autumnal feel that’s great for fall gatherings.
Chocolate‑Covered
After assembling, dip the entire sandwich in melted chocolate and let it set. This adds a glossy coating and a rich chocolate flavor that elevates the dessert.
Gingerbread Twist
For a holiday twist, add 1 tsp ground ginger, ½ tsp cinnamon, and ¼ tsp cloves to the dough. Pair with a scoop of gingerbread ice cream for a festive treat.
Storing and Bringing It Back to Life
Fridge Storage
Store assembled sandwiches in an airtight container in the refrigerator for up to 48 hours. The ice cream will soften slightly, but the cookies will remain crisp.
Freezer Friendly
Wrap each sandwich tightly in plastic wrap and place them in a freezer bag. They can be stored for up to 3 months. When ready to serve, let them sit at room temperature for 5 minutes before slicing.
Best Reheating Method
If you prefer a slightly melted ice cream, microwave the sandwich on high for 10–15 seconds. The heat will soften the ice cream just enough to create a warm, gooey center without melting the cookie entirely.