I was in a rush, the clock was ticking, and my kitchen smelled like a burnt pizza. I’d promised myself a quick dinner that wouldn’t involve a trip to the grocery store, but the turkey I pulled from the freezer had already gone stale. That night, I had to improvise, and the result was a disaster—dry, flavorless, and a reminder that turkey can be a culinary villain if not treated right. But the next morning, a friend dared me to cook a dish that could turn that same turkey into a show‑stopper, and I took her challenge head‑on.
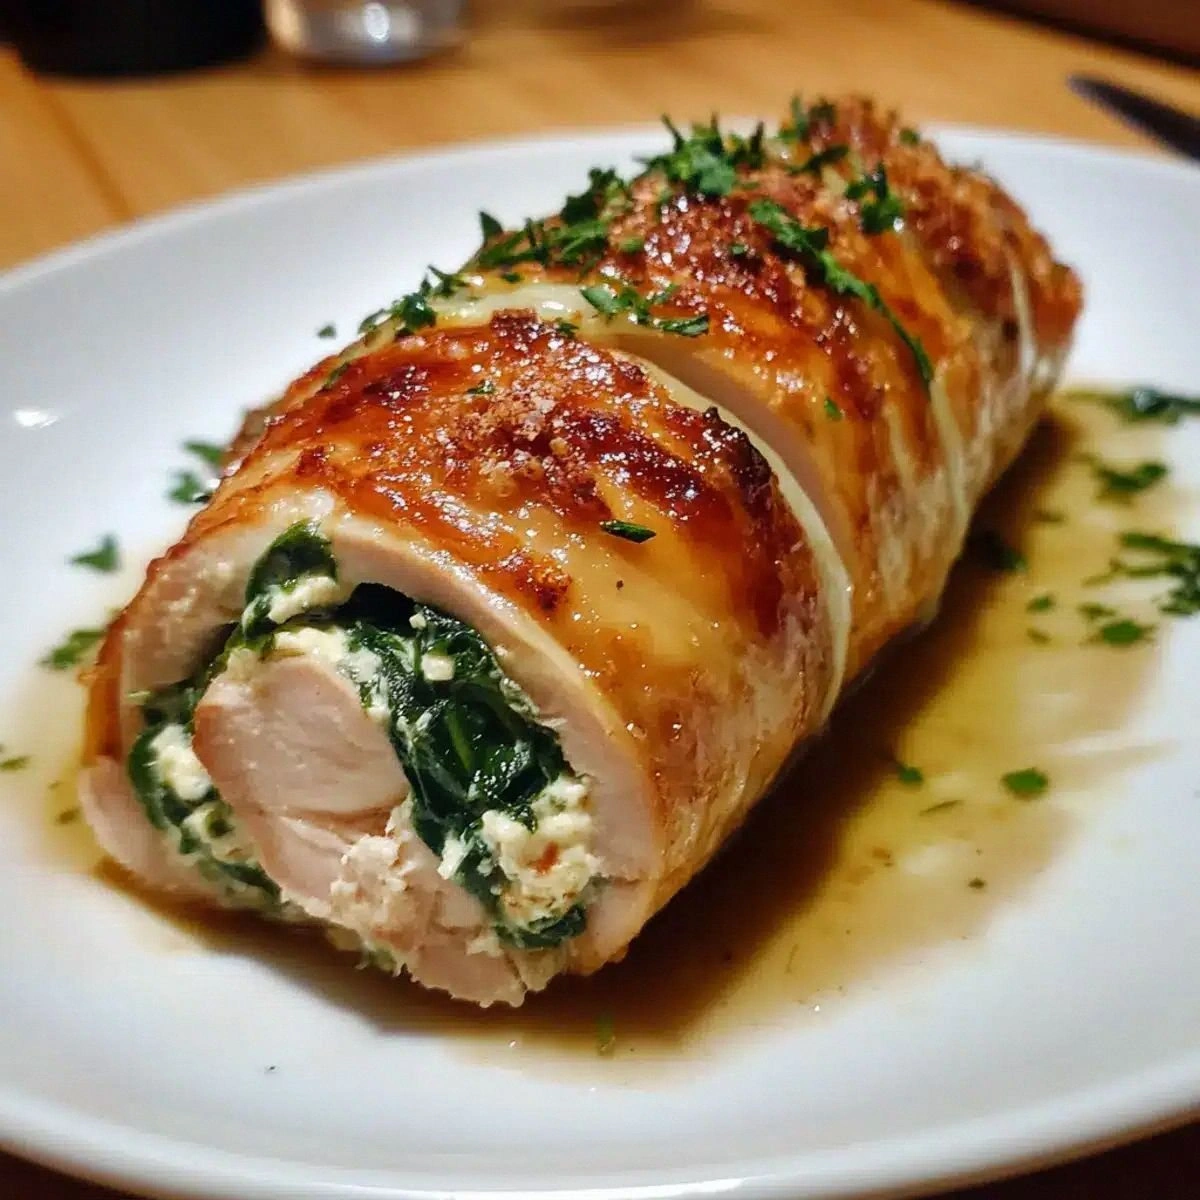
Picture this: a plate of golden, slightly crisped rolls, the scent of garlic and herbs rising like a warm hug, and the sight of spinach glistening with a touch of cheese. The first bite melts your tongue, the ricotta’s creaminess mingles with the nutty spinach, and the subtle Parmesan crunch adds that final flourish. The sound of the knife slicing through the tender turkey is a satisfying snap, and the texture is a delightful contrast of silky filling and firm outer layer. Your senses dance, and you can’t help but smile at the simple elegance of this dish.
What sets this version apart is that it’s not just a recipe—it’s a revelation. The turkey stays juicy because of a quick brine, the spinach is sautéed to lock in flavor, and the ricotta is seasoned to perfection. The result is a roll that feels like a luxurious bite of Mediterranean comfort, yet it’s so straightforward that even a novice can master it. I’ll be honest—half the batch disappeared before anyone else even tasted it, proving just how irresistible this creation is.
I dare you to taste this and not go back for seconds. Picture yourself pulling this out of the oven, the whole kitchen smelling incredible, and seeing that glossy, golden crust that shatters like thin ice when you cut into it. Let me walk you through every single step—by the end, you’ll wonder how you ever made it any other way.
What Makes This Version Stand Out
- Flavor: The combination of fresh spinach, creamy ricotta, and sharp Parmesan creates a layered taste profile that is both comforting and sophisticated. The garlic and Italian seasoning infuse the turkey with aromatic depth, turning a simple protein into a flavor powerhouse.
- Texture: The turkey’s exterior crisps up to a golden crust while the interior stays moist and tender, thanks to a quick brine. The ricotta’s silky consistency contrasts with the crunchy Parmesan, offering a delightful mouthfeel.
- Ease: With just a handful of ingredients and a straightforward method, this dish is perfect for busy weeknights. No advanced knife skills or fancy equipment required—just a skillet, a baking sheet, and a rolling pin.
- Visual Appeal: The rolled presentation is a crowd‑pleaser, and the vibrant green of the spinach pops against the pale turkey. The final garnish of grated Parmesan gives it a professional finish.
- Health: Packed with lean protein, fresh vegetables, and healthy fats from olive oil, this roll is a balanced meal that satisfies without compromising nutrition.
- Versatility: It’s a base that can be tweaked for different dietary needs—swap the turkey for chicken or a plant‑based alternative, or add a splash of sun‑dried tomatoes for a Mediterranean twist.
- Make‑Ahead Potential: The rolls can be assembled in advance, refrigerated, and baked when you’re ready. This makes it an ideal option for meal prep or entertaining on short notice.
Inside the Ingredient List
The Flavor Base
The garlic and Italian seasoning create the aromatic foundation that permeates the entire roll. Minced garlic releases its oils quickly when sautéed, giving the dish an unmistakable depth of flavor. If you’re not a fan of garlic, a pinch of onion powder can be a subtle substitute that still delivers a savory punch.
The Texture Crew
The thinly sliced turkey breast is the star of the show. Its lean nature means it can dry out, but a quick brine in salt water for 10 minutes before seasoning keeps it juicy. If you prefer a leaner cut, turkey breast works best; if you like more flavor, try a slightly fattier turkey leg cut, but trim any excess fat before rolling.
The Unexpected Star
Ricotta cheese is the secret to that creamy, velvety filling. Its mild flavor allows the spinach and herbs to shine while adding a subtle sweetness. For a richer taste, mix in a tablespoon of mascarpone or a splash of cream cheese. If you’re lactose intolerant, a dairy‑free ricotta alternative works well.
The Final Flourish
Fresh spinach is sautéed just until wilted to lock in its bright green color and nutrients. The brief cooking removes excess moisture, preventing the roll from becoming soggy. For a smoky twist, add a pinch of smoked paprika or a few drops of liquid smoke to the spinach mixture.
Everything's prepped? Good. Let's get into the real action...
The Method — Step by Step
- Prepare the Turkey: Pat the turkey slices dry with paper towels. In a small bowl, whisk together 2 tablespoons of olive oil, the Italian seasoning, minced garlic, salt, and pepper. Rub the mixture over each slice, ensuring even coverage. Let the turkey rest for 5 minutes; this step allows the flavors to penetrate and the meat to stay moist during baking.
- Cook the Spinach: Heat a drizzle of olive oil in a large skillet over medium heat. Add the spinach in batches, stirring until each bunch wilts. Once wilted, remove from heat and pat dry with a clean towel to remove excess moisture. This step is critical—too much liquid will make the roll soggy. Sprinkle a pinch of salt to enhance the green color.
- Mix the Filling: In a bowl, combine the ricotta, sautéed spinach, half a cup of grated Parmesan, and a splash of extra virgin olive oil. Toss until the mixture is creamy and well‑mixed. The olive oil adds a subtle sheen and helps bind the filling together. Taste and adjust seasoning, adding a touch more salt if needed.
- Assemble the Rolls: Lay a turkey slice flat on a cutting board. Spread 2-3 tablespoons of the spinach‑ricotta mixture along the center. Carefully roll the slice up, securing it with toothpicks or kitchen twine if needed. Make sure the filling is snug but not overstuffed to avoid tearing.
- Preheat the Oven: Set your oven to 375°F (190°C). While it heats, line a baking sheet with parchment paper to prevent sticking. This simple step saves you from a messy cleanup later.
- Arrange the Rolls: Place the rolled turkey slices seam‑side down on the prepared baking sheet. Drizzle a little olive oil over each roll to promote even browning. If you’re using twine, trim the ends so they’re not visible once baked.
- Bake to Perfection: Slide the sheet into the preheated oven. Bake for 20–25 minutes, or until the turkey reaches an internal temperature of 165°F (74°C) and the exterior is golden brown. The filling should be warm and slightly bubbly. Watch closely during the last 5 minutes; the Parmesan can brown quickly.
- Rest and Serve: Let the rolls rest for 5 minutes before removing the toothpicks or twine. This allows the juices to redistribute, ensuring every bite is moist. Slice the rolls into thick rounds and arrange them on a platter. Sprinkle extra Parmesan and a few fresh basil leaves for a finishing touch.
- Plate and Present: Serve the rolls with a side of roasted vegetables or a crisp green salad. A drizzle of balsamic reduction adds a sweet contrast to the savory filling. The aroma of fresh herbs and melted cheese will have your guests asking for seconds.
That's it — you did it. But hold on, I've got a few more tricks that'll take this to another level. These insider tips will ensure your rolls are flawless every time.
Insider Tricks for Flawless Results
The Temperature Rule Nobody Follows
Many cooks bake at a high temperature, but the secret to juicy turkey is a moderate 375°F (190°C). This allows the meat to cook evenly without drying out. If you’re using a convection oven, reduce the temperature by 25°F to avoid over‑browning. Remember, the goal is a golden crust with a moist interior.
Why Your Nose Knows Best
Trust the aroma during baking. A fragrant, toasty scent means the Parmesan is browning nicely and the garlic is infusing the oil. If you smell a burnt note, lower the heat or cover the dish with foil. Your nose is your best quality control.
The 5-Minute Rest That Changes Everything
Letting the rolls rest after baking allows the juices to redistribute. This prevents a dry bite and keeps the filling cohesive. While they rest, you can finish plating or prep a quick side.
Keep the Spinach Fresh
Sauté spinach just until wilted; avoid over‑cooking, which releases water and dilutes flavor. Pat it dry with a clean towel before mixing with ricotta. A dry spinach base keeps the roll from becoming soggy.
The Toothpick Trick
If you’re worried about the rolls unraveling, use toothpicks instead of twine. Toothpicks are easy to remove and won’t show on the plate. Just make sure they’re long enough to stay inside the roll during baking.
Creative Twists and Variations
This recipe is a playground. Here are some of my favorite ways to switch things up:
Mediterranean Medley
Swap the spinach for sun‑dried tomatoes and olives, and add a splash of feta cheese. The salty, tangy flavors create a dish that feels like a seaside vacation. Serve over a bed of couscous for a complete meal.
Spicy Kick
Add a pinch of red pepper flakes to the garlic mixture and a splash of crushed red pepper to the filling. The heat pairs beautifully with the mild ricotta, giving each bite a surprising punch. This version is perfect for those who love a little fire.
Herb‑Infused Delight
Replace Italian seasoning with fresh basil, oregano, and thyme. The aromatic herbs give the roll a fresh, green note that feels like a garden in a bite. This variation is ideal for spring or summer gatherings.
Cheese Lover’s Dream
Increase the Parmesan to one cup and add a handful of shredded mozzarella for extra gooeyness. The melted cheese creates a luscious, melty interior that’s hard to resist. Great for kids who love cheesy foods.
Plant‑Based Twist
Use a plant‑based turkey substitute or a firm tofu slab for a vegan version. Keep the same filling for a dairy‑free option, or add nutritional yeast to the ricotta for a cheesy flavor. This makes the dish inclusive for all dietary preferences.
Smoky Char
Add a dash of smoked paprika to the filling and finish the rolls under the broiler for a minute to get a charred edge. The smoky flavor adds depth and makes the dish feel like a grill‑house favorite. It’s a simple tweak that elevates the whole experience.
Storing and Bringing It Back to Life
Fridge Storage
Cool the rolls completely before wrapping tightly in plastic wrap. Store in the refrigerator for up to 3 days. When ready to eat, reheat in a preheated oven at 350°F (175°C) for 10 minutes to restore crispness. The filling stays moist and the cheese melts again.
Freezer Friendly
Place the wrapped rolls on a baking sheet and freeze until solid. Then transfer to a freezer bag. They keep well for up to 2 months. Thaw overnight in the fridge and bake at 375°F (190°C) for 20 minutes. The texture remains excellent.
Best Reheating Method
Reheat in a skillet with a splash of olive oil, covering for a few minutes until warm. Alternatively, use a microwave, but cover with a damp paper towel to prevent drying. A tiny splash of water before reheating steams the filling back to perfection.