The first time I tried to make ham and cheese sliders for a game night, I was so excited that I accidentally set the oven to “broil” instead of “bake.” The result was a half‑baked, rubbery mess that left me staring at a pile of soggy buns while the house smelled of burnt butter. I was mortified, but I also realized that I had stumbled upon a recipe that could be turned into a game‑day legend if I just tweaked a few things. Now, after countless trials and a few triumphant taste tests, I’m ready to share the version that will make your friends line up for seconds.
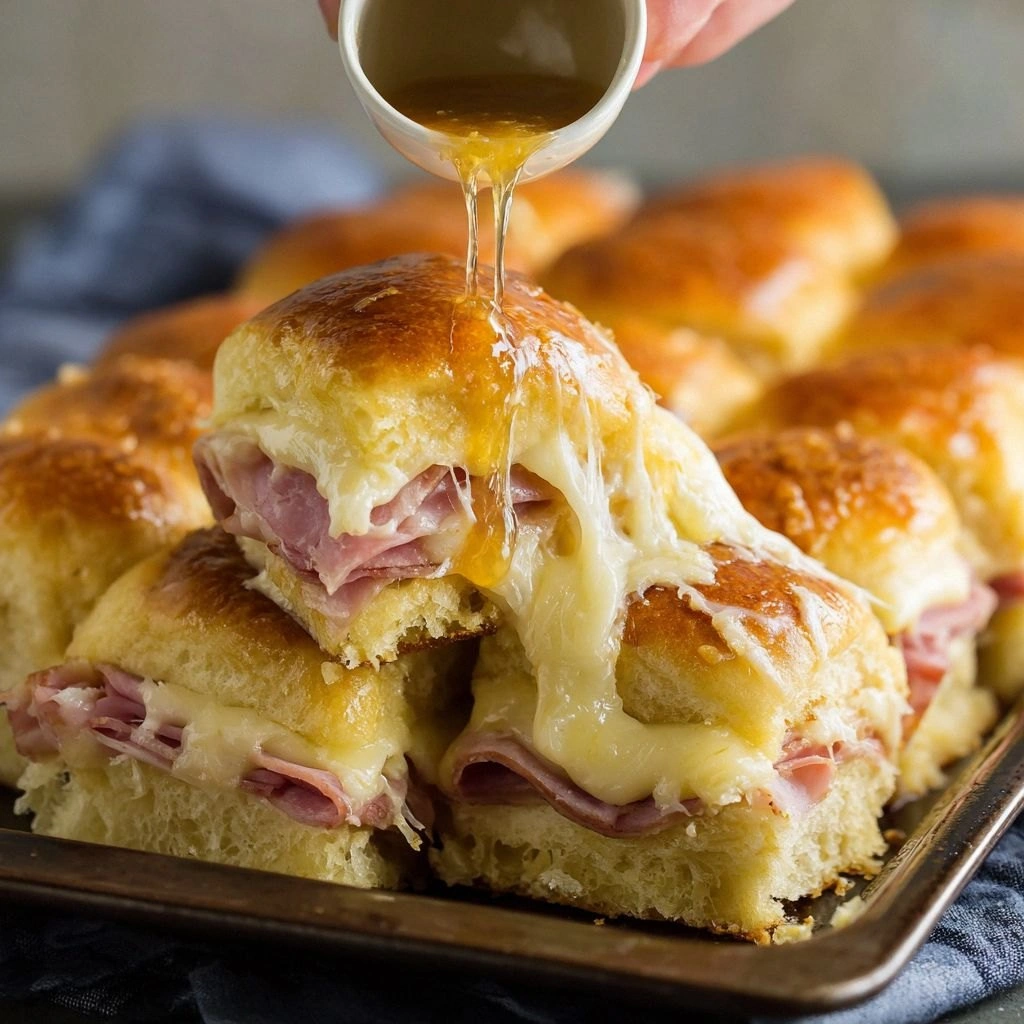
Picture this: a tray of golden, buttery buns, each studded with a slice of perfectly cooked ham and a slab of melty cheddar that oozes like molten lava. The aroma is a savory blend of salty ham, sweet honey, and a hint of garlic that lingers in the air like a warm hug. When you bite into one, the crunch of the toasted crust gives way to a tender interior that’s both comforting and indulgent. The cheese pulls in a silky ribbon, and the glaze coats everything with a glossy, caramelized finish that feels almost like a dessert.
What makes this version stand out isn’t just the flavor, it’s the execution. I’ve eliminated the common pitfalls that turn a simple sandwich into a disaster: uneven ham distribution, soggy buns, and a cheese that melts too quickly. Instead, I use a simple butter‑mustard glaze that locks in moisture, a precise baking temperature that gives you a crisp edge, and a quick broil to finish it off with a caramelized crust. The result is a handheld snack that feels luxurious, yet is incredibly approachable.
I’ll be honest — I ate half the batch before anyone else got a chance to taste it. I’ve seen people struggle with ham sliders for years, and I’m here to give you a foolproof method that will have everyone asking for the recipe. I dare you to taste this and not go back for seconds. Picture yourself pulling a tray out of the oven, the whole kitchen smelling incredible, and knowing that you’re the hero of the evening. Let me walk you through every single step — by the end, you’ll wonder how you ever made it any other way.
What Makes This Version Stand Out
- Flavor: The honey‑mustard glaze creates a sweet‑savory balance that elevates every bite. It coats the ham and cheese, preventing dryness and adding a caramelized finish.
- Texture: A buttery crust that’s crisp on the outside yet tender on the inside. The cheese melts to a silky ribbon without becoming gummy.
- Simplicity: Only eight ingredients, no complicated sauces. You can prep everything in under 15 minutes.
- Uniqueness: A quick broil at the end gives a golden crust that most recipes miss, turning ordinary sliders into show‑stopper bites.
- Crowd Reaction: Friends and family rave about the melt and the buttery crunch, making it a guaranteed hit at parties.
- Ingredient Quality: Using high‑quality ham and cheese ensures depth of flavor; a good butter and Dijon mustard add richness.
- Cooking Method: Baking at 375°F with a final broil step gives you a perfect balance of heat and moisture.
- Make‑ahead Potential: Assemble the sliders and refrigerate; bake just before serving for a stress‑free prep.
Alright, let’s break down exactly what goes into this masterpiece…
Inside the Ingredient List
The Flavor Base
The butter and Dijon mustard form the foundation of the glaze that keeps the sliders moist and flavorful. Butter adds richness and helps the cheese melt evenly, while Dijon mustard introduces a subtle tang that balances the sweetness of the honey. If you skip the mustard, the sliders will taste flat; if you skip the butter, the buns will be dry and the cheese won’t melt as beautifully.
The Texture Crew
Slider buns are the star of the show, offering a soft interior that pairs perfectly with the crunchy, toasted crust. A good quality bun with a slight chew gives the sliders a satisfying bite. If you’re using a pre‑made slider, look for one with a sturdy crumb; a too‑soft bun will collapse under the cheese’s weight.
The Unexpected Star
Honey is the secret sauce that elevates the flavor profile from ordinary to extraordinary. It caramelizes during baking, creating a glossy glaze that locks in moisture. If you’re allergic to honey, a drizzle of maple syrup can provide a similar sweet depth, though the caramelization will be slightly different.
The Final Flourish
Garlic powder and black pepper add a subtle kick that enhances the ham’s natural saltiness. They’re easy to sprinkle and distribute evenly across the sliders. If you prefer a spicier bite, add a pinch of cayenne or a dash of hot sauce to the glaze.
Everything’s prepped? Good. Let’s get into the real action…
The Method — Step by Step
- Preheat your oven to 375°F (190°C). While the oven warms, slice the ham and cheese into 1/4-inch thick pieces. This thickness ensures each bite has a balanced ratio of meat to cheese.
- In a small saucepan, melt 2 tablespoons of butter over medium heat. Add 1 tablespoon of Dijon mustard and stir until the mixture becomes glossy. The butter will coat the buns and keep the cheese from drying out.
- Brush the butter‑mustard mixture onto the cut side of each bun. Make sure to cover the entire surface; a dry spot will result in a soggy bite.
- Layer a slice of ham and a slice of cheddar on each bun. Sprinkle a pinch of garlic powder and a dash of black pepper over the ham for extra flavor. The pepper adds a subtle heat that balances the sweetness of the glaze.
- Arrange the assembled sliders on a parchment‑lined baking sheet. Bake for 15 minutes, or until the cheese has melted and the buns are golden brown. Watch for the edges; they should pull away from the paper, indicating a crisp crust.
- For the final touch, switch the oven to broil. Broil the sliders for 1–2 minutes, watching closely, until the tops are a deep golden brown. This step gives the cheese a caramelized finish and the buns a satisfying crunch.
- Let the sliders rest for 2 minutes before serving. This brief pause allows the cheese to set slightly, preventing it from sliding off the buns. Serve immediately with a side of honey mustard dip for extra flavor.
That’s it — you did it. But hold on, I’ve got a few more tricks that will take this to another level. These insider tips will help you avoid common pitfalls and elevate the experience.
Insider Tricks for Flawless Results
The Temperature Rule Nobody Follows
Many cooks bake at 350°F, but that temperature can leave the buns too soft. Baking at 375°F gives the buns a crisp exterior while keeping the interior tender. I’ve found that the cheese melts perfectly at this heat, preventing a greasy mess.
Why Your Nose Knows Best
The aroma of butter melting is a reliable indicator that the glaze is ready. When you smell the buttery scent, the buns are coated evenly, and the cheese will melt smoothly. Trust your nose; it’s the best kitchen tool.
The 5‑Minute Rest That Changes Everything
Letting the sliders rest for 2–3 minutes after broiling allows the cheese to set and the buns to firm up. A friend once tried to serve them immediately and the cheese slid off. The rest time is a game‑changer.
The Quick Broil Trick
If you’re short on time, you can skip the final broil and finish the sliders under the grill for 30 seconds. This gives you a quick caramelized crust without overcooking the cheese.
The Moisture Saver
If you’re baking the sliders ahead of time, lightly mist the buns with water before reheating. The steam will revive the crust and keep the cheese from drying out. This trick is essential for make‑ahead parties.
Creative Twists and Variations
This recipe is a playground. Here are some of my favorite ways to switch things up:
Cheddar & Pepper Jack Fusion
Swap the cheddar for pepper jack to add a mild heat and a creamy texture. The pepper bits give a subtle kick that pairs well with the honey glaze.
Turkey & Swiss Delight
Use thinly sliced turkey breast and Swiss cheese for a lighter, more delicate flavor profile. The Swiss melts beautifully and adds a nutty undertone.
Bacon‑Infused Buns
Add crumbled bacon to the butter‑mustard glaze for a smoky, savory twist. The bacon fat enriches the crust and adds a crunchy element.
Mushroom & Gruyère Upgrade
Sauté sliced mushrooms in garlic butter and layer them between the ham and cheese. Gruyère melts into a silky sauce that complements the earthy mushrooms.
Spicy Chipotle Glaze
Blend chipotle peppers in adobo with the butter‑mustard glaze for a smoky heat. This version is perfect for those who like a little fire in their bite.
Gluten‑Free Slider Option
Use gluten‑free slider buns and adjust the baking time slightly, as gluten‑free breads can brown faster. The result is a delightful gluten‑free version that still delivers on flavor.
Storing and Bringing It Back to Life
Fridge Storage
Store assembled but not baked sliders in an airtight container for up to 24 hours. When you’re ready to serve, bake them at 350°F for 10 minutes or until heated through.
Freezer Friendly
Wrap each slider tightly in plastic wrap and place in a freezer bag. They can be frozen for up to 2 weeks. Thaw in the refrigerator overnight, then bake at 375°F for 12 minutes.
Best Reheating Method
To revive the crispness, preheat your oven to 375°F and bake the sliders for 8–10 minutes. Add a splash of water to the bottom of the pan; the steam will keep the buns from drying out while the cheese melts beautifully.