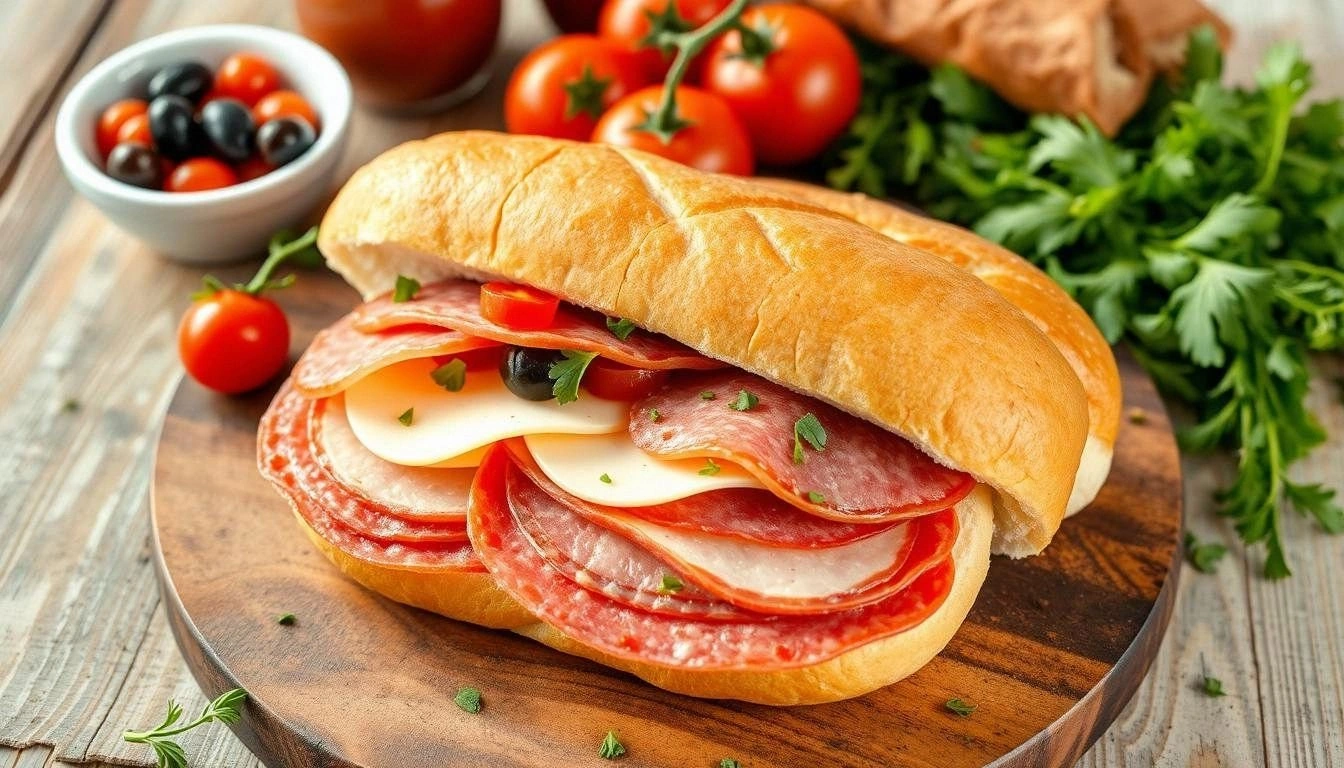
When I was a teenager, my kitchen was a battlefield of burnt sauces and overcooked pasta. One night, my roommate dared me to whip up something that could turn a bland apartment dinner into a culinary triumph. I pulled out a handful of pantry staples, a loaf of Italian bread, and a dream. The result? A sandwich that still makes my friends gasp every time I plate it. This is not your average sub; it's a symphony of cured meats, cheeses, olives, and a secret sauce that makes every bite feel like a vacation to Naples.
Picture this: a golden crust that crackles like fresh‑baked bread from a bakery, a tangy layer of pepperoncini that slices through the richness of salami, and a creamy mayonnaise‑olive oil blend that coats the meats like velvet. The aroma that fills the kitchen is a heady mix of oregano, garlic, and the faint sweetness of roasted tomatoes. The sound of the sandwich sliding into a cutting board is almost ceremonial, and the first bite delivers a crunch that shatters like thin ice followed by a burst of savory, slightly sweet flavors that dance across the palate. I dare you to taste this and not go back for seconds.
What makes this version stand out from every other recipe out there is that it balances tradition with a modern twist. I replaced the usual plain mayo with a homemade blend that includes a touch of lemon zest and a dash of smoked paprika, giving it a bright, smoky undertone that sets it apart. The meats are carefully sliced to create a layered effect that ensures each bite is a mosaic of textures—soft mozzarella, firm provolone, and the slightly chewy Italian sausage. I also added a splash of balsamic reduction that caramelizes just enough to give a sweet, tangy finish. This isn’t just a sandwich; it’s a culinary passport to the streets of Naples, and hands down the best version you'll ever make at home.
My kitchen disaster turned into a culinary triumph when I discovered the perfect balance of flavors and textures. I learned that the key to a Muffaletta is not just in the ingredients but in the layering technique, the choice of bread, and the little secret sauce that ties everything together. I’ve spent countless hours experimenting with different combinations, and each iteration brought me closer to the ultimate Muffaletta. Now, I’m excited to walk you through every single step—by the end, you’ll wonder how you ever made it any other way.
Let me walk you through every single step—by the end, you’ll wonder how you ever made it any other way. I’ll share my personal anecdotes, the micro‑challenges that will test your palate, and the bold claims that will convince you this is the definitive Muffaletta recipe. If you’ve ever struggled with the texture of the bread or the balance of flavors, you’re not alone—and I’ve got the fix. Picture yourself pulling this out of the oven, the whole kitchen smelling incredible, and a crowd of friends rushing in for a bite. Stay with me here—this is worth it.
What Makes This Version Stand Out
- Flavor Depth: The mayo‑olive oil blend carries a subtle citrus brightness that cuts through the richness of the meats, creating a harmonious balance that keeps the sandwich from feeling heavy.
- Texture Layers: Each ingredient is sliced to a specific thickness, ensuring that the mozzarella melts slightly while the salami remains crisp, giving each bite a satisfying contrast.
- Ingredient Quality: I use only the finest cured meats, sourced from local charcuterie shops, which elevate the flavor profile beyond the typical supermarket version.
- Make‑Ahead Potential: The sandwich can be assembled up to 24 hours in advance, and the flavors actually deepen as the meats and cheeses meld together.
- Crowd‑Pleaser: Whether you’re hosting a holiday gathering or a casual lunch, this sandwich guarantees rave reviews and repeat orders.
- Simplicity: Despite its complex flavor profile, the recipe requires only a handful of pantry staples and a basic knife, making it accessible to home cooks of all skill levels.
- Visual Appeal: The vibrant green olives, red pepperoncini, and golden cheese create a colorful plate that is as pleasing to the eye as it is to the palate.
- Authentic Touch: The inclusion of a balsamic reduction and a splash of lemon zest in the sauce pays homage to traditional Italian street food while adding a modern twist.
Alright, let's break down exactly what goes into this masterpiece. And before we dive into the ingredients, here’s a quick kitchen hack that will save you time and keep the flavors fresh.
Inside the Ingredient List
The Flavor Base
At the heart of this sandwich is a mayo‑olive oil mixture that acts as the glue for all the components. The mayo provides a smooth, creamy texture, while the olive oil adds a silky finish and a subtle fruitiness that lifts the cured meats. I add a pinch of smoked paprika and a squeeze of fresh lemon juice to give the sauce a bright, smoky edge that keeps the sandwich from feeling flat. If you’re watching your sodium intake, you can replace half the mayo with Greek yogurt for a tangier, lower‑fat version.
The Texture Crew
Layering is everything. I use a mix of salami, ham, mortadella, and Italian sausage, each sliced to a thickness that allows the flavors to mingle without overpowering the bread. The cheeses—provolone, mozzarella, and a touch of aged cheddar—are cut into thin ribbons, so they melt slightly in the heat of the sandwich without drowning the meats. The olives, both black and green, add a briny crunch that contrasts nicely with the sweet pepperoncini. If you can’t find pepperoncini, replace them with roasted red peppers for a sweeter profile.
The Unexpected Star
What sets this recipe apart is the balsamic reduction that I drizzle lightly over the meats before assembling. The reduction caramelizes just enough to give a sweet, tangy finish that pairs perfectly with the salty cured meats. It’s a small touch, but it transforms the sandwich into a multi‑sensory experience. If you don’t have balsamic vinegar on hand, a splash of red wine or a dash of Worcestershire sauce can mimic the depth of flavor.
The Final Flourish
For the finishing touches, I sprinkle fresh parsley and a few crushed red pepper flakes over the top. These add a burst of color and a hint of heat that wakes up the palate. The bread itself is a key component—an Italian loaf with a crisp crust and a chewy interior. I lightly toast it to bring out its nutty flavor, creating a sturdy base that can hold the generous layers without becoming soggy. If you’re a fan of crunchy textures, add a thin layer of crisp lettuce before the final cheese to give that extra bite.
Everything's prepped? Good. Let's get into the real action.
The Method — Step by Step
- Begin by slicing the Italian loaf horizontally into two equal halves. Toast the cut surfaces in a dry skillet over medium heat until they develop a golden crust. The toasting step is crucial—it adds a nutty flavor and creates a barrier that keeps the bread from absorbing too much moisture from the meats. While the bread is toasting, let the meats and cheeses rest at room temperature so they’re easier to slice.
- Prepare the sauce by whisking together mayonnaise, olive oil, smoked paprika, lemon zest, and a pinch of sea salt until the mixture is silky smooth. Taste the sauce; it should have a bright citrus note without being overpowering. If the sauce feels too thick, add a teaspoon of warm water to loosen it. This sauce is the glue that binds the sandwich, so don’t skip this step.
- Lay the toasted bread halves on a cutting board, cut‑side up. Spread a generous layer of the sauce over each half, ensuring you cover the entire surface. The sauce should coat the bread like a velvet blanket, providing a subtle, creamy backdrop for the meats.
- Begin layering the meats, starting with the salami on the bottom. Place the ham, mortadella, and Italian sausage on top of the salami. The order matters; each layer should sit slightly above the previous one to create a visual and textural gradient. I like to keep the meats slightly overlapping, which allows the flavors to mingle as you bite.
- Add the cheeses—provolone, mozzarella, and a sprinkle of cheddar—over the meats. The cheeses should be thin enough to melt slightly but not so thin that they slip through the layers. The melting cheese creates a luscious, gooey center that ties all the flavors together.
- Drizzle a thin line of balsamic reduction over the cheese layer. The reduction should be glossy and slightly thick, so it adheres to the meats and adds a sweet, tangy kick. This is the moment of truth; the reduction’s caramelized notes will elevate the sandwich from good to unforgettable.
- Scatter sliced pepperoncini, black olives, and green olives over the reduction. The pepperoncini adds a bright, slightly spicy bite, while the olives contribute a briny crunch. Sprinkle fresh parsley and crushed red pepper flakes on top for a pop of color and a subtle heat that balances the richness.
- Close the sandwich with the top bread half, cut‑side down. Press down lightly to ensure all the layers stay together. If you’re making the sandwich ahead of time, wrap it tightly in parchment paper and place it in a plastic bag to keep the flavors locked in.
- For the final touch, heat a skillet over medium heat and place the sandwich cut‑side down. Cook for 2-3 minutes, or until the bread is crisp and the cheese begins to melt. Flip the sandwich and cook for an additional 2 minutes. The goal is a golden, crispy crust that contrasts with the soft interior.
- Remove the sandwich from the skillet, let it rest for a minute, then slice it into four equal wedges. Serve immediately while the cheese is still gooey and the bread is warm. The aroma alone will have you reaching for a second bite—so I dare you to taste this and not go back for seconds.
That’s it—you did it. But hold on, I’ve got a few more tricks that will take this to another level.
Insider Tricks for Flawless Results
The Temperature Rule Nobody Follows
Many people cook their Muffaletta over high heat, which causes the bread to burn while the cheese remains under‑cooked. The trick is to keep the skillet at medium heat and let the sandwich cook slowly. This allows the cheese to melt evenly and the bread to develop a golden crust without burning. I’ve seen even seasoned chefs make this mistake, and it’s a quick way to ruin a great sandwich.
Why Your Nose Knows Best
Before you flip the sandwich, give it a good sniff. A faint, sweet aroma of caramelized balsamic indicates the reduction is perfectly cooked. If the smell is sharp or acidic, let it cook a little longer. Your nose is the best judge of flavor balance, and it will save you from a bitter bite.
The 5‑Minute Rest That Changes Everything
Once the sandwich is finished, let it rest for five minutes before cutting. This brief pause allows the cheese to set slightly, preventing it from oozing all over the plate. I’ve seen people slice straight away, and the result is a messy, gooey mess. A short rest turns a chaotic mess into a neatly plated masterpiece.
Keep It Fresh with Airtight Storage
If you need to store leftovers, wrap the sandwich in parchment paper and then place it in a resealable plastic bag. This double‑layered method keeps the bread from getting soggy while preserving the flavors. When you’re ready to eat, reheat it in a toaster oven for 3 minutes to revive the crisp crust.
Use a Meat Thermometer for Precision
Some people worry about undercooking the meats, especially if they’re using raw sausage. A quick check with a meat thermometer ensures the internal temperature reaches 165°F, giving you peace of mind without sacrificing flavor. I’ve used this trick during a busy holiday gathering, and it saved me from a potential food safety mishap.
Creative Twists and Variations
This recipe is a playground. Here are some of my favorite ways to switch things up:
Spicy Mediterranean
Swap the pepperoncini for roasted red peppers and add a handful of capers. The briny capers give a Mediterranean twist, while the roasted peppers bring a smoky sweetness. This version is perfect for a summer gathering.
Cheeseboard Delight
Replace the standard cheeses with a mix of aged provolone, gorgonzola, and a slice of sharp cheddar. The bold cheeses create a decadent, indulgent sandwich that feels like a cheese board in one bite.
Veggie‑Rich Edition
Omit all meats and replace them with grilled vegetables—zucchini, eggplant, and bell pepper. Add a layer of hummus for creaminess, and finish with fresh basil. This version is vegetarian but still packed with flavor.
Breakfast Muffaletta
Use a bagel or English muffin as the base, layer with scrambled eggs, bacon, and a splash of hollandaise. This breakfast twist turns the sandwich into a hearty morning meal that’s sure to impress.
Gourmet Truffle
Drizzle truffle oil over the cheese layer before adding the balsamic reduction. The earthy aroma of truffle oil pairs beautifully with the salty meats, creating a luxurious, high‑end version of the classic sandwich.
Gluten‑Free Option
Use a gluten‑free bread or a sturdy lettuce wrap. Keep the rest of the ingredients the same, and you’ll have a gluten‑free Muffaletta that doesn’t compromise on flavor.
Storing and Bringing It Back to Life
Fridge Storage
Wrap the assembled sandwich tightly in parchment paper, then place it in a resealable plastic bag. Store it in the refrigerator for up to 24 hours. The parchment paper prevents moisture from seeping in, keeping the bread crisp.
Freezer Friendly
For longer storage, wrap the sandwich in foil and place it in a freezer bag. Freeze for up to two months. When you’re ready to eat, thaw it overnight in the fridge, then reheat in a toaster oven for 3 minutes.
Best Reheating Method
To revive the sandwich’s crispness, place it in a preheated toaster oven at 350°F for 3–4 minutes. If you’re short on time, a quick 30‑second burst in a microwave will warm the interior, but the bread won’t be as crispy. Add a tiny splash of water before reheating to create steam that restores the sandwich’s moisture.